A2. Human-Centered Design for XR

Learning Outcomes
- Explain the value of multiple input modalities in spatial AR. Understand the concepts of modality, natural user interfaces, and context-aware interaction, and discuss how combining inputs such as voice, gaze, and gesture can enhance usability and accessibility.
- Compare the strengths and limitations of different input types. Evaluate how controllers, voice commands, hand gestures, and gaze each contribute to precision, speed, and user comfort in various contexts.
- Analyze design considerations for multimodal XR experiences. Identify factors such as ergonomics, cognitive load, accessibility, and environment that influence input modality choices.
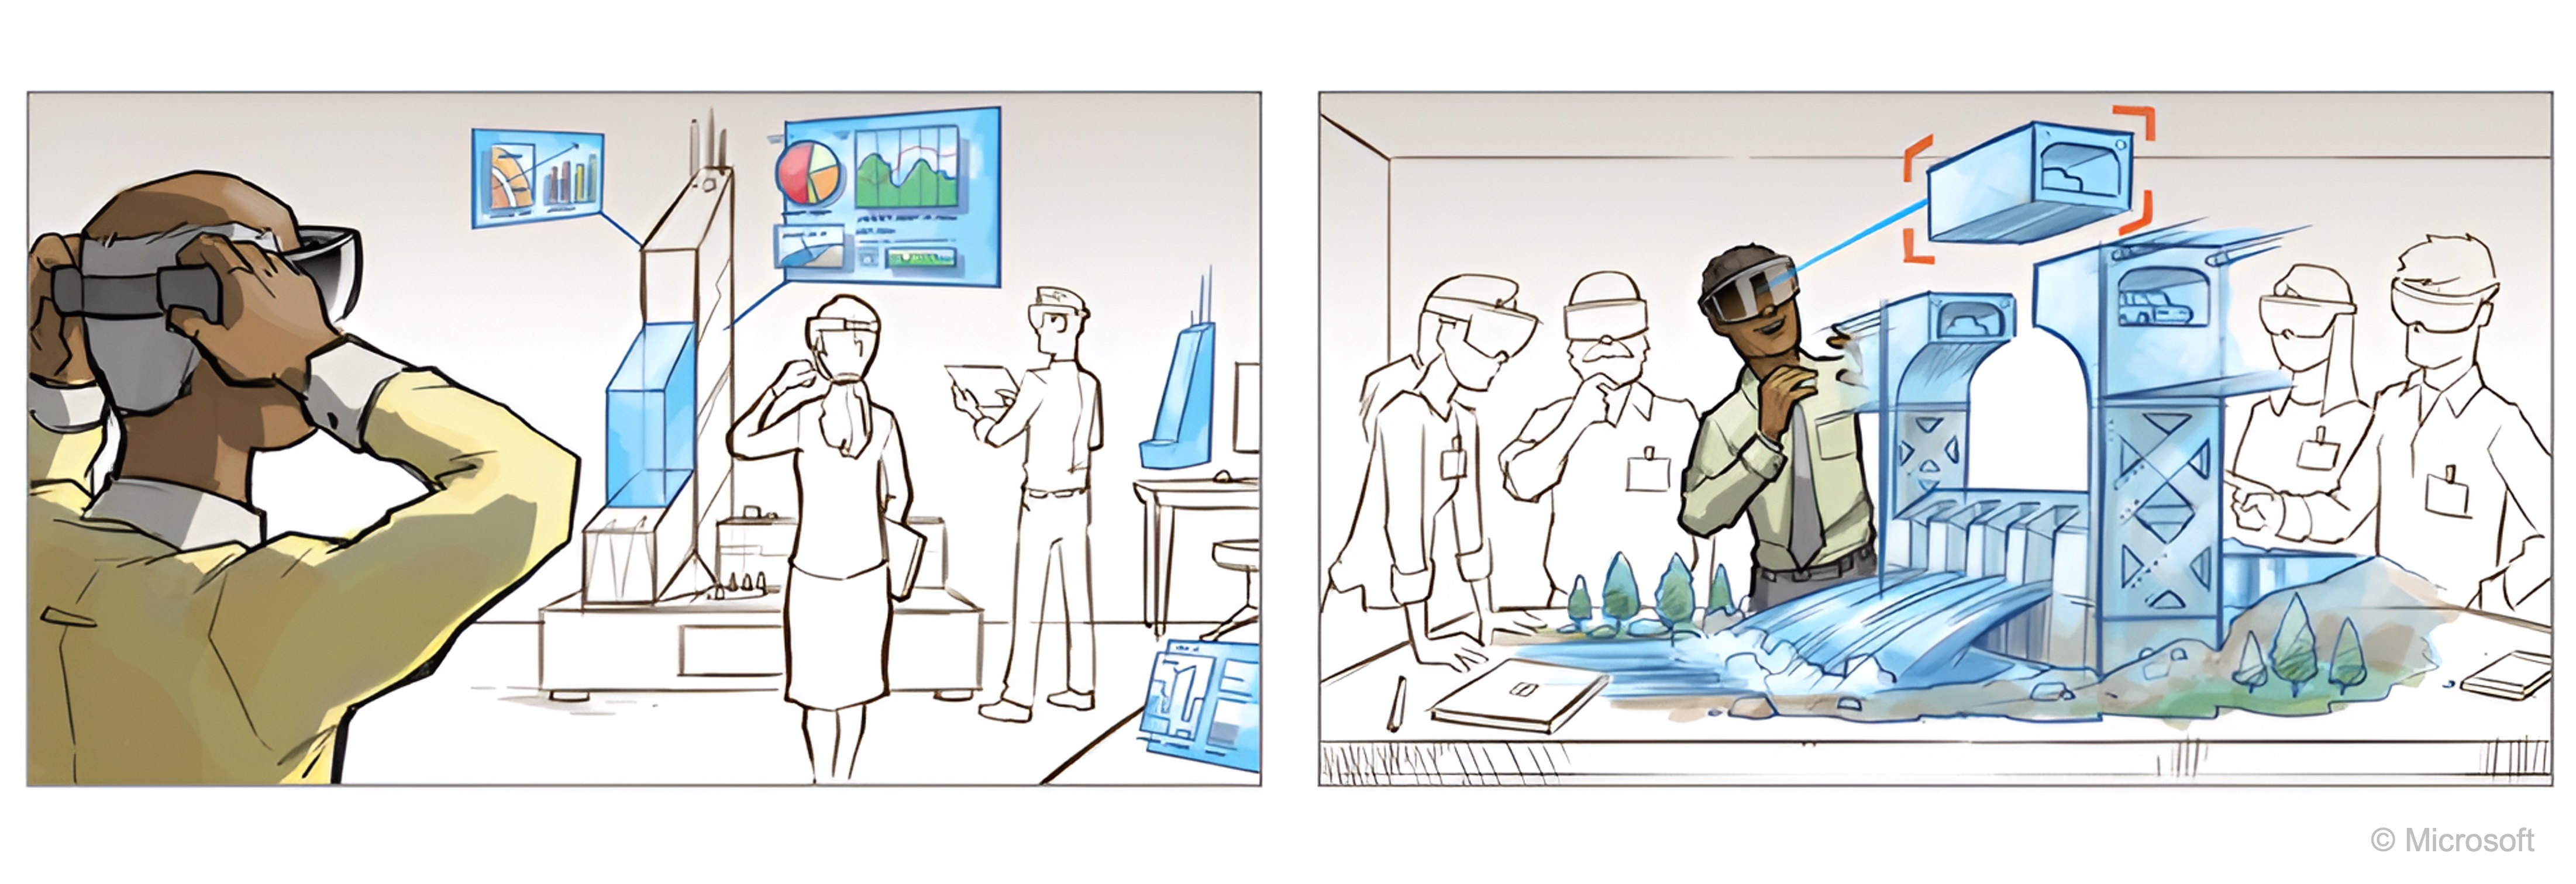
- Discuss real-world scenarios for multimodal interaction. Draw on examples like the V8 engine demo to illustrate how multiple inputs can work together to improve task performance and situational awareness.
- Reflect on user-centered evaluation methods for XR input design. Consider approaches for gathering user feedback and assessing the effectiveness of multimodal interaction in AR environments.
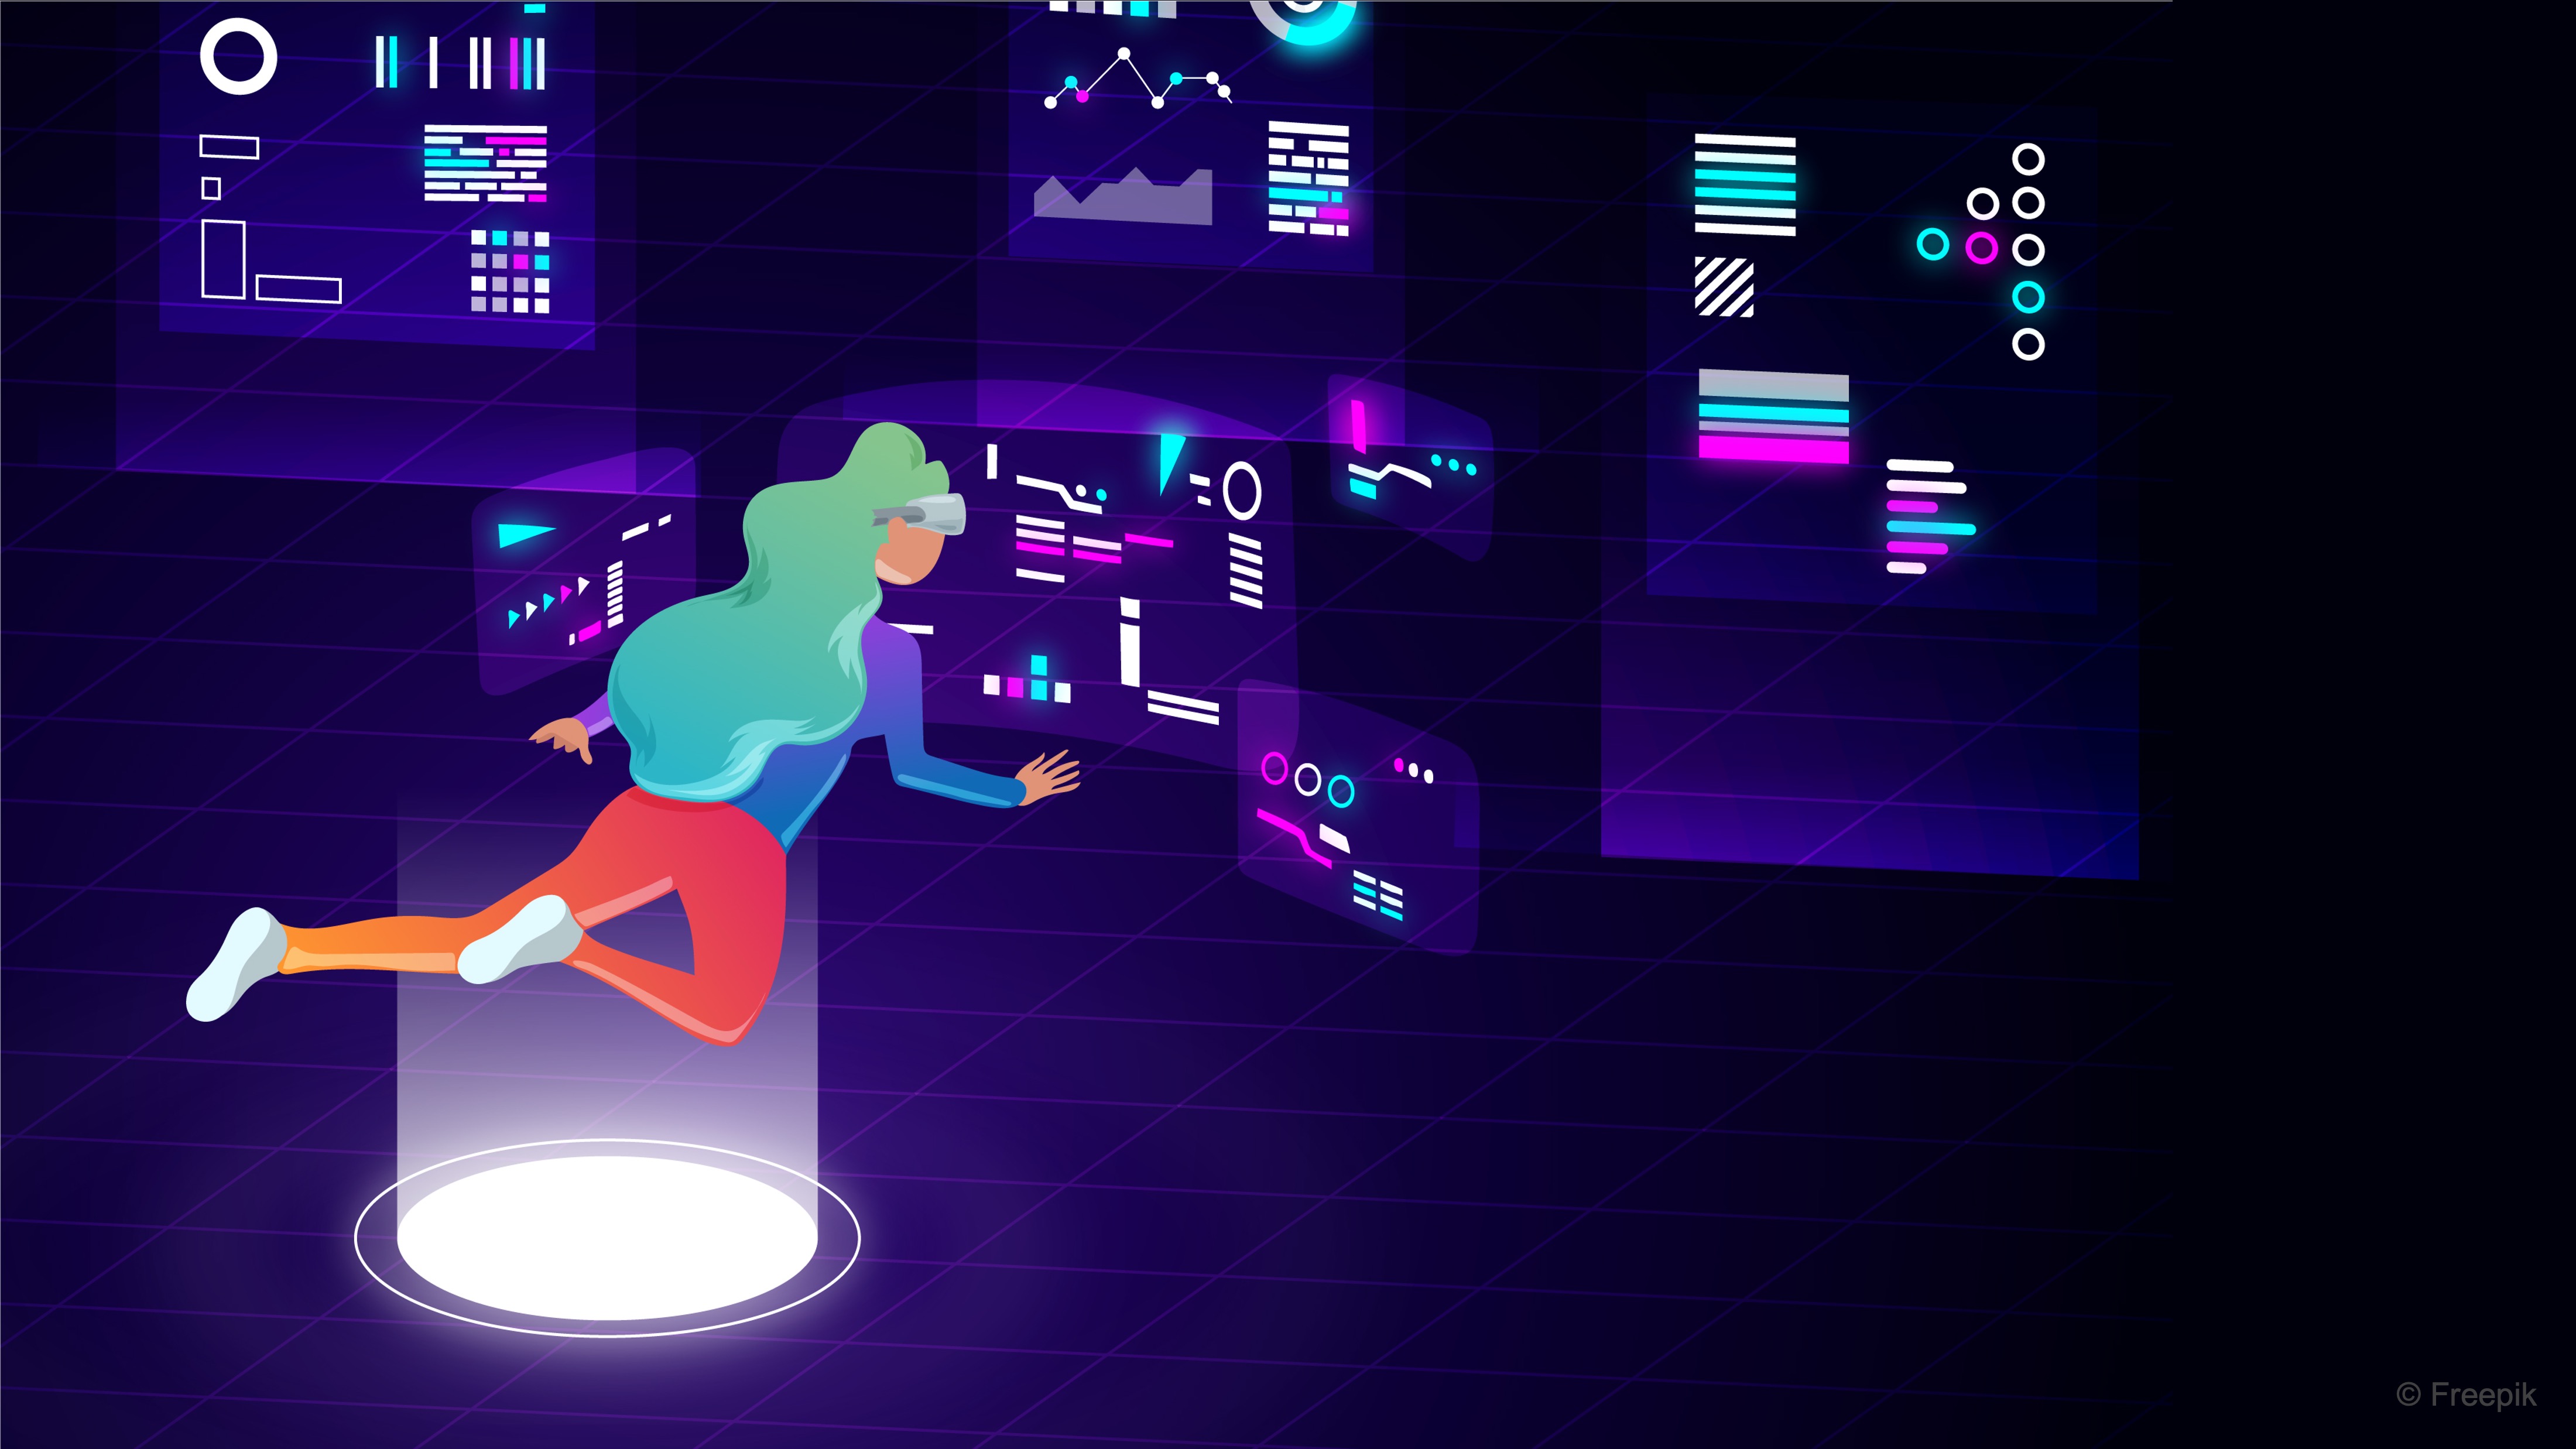
What’s Human-Centered Design?
Designing user experiences in XR builds on general human-centered design fundamentals while accounting for immersion and spatial interaction. A core starting point is user-centered design—keeping the user’s needs, abilities, and comfort at the forefront. In XR, user-centered design is especially crucial because the immersive nature of the medium amplifies the impact of good or bad design. Users are quite literally surrounded by the interface, so any confusion or discomfort is intensified.
XR Design Principles
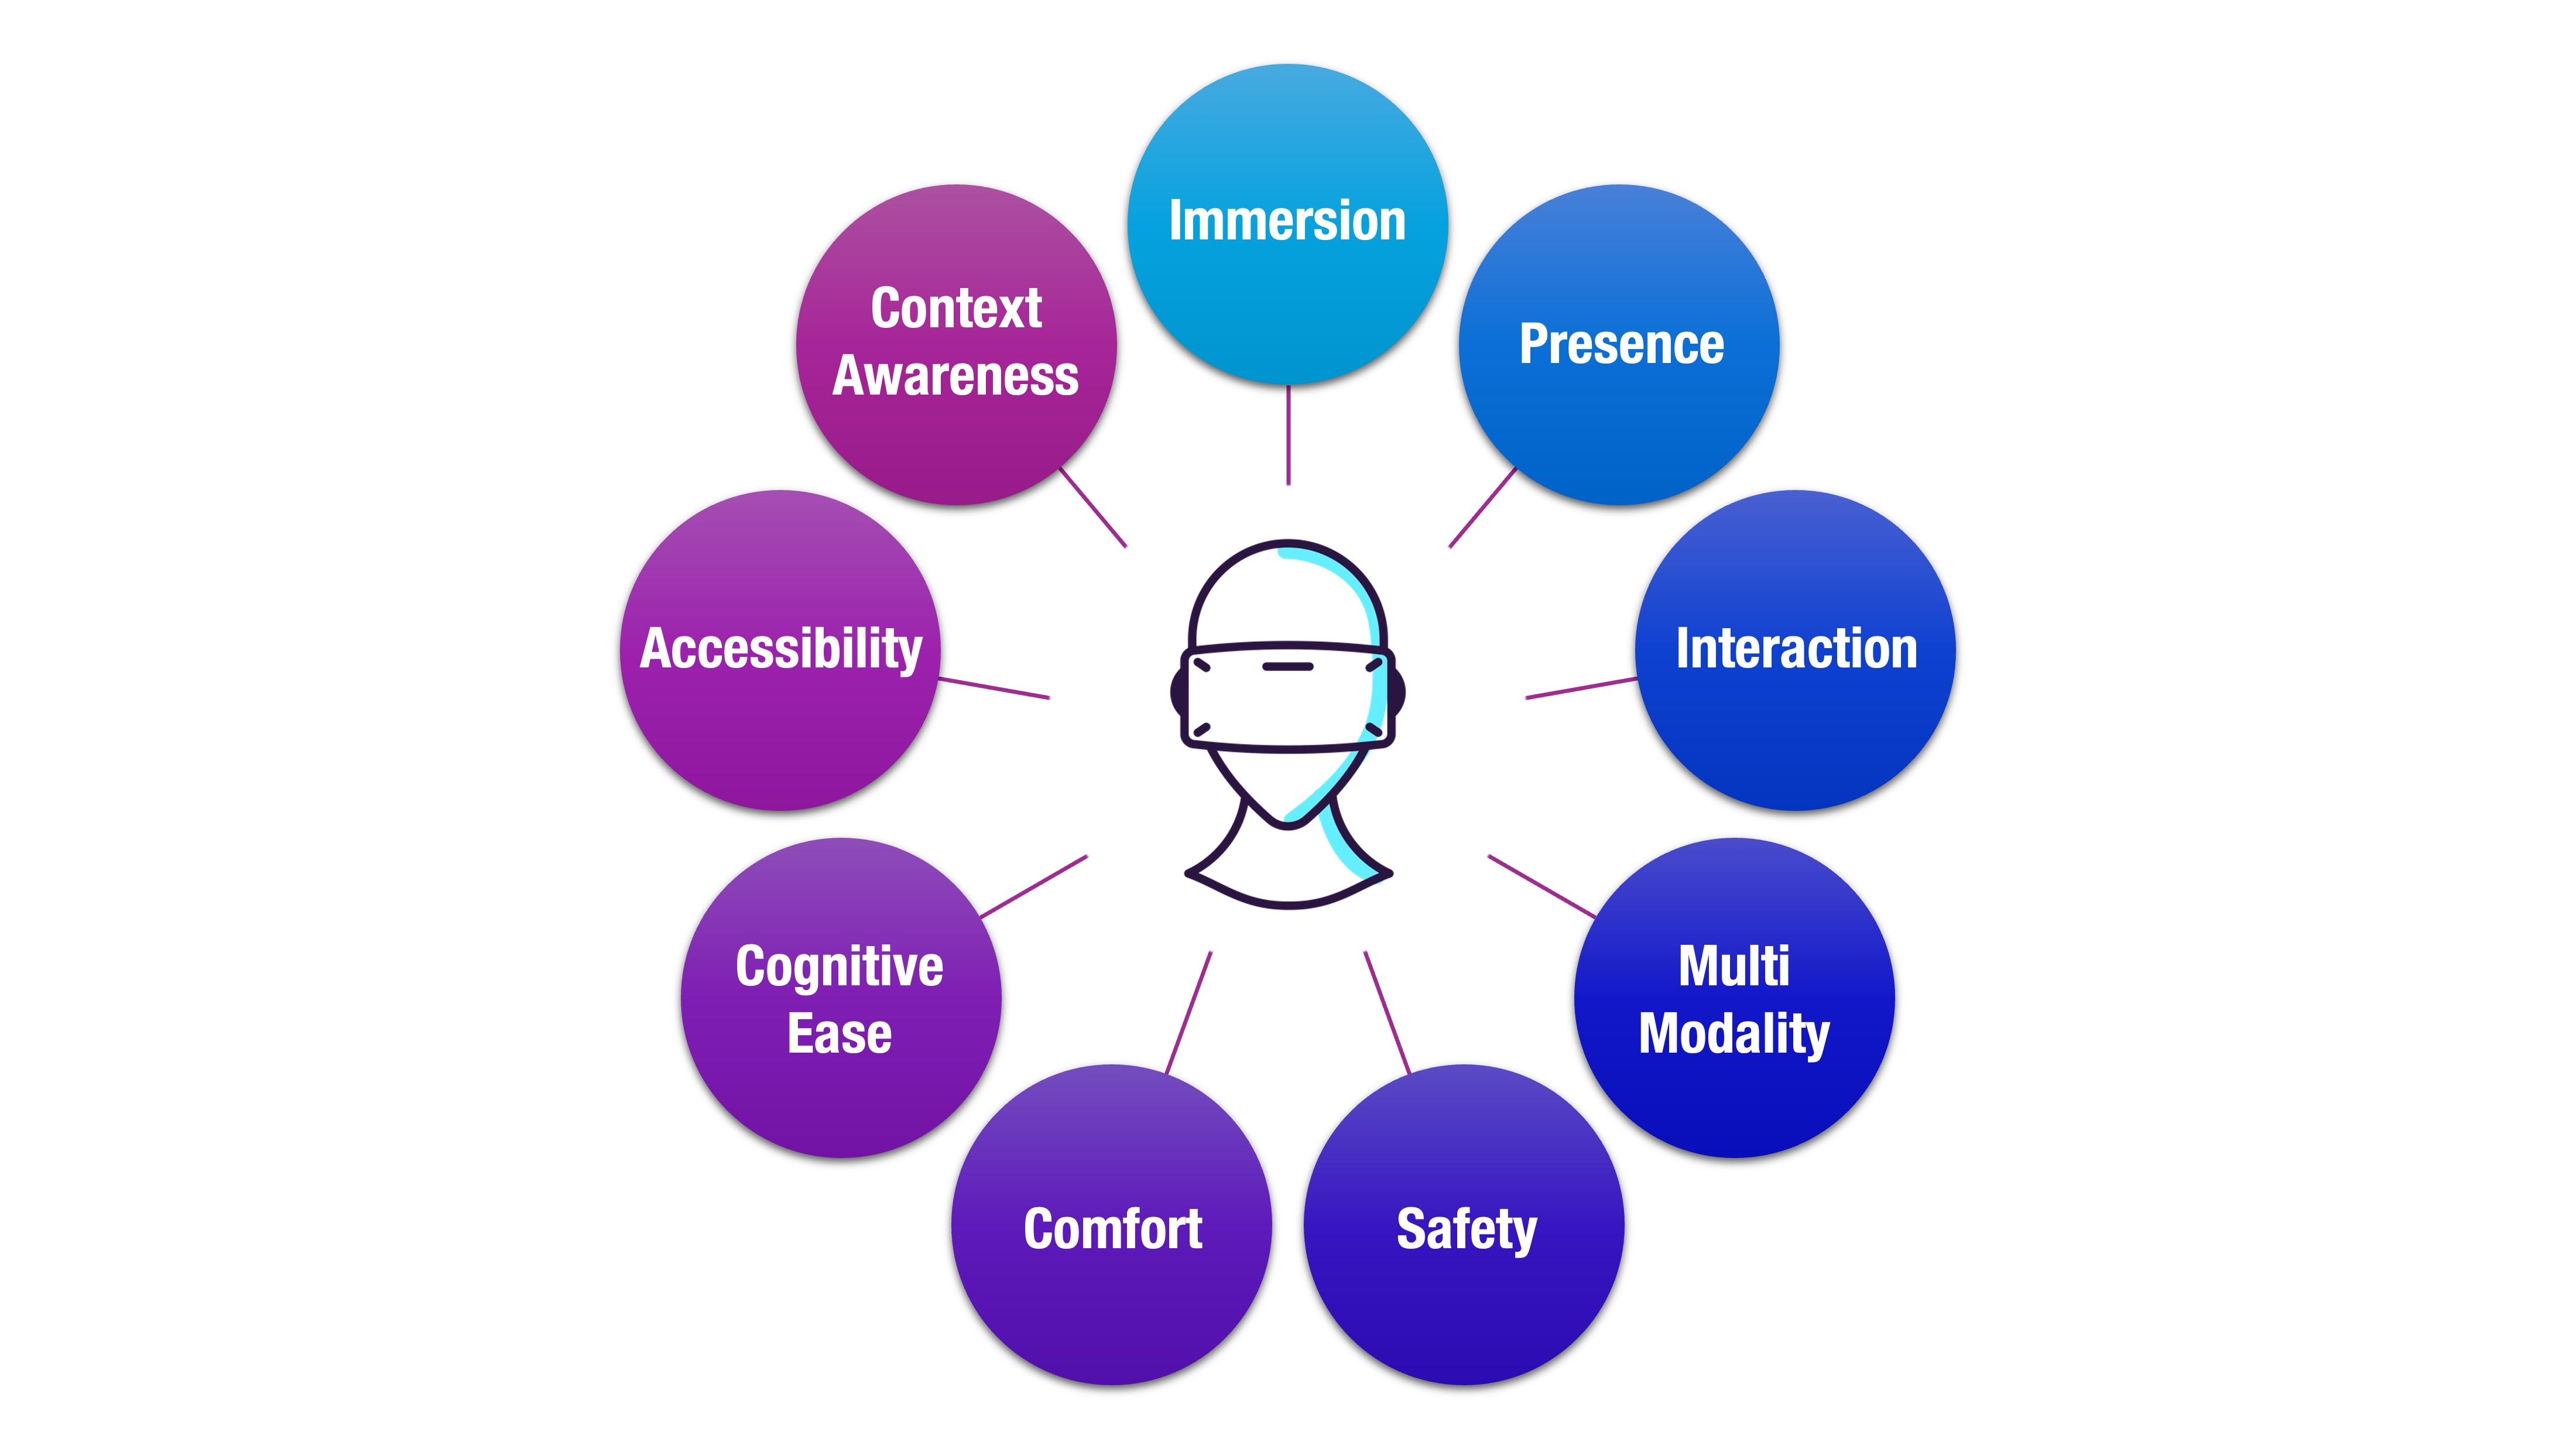
At the heart of great XR experiences is human-centered design (or user-centered design). Recognizing that XR may be completely new to many users, designers must craft experiences that gradually build user confidence. Understanding user needs, limitations, and emotional states is essential. A well-designed XR environment is empathetic and supportive, providing a sense of welcome and guidance rather than confusion or intimidation. This thoughtful approach helps create lasting engagement and user satisfaction. Key human-centered XR design principles include:
-
Immersion: Immersion is one of the fundamental design goals in XR. It refers to the degree to which the system draws the user into the experience and is largely an objective measure based on technical features like field of view, quality of sound, and level of interactivity. These system features work together to create a virtual world that is highly absorbing and engaging, helping users feel as though they have genuinely stepped into another reality.
-
Presence: While closely related to immersion, presence in XR is distinct in being more subjective. It describes the user’s internal sensation of truly “being there” within the virtual environment. A well-designed XR experience strives to maximize both immersion and presence by delivering rich, consistent sensory input and responsive interactivity, thereby making the virtual world feel vivid, believable, and emotionally resonant.
-
Interaction: While immersion and presence are sensory, interaction design covers how users act in XR. Interaction design in XR governs how users manipulate, navigate, and receive feedback from the virtual environment. Effective XR systems ensure intuitive controls, provide clear and immediate multimodal feedback (visual, haptic, auditory), and avoid disorientation through well-designed locomotion methods like teleportation, arm-swinging, or physical walking. Controls should feel natural and responsive, reducing friction and enhancing user agency across different levels of expertise.
-
Multimodality: Multimodal design leverages multiple sensory channels—visual, auditory, haptic—to convey information and support interaction. Interfaces should be placed with spatial awareness, respecting human depth perception and ergonomic reach, to minimize fatigue and maximize usability. Designing with multimodality in mind not only increases accessibility but also reinforces understanding and immersion by aligning multiple cues around the same interaction or event.
-
Safety: Standard safety features in XR include boundary systems like VR guardian grids, which warn users when they approach real-world obstacles, and careful design to avoid motions that could lead to cable entanglement or tripping. In AR, where users navigate real-world spaces while viewing digital overlays, ensure that important real-world elements are never obscured. Consider pausing virtual elements when a collision risk is detected or encouraging regular breaks to avoid fatigue. Under no circumstances should safety be compromised for the sake of deeper immersion.
-
Comfort: While high immersion is desirable, it introduces challenges related to user comfort. No matter how visually stunning an experience is, it becomes ineffective if users feel sick, dizzy, or unsafe. Stay highly attuned to human sensory limitations and avoid overtaxing them. A key concern is visual-vestibular mismatch, where the eyes perceive motion that the body does not, often causing motion sickness. Offer stable frames of reference like horizon lines or cockpit views, utilize teleportation or slow, consistent movement for travel, and maintain a high frame rate to prevent stuttering and reduce latency.
-
Cognitive Ease: Immersive XR environments can be mentally overwhelming if not carefully managed. To reduce cognitive load, interfaces and tasks should remain simple and clear. Interactions should be introduced gradually, typically starting with onboarding tutorials set in calm environments. Overloading users with too many visual elements or complex options should be avoided. A carefully structured progression helps ensure the learning curve feels manageable and intuitive rather than overwhelming.
-
Accessibility: XR experiences should be inclusive and usable by people with a wide range of physical, sensory, and cognitive abilities. This includes providing alternatives to visual or audio cues (such as captions and high-contrast visuals), supporting one-handed or voice control input, allowing seated experiences, and ensuring UI elements are reachable and legible. Accessibility isn’t just about compliance—it improves usability for everyone.
-
Context Awareness: XR systems must account for the user’s physical and situational context. This means adapting content to real-world spaces, detecting environmental hazards, adjusting to lighting conditions, and respecting the user’s current activity or surroundings. In AR, this also includes ensuring that virtual overlays do not obscure critical real-world objects or cues. A context-aware system creates more relevant, usable, and seamless experiences.
Norman’s Principles for XR
Don Norman’s design principles, often referred to as the Principles of Good Design, emphasize intuitive, user-centered products that align with human perception and behavior. Originally developed for physical and digital interfaces, these principles also provide a valuable foundation for XR system design. They complement the core principles of XR design by grounding them in the psychology of perception, action, and understanding:
-
Visibility: In any XR experience, users must be able to easily perceive available actions and understand the system’s current state. A well-designed environment clearly indicates which objects or areas are interactive—using cues like highlights, subtle glow effects, tooltips, or contextual hand icons. Poor visibility leads to frustration and hesitation. In XR, where users rely heavily on sensory cues, ensuring visibility is critical for exploration, confidence, and sustained engagement.
-
Feedback: Immediate and unambiguous feedback confirms that a user’s action has been registered and interpreted by the system. In XR, this may include visual cues (like object animations or color shifts), auditory cues (like clicks or beeps), or haptic responses (such as vibrations). Feedback helps orient users, reinforces learning, and sustains immersion. Without it, users may feel uncertain, disconnected, or distrustful of the system’s responsiveness.
-
Affordances: Affordances suggest how an object can be used, based on its appearance and behavior. Effective XR design mimics real-world affordances—a handle looks graspable, a dial turns, a button depresses. These familiar cues allow users to intuitively understand interaction possibilities without explicit instruction, reducing friction and reinforcing immersion through natural behavior.
-
Signifiers: While affordances imply potential actions, signifiers actively communicate where action is possible. In XR, these may include visual highlights, hover states, labels, directional arrows, or contextual hand prompts. Signifiers are crucial for eliminating ambiguity, preventing user error, and avoiding the XR equivalent of a “Norman door”—an object that looks usable but gives no clear hint about how to interact with it.
-
Mapping: Mapping refers to the logical relationship between controls and their effects in the system. In XR, intuitive mapping means that moving or rotating a controller should directly translate to equivalent movements in the virtual world. For example, raising a controller should lift a virtual object. When mappings align with users’ spatial expectations, interactions feel natural, predictable, and cognitively effortless.
-
Constraints: Constraints limit user actions in meaningful, consistent ways to guide appropriate behavior. In XR, constraints might take the form of physical limitations (objects can’t pass through walls), system-imposed rules (menus that only appear in certain zones), or realistic physics (gravity and momentum). Thoughtful constraints prevent errors, reduce uncertainty, and keep users focused on purposeful interaction without breaking immersion.
-
Conceptual Models: A strong conceptual model helps users form accurate mental expectations about how the XR system works. This means ensuring consistent logic across scenes—if gravity applies in one context, it shouldn’t vanish in another without explanation. When the system’s behavior aligns with real-world understanding, users are better able to predict outcomes, recover from mistakes, and build trust in the virtual environment. A coherent conceptual model fosters intuitive navigation and deepens immersion.
Spatial Design in XR
In XR design, you are not just creating an interface on a screen—you are architecting an entire space or even a world for the user. Just as architects design physical spaces by considering layout, lighting, scale, and user movement, XR designers must thoughtfully create virtual (or hybrid virtual-real) environments that are functional, comfortable, believable, and safe.
Spatial Layout
The arrangement of virtual or augmented spaces must be intentional to support natural movement, efficient workflows, and spatial understanding. By integrating presence and context awareness, designers can ensure that spatial elements align with user expectations and situational needs, enhancing realism and intuitive interaction.
-
Maintain realistic scale and proportion to preserve depth perception and ensure tools, machinery, and equipment match user expectations. Applying immersion principles here allows users to feel physically present in the environment, while cognitive ease ensures they can judge distances and interact without mental strain.
-
Design lighting and depth cues (e.g., shadows, occlusion, texture gradients) that reinforce spatial hierarchy and convey environmental structure. Leveraging visibility and presence ensures that visual cues not only guide attention but also create a convincing and navigable sense of space.
-
Incorporate spatial audio to simulate operational sounds such as motor hums, alerts, or tool clinks, which help users orient themselves and detect nearby activity. Using multimodality and feedback principles, these sounds provide immediate, intuitive information that complements visual input and aids rapid decision-making.
-
Arrange workstations, panels, or tools in logical proximity to tasks, minimizing unnecessary navigation and supporting flow. Implementing mapping and comfort principles ensures that object placement matches real-world spatial logic and reduces physical or cognitive fatigue during use.
Architectural Ergonomics
Human-centered XR must consider biomechanical constraints to reduce fatigue and promote efficiency, especially in simulation or training scenarios. Incorporating safety and comfort principles ensures that physical interactions in XR protect the user’s body and promote sustained engagement without strain.
-
Place interaction points within comfortable reach zones (~45–75 cm) to mimic real-world ergonomics and avoid excessive arm extension. Applying cognitive ease and accessibility principles ensures that users can interact naturally without overexertion, making systems more inclusive and less mentally taxing.
-
Design for PPE compatibility, such as users wearing gloves, hard hats, or safety glasses—this may require larger buttons, voice input, or gesture alternatives. By using multimodality and constraints, designers can ensure interactions remain effective even when physical dexterity or visibility is limited.
-
Avoid interaction patterns that involve repeated bending, twisting, or kneeling, especially in VR where such movements may be exaggerated or disorienting. Emphasizing safety and comfort here reduces the risk of strain or motion sickness, enabling longer and more effective training sessions.
-
Provide adjustable elements like height-scaled interfaces or seated/standing mode toggles to accommodate diverse users. Incorporating accessibility and context awareness allows the system to adapt to individual needs, ensuring that all users—regardless of body size or ability—can operate comfortably.
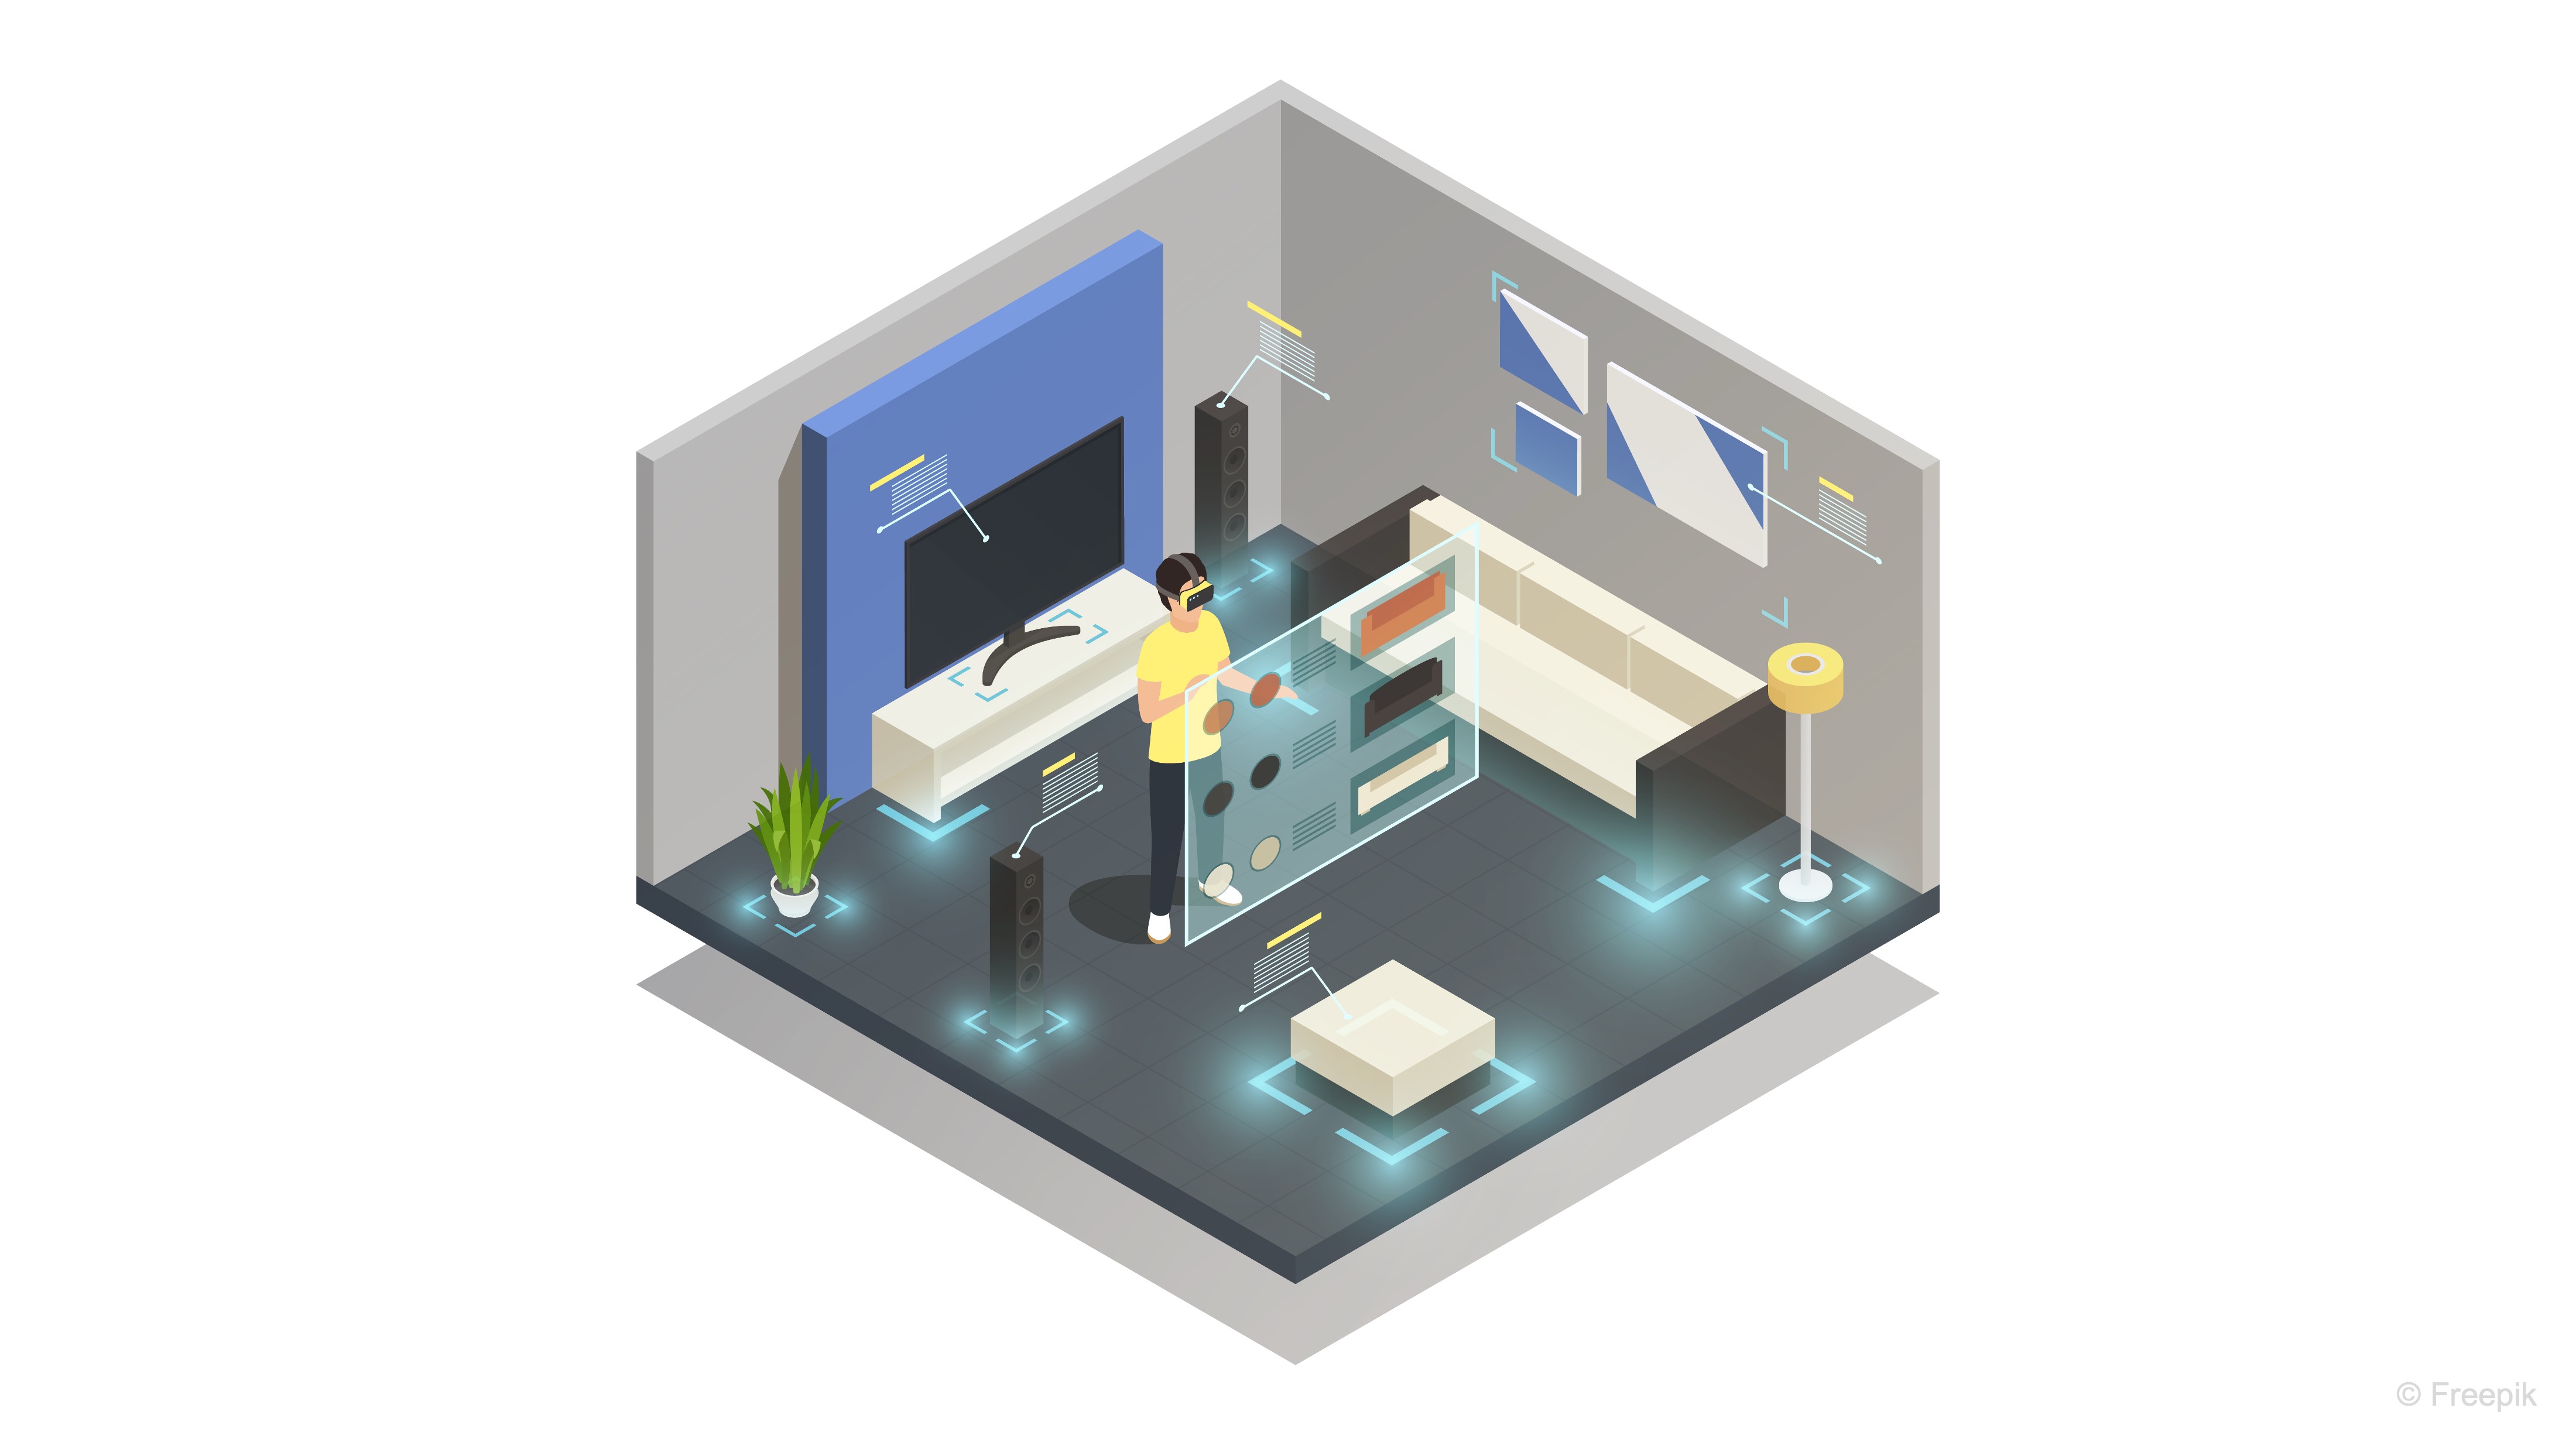
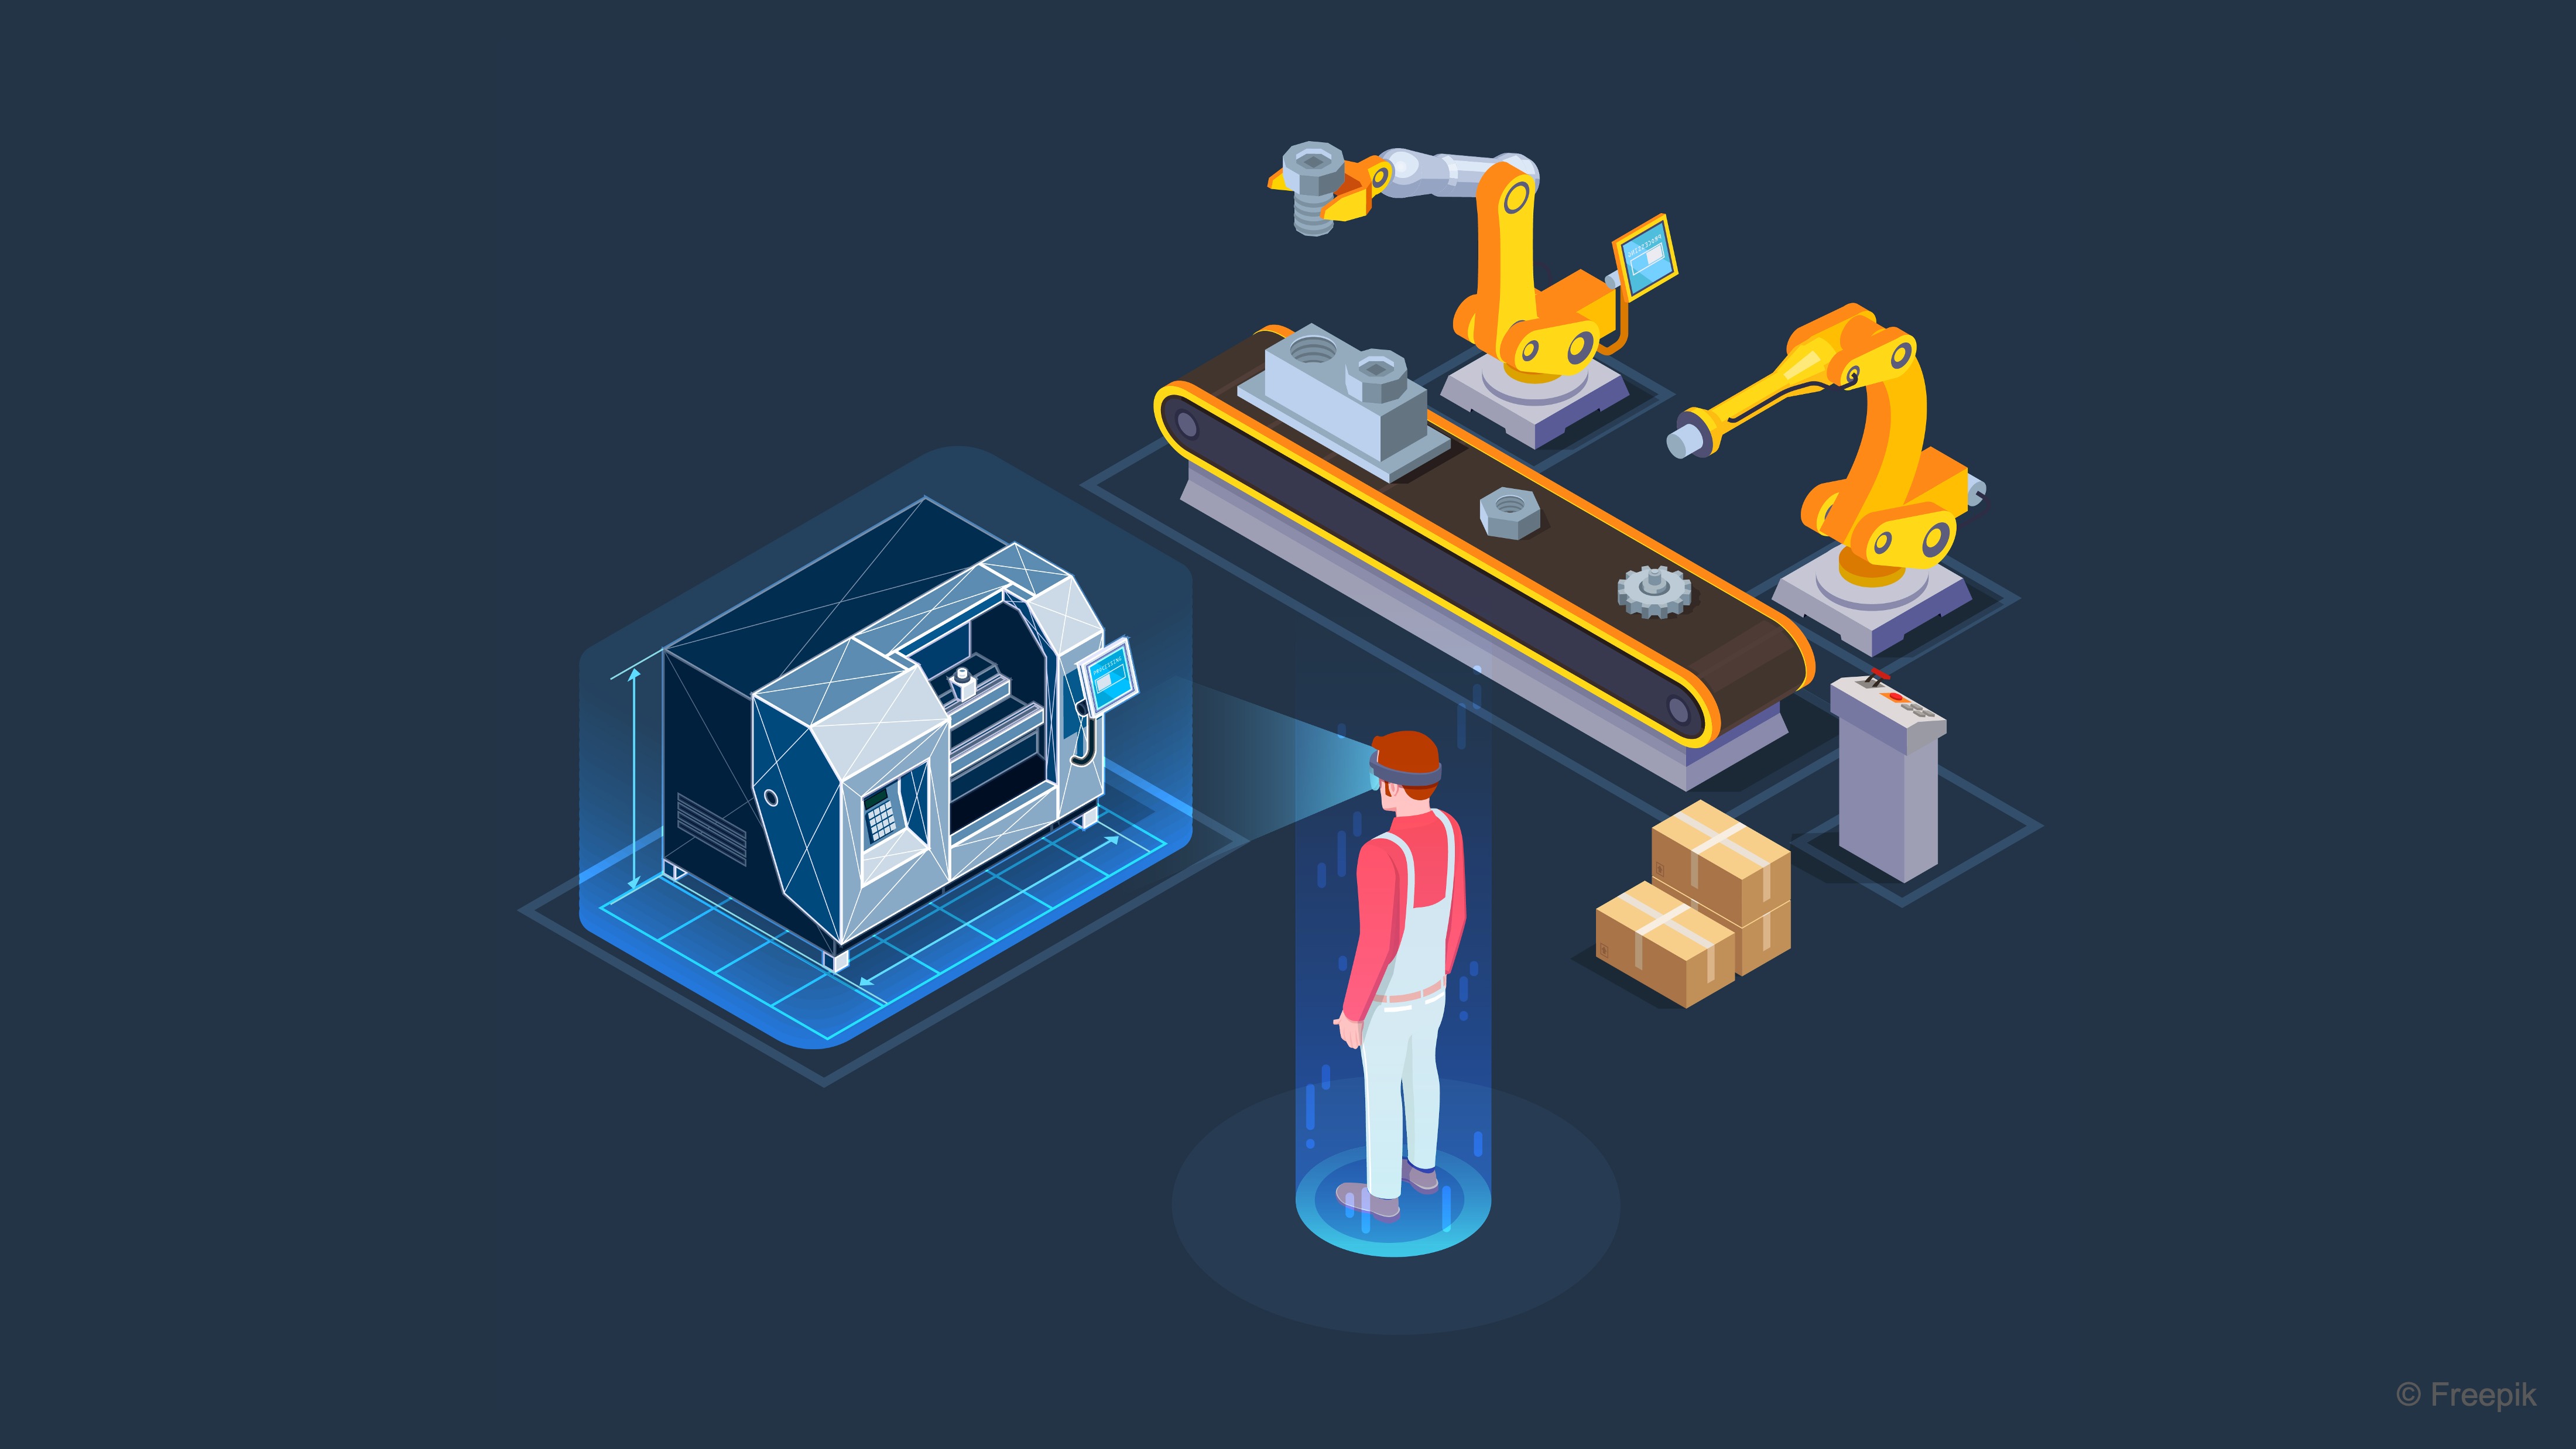
Environmental Integration
In AR deployments, the system must adapt to unpredictable, real-world settings like factories, warehouses, or outdoor worksites. Embedding context awareness and visibility principles ensures that virtual elements remain accurate, relevant, and perceivable regardless of environmental variability.
-
Use anchor detection and surface scanning to align overlays with real-world objects such as conveyor belts, control panels, or vehicle components. Incorporating mapping and presence principles guarantees that virtual content feels stably integrated into the user’s surroundings.
-
Adjust content contrast, line thickness, and brightness based on ambient lighting and surface reflectivity, especially in outdoor or high-glare environments. Applying visibility and comfort principles ensures information remains readable without causing visual strain.
-
Design for environmental robustness: AR interfaces should remain legible in dust, rain, direct sunlight, or noisy, cluttered environments. Leveraging safety and accessibility ensures that critical data is reliably delivered under challenging conditions.
-
Offer context-aware AR overlays (e.g., exploded views, inspection labels, step-by-step instructions) that enhance, not obstruct, real-world awareness. Using feedback and cognitive ease principles helps overlays deliver actionable insights without overwhelming or distracting the user.
Locomotion in VR
Movement in VR should preserve user comfort while accurately representing spatial tasks. Applying comfort and cognitive ease principles ensures that navigation methods feel natural, reduce disorientation, and support focus on the task at hand.
-
Use teleportation, dash movement, or blink transitions to allow users to reposition without nausea, particularly in confined or repetitive spaces. Incorporating safety and immersion principles keeps motion both physically comfortable and visually convincing.
-
Introduce visual comfort zones—grounding objects like rails, floor grids, or virtual walls that help users maintain orientation and reduce disorientation. Leveraging presence and visibility ensures these reference points are intuitively recognized and reinforce spatial stability.
-
Recreate realistic footpaths, safety perimeters, and clearance zones found on actual factory floors to build spatial memory transferable to the real world. Applying mapping and context awareness helps align VR navigation patterns with real-world expectations.
-
Provide virtual floor maps, minimaps, or spatial compasses to aid navigation in large or multizone training environments. Using feedback and accessibility principles ensures that navigation aids are easy to interpret and inclusive for users with varying spatial abilities.
Navigation in AR
Wayfinding and orientation support are critical when users navigate large or unfamiliar industrial spaces. Embedding context awareness and multimodality principles ensures that guidance adapts to environmental conditions and user preferences for optimal clarity.
-
Use AR arrows, signage, and directional cues to guide users toward workstations, exits, or task locations with minimal distraction. Incorporating visibility and cognitive ease helps ensure that cues are easy to follow without overloading the user’s attention.
-
Employ anchored POIs (points of interest) with proximity-based fading or highlighting to avoid clutter while staying informative. Applying mapping and feedback principles ensures users receive location-relevant guidance that updates seamlessly as they move.
-
Ensure visual elements adapt to lighting extremes, including harsh shadows or dim corridors—using high-contrast outlines, drop shadows, or glow effects. Leveraging visibility and comfort principles maintains legibility and reduces eye strain in changing conditions.
-
Add voice guidance, vibration prompts, or ambient light indicators to reinforce navigation in loud or visually saturated environments. Using multimodality and accessibility principles ensures that wayfinding remains effective for users with varying sensory capabilities.
Multi-User Experiences
Multi-user XR scenarios, such as remote inspections or co-design reviews, demand coordination and shared spatial understanding. Applying presence and feedback principles ensures that participants feel co-located and remain aware of each other’s actions in real time.
-
Anchor shared models to real-world reference points like tables, floor grids, or equipment, ensuring all users see the same content aligned correctly. Leveraging mapping and context awareness guarantees consistent spatial alignment for all participants, reducing confusion during collaboration.
-
Visualize collaborators using avatars, cursor trails, or head/body indicators, showing gaze direction, position, or tool use. Incorporating visibility and presence principles makes interactions more intuitive by clearly conveying where others are and what they are focusing on.
-
Enable multi-user annotation (e.g., virtual sticky notes or laser pointers) to support discussion, instruction, and review. Using feedback and cognitive ease ensures that annotations are immediately understood and help guide the group’s attention effectively.
-
Support asynchronous collaboration by allowing users to leave persistent notes or record sessions for later review. Applying accessibility and context awareness makes it possible for contributors in different time zones or shifts to fully participate and stay informed.
Attention Guidance
XR users are surrounded by information—design must deliberately guide focus without overwhelming. Incorporating visibility and cognitive ease principles ensures that key elements stand out clearly while minimizing mental load.
-
Establish a clear visual hierarchy using size, brightness, color contrast, motion, and depth to draw attention to critical items. Applying mapping and immersion principles ensures that highlighted elements are perceived as naturally important within the scene.
-
Use animated transitions, pulsing indicators, or halo glows to highlight areas requiring action or inspection. Leveraging feedback and presence principles makes these visual prompts both noticeable and contextually grounded.
-
Avoid overloading the field of view with multiple competing stimuli; only surface relevant info based on user proximity or task stage. Incorporating context awareness and comfort helps maintain clarity while preventing sensory fatigue.
-
Employ spatial audio cues (e.g., beeps from behind, directional alerts) to guide users’ gaze toward malfunctions, alarms, or instructions. Using multimodality and safety ensures that critical alerts reach the user even if visual attention is elsewhere.
-
Support procedural tasks with step-based visual cues or task-specific overlays that adapt as the user progresses. Applying feedback and cognitive ease ensures that users receive timely, understandable instructions without breaking their workflow.
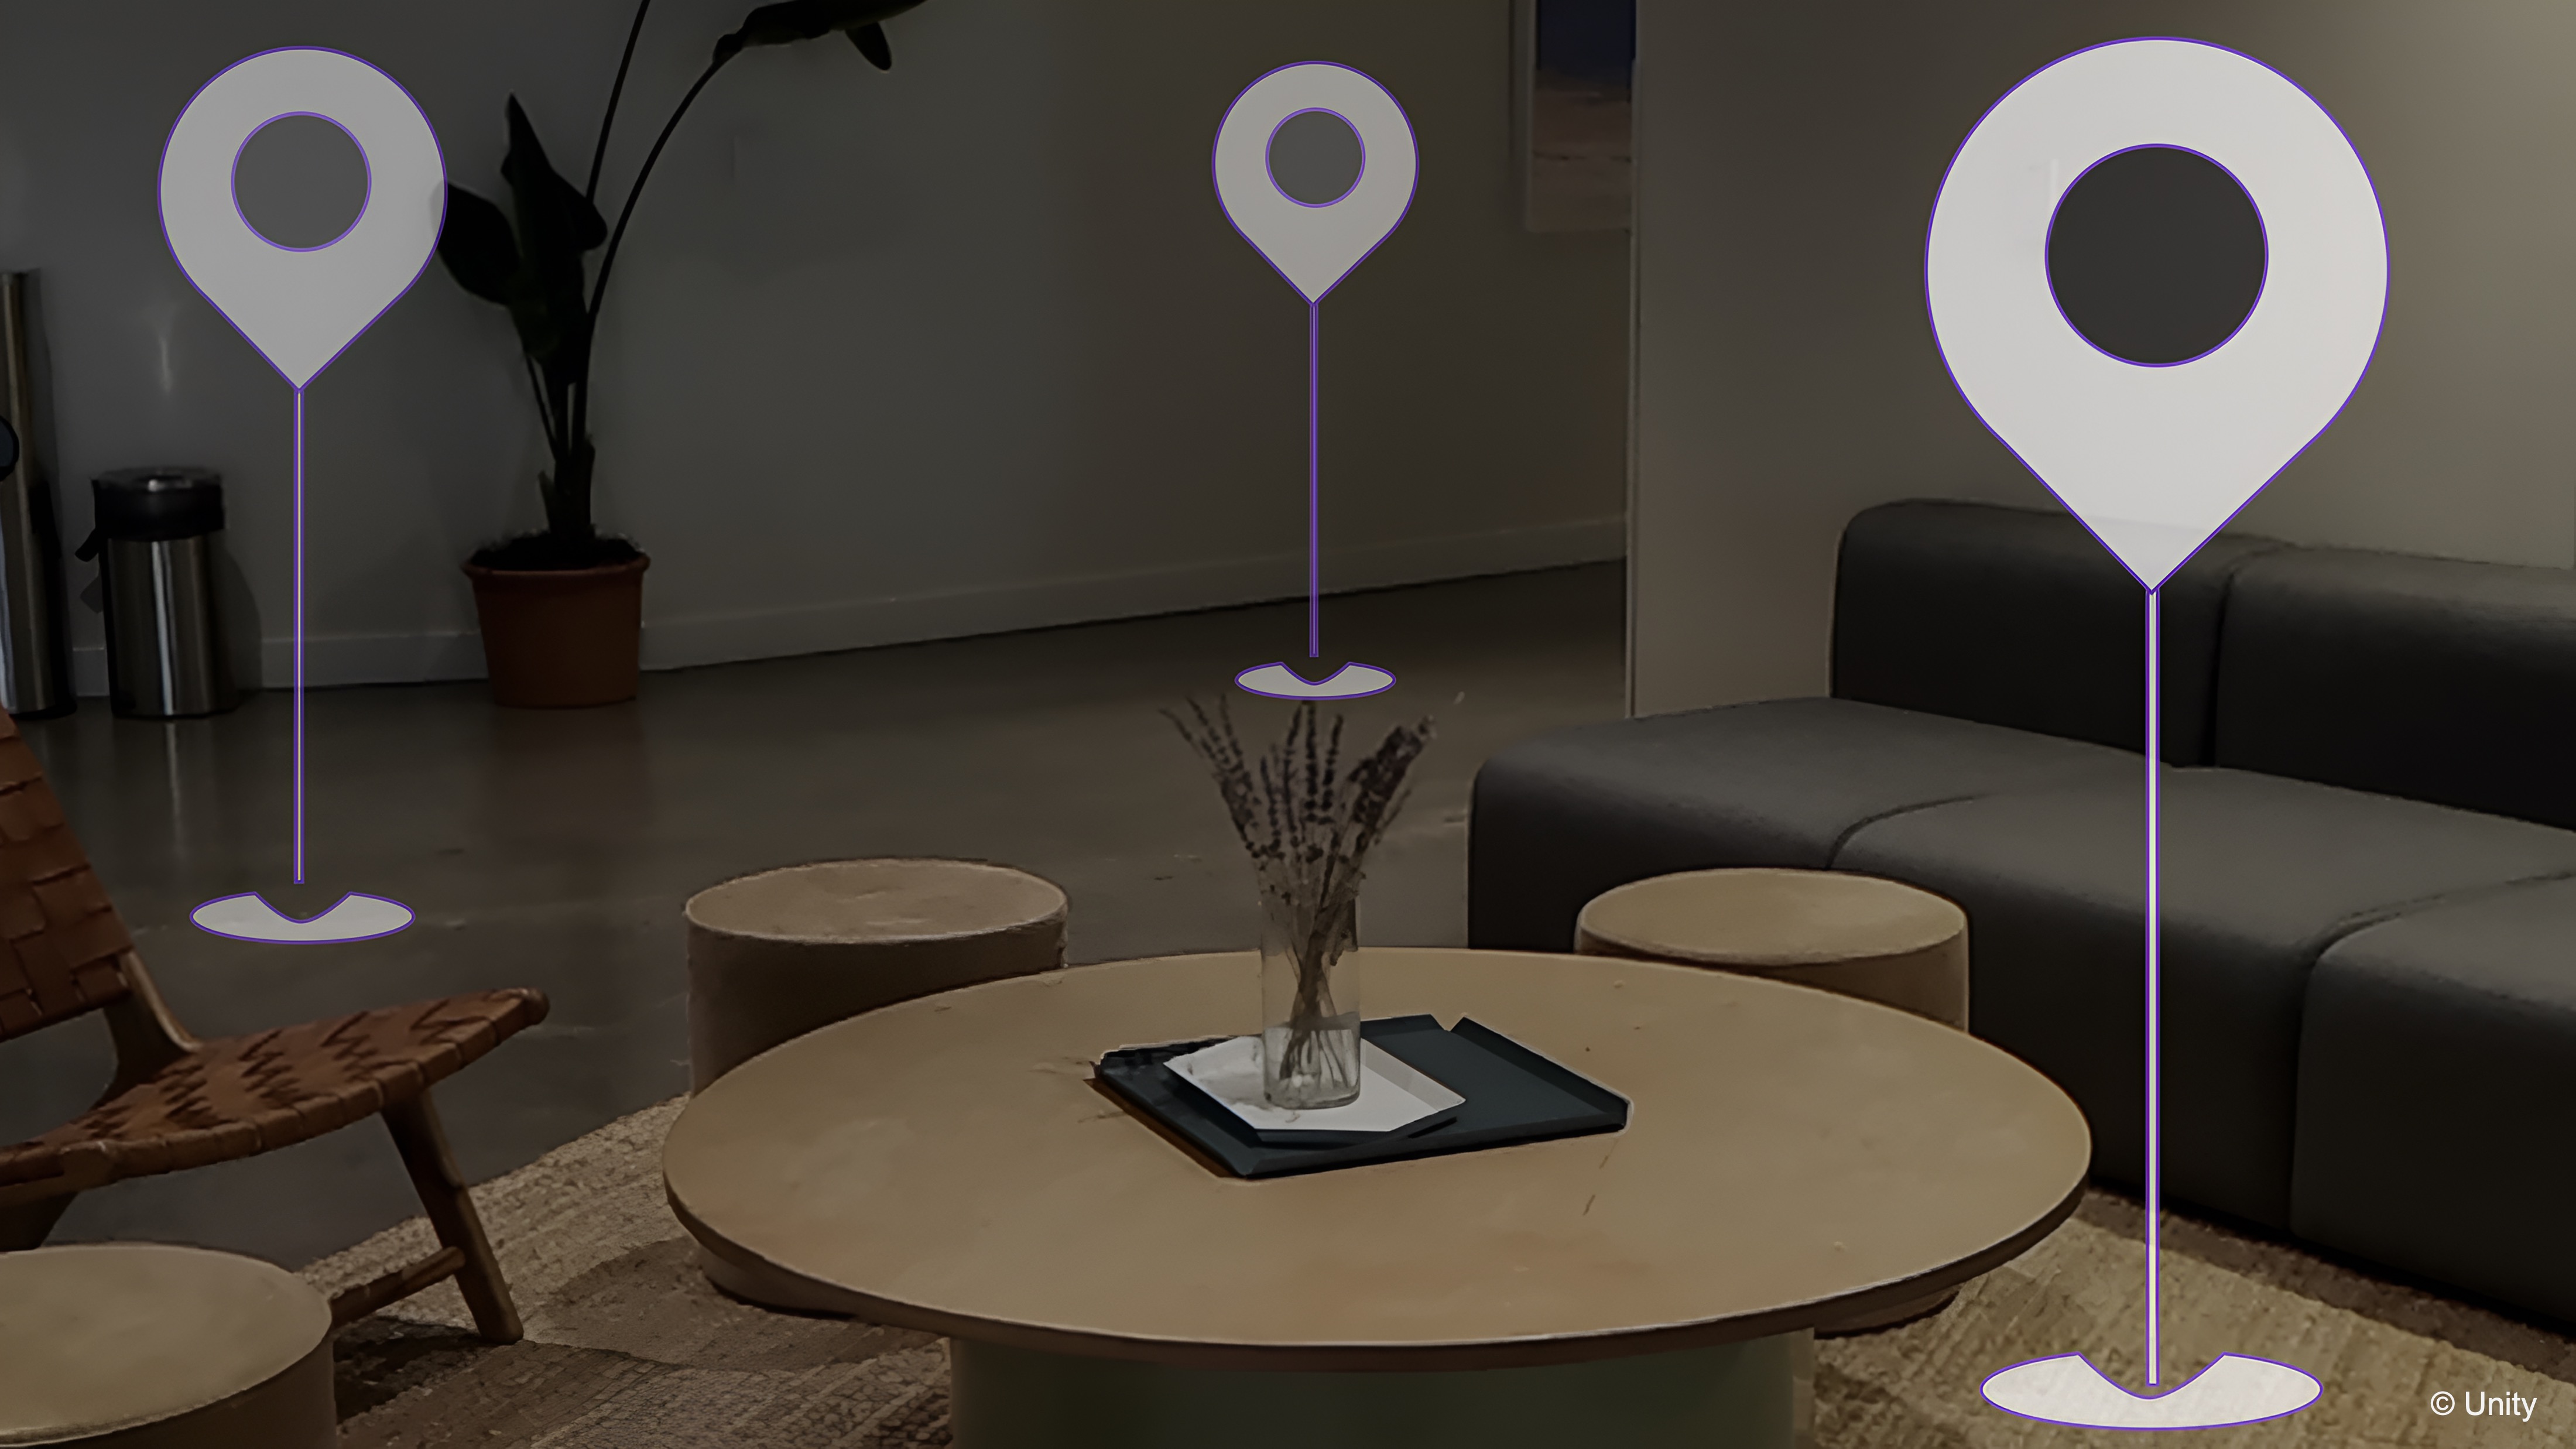
Occlusion Management
In both AR and VR, vital information must remain visible, even as users or objects move unpredictably. Applying visibility and feedback principles ensures that important data is consistently perceivable and responsive to changing conditions.
-
Place critical UI elements in persistent, anchored positions—such as head-locked displays or always-on-top floating panels. Leveraging context awareness and cognitive ease ensures users can access essential information without searching for it.
-
Use dynamic repositioning to shift labels or indicators into the user’s view when occlusion is detected. Incorporating feedback and comfort principles makes these adjustments seamless and non-disruptive to the task at hand.
-
Design with transparency, outlines, or cutaways to reveal hidden content, especially in layered machinery or behind obstacles. Applying visibility and mapping ensures that users can maintain spatial understanding while accessing concealed details.
-
Ensure overlays are legible against complex or dynamic backdrops, using shadow boxes, background blurs, or contrast-enhancing visual treatments. Using visibility and safety principles guarantees that critical information remains readable in any environment, reducing the risk of errors.

Complexity Management
Balancing visual richness with usability is vital in complex environments such as factories or energy facilities. Incorporating cognitive ease and context awareness ensures that users can focus on relevant details without being overwhelmed by unnecessary visual information.
-
Reduce non-essential clutter in virtual models while preserving key structural context—hide inactive systems or unused tools dynamically. Applying visibility and comfort principles helps maintain clarity while minimizing mental and visual fatigue.
-
Provide role-specific views: a maintenance technician might need a full 3D model, while an inspector may only need functional indicators or diagnostic overlays. Leveraging accessibility and mapping ensures that each user’s interface aligns with their task requirements and mental model.
-
Use semantic simplification: simplify objects visually without losing their functional meaning (e.g., using iconographic representations for repeated elements). Incorporating immersion and cognitive ease ensures that simplified visuals remain contextually believable and quick to interpret.
-
Allow users to toggle layers of information (e.g., mechanical, electrical, procedural) to reduce overload. Applying feedback and context awareness ensures that layer toggling is intuitive and adapts to the user’s changing focus or workflow.

Interaction Design in XR
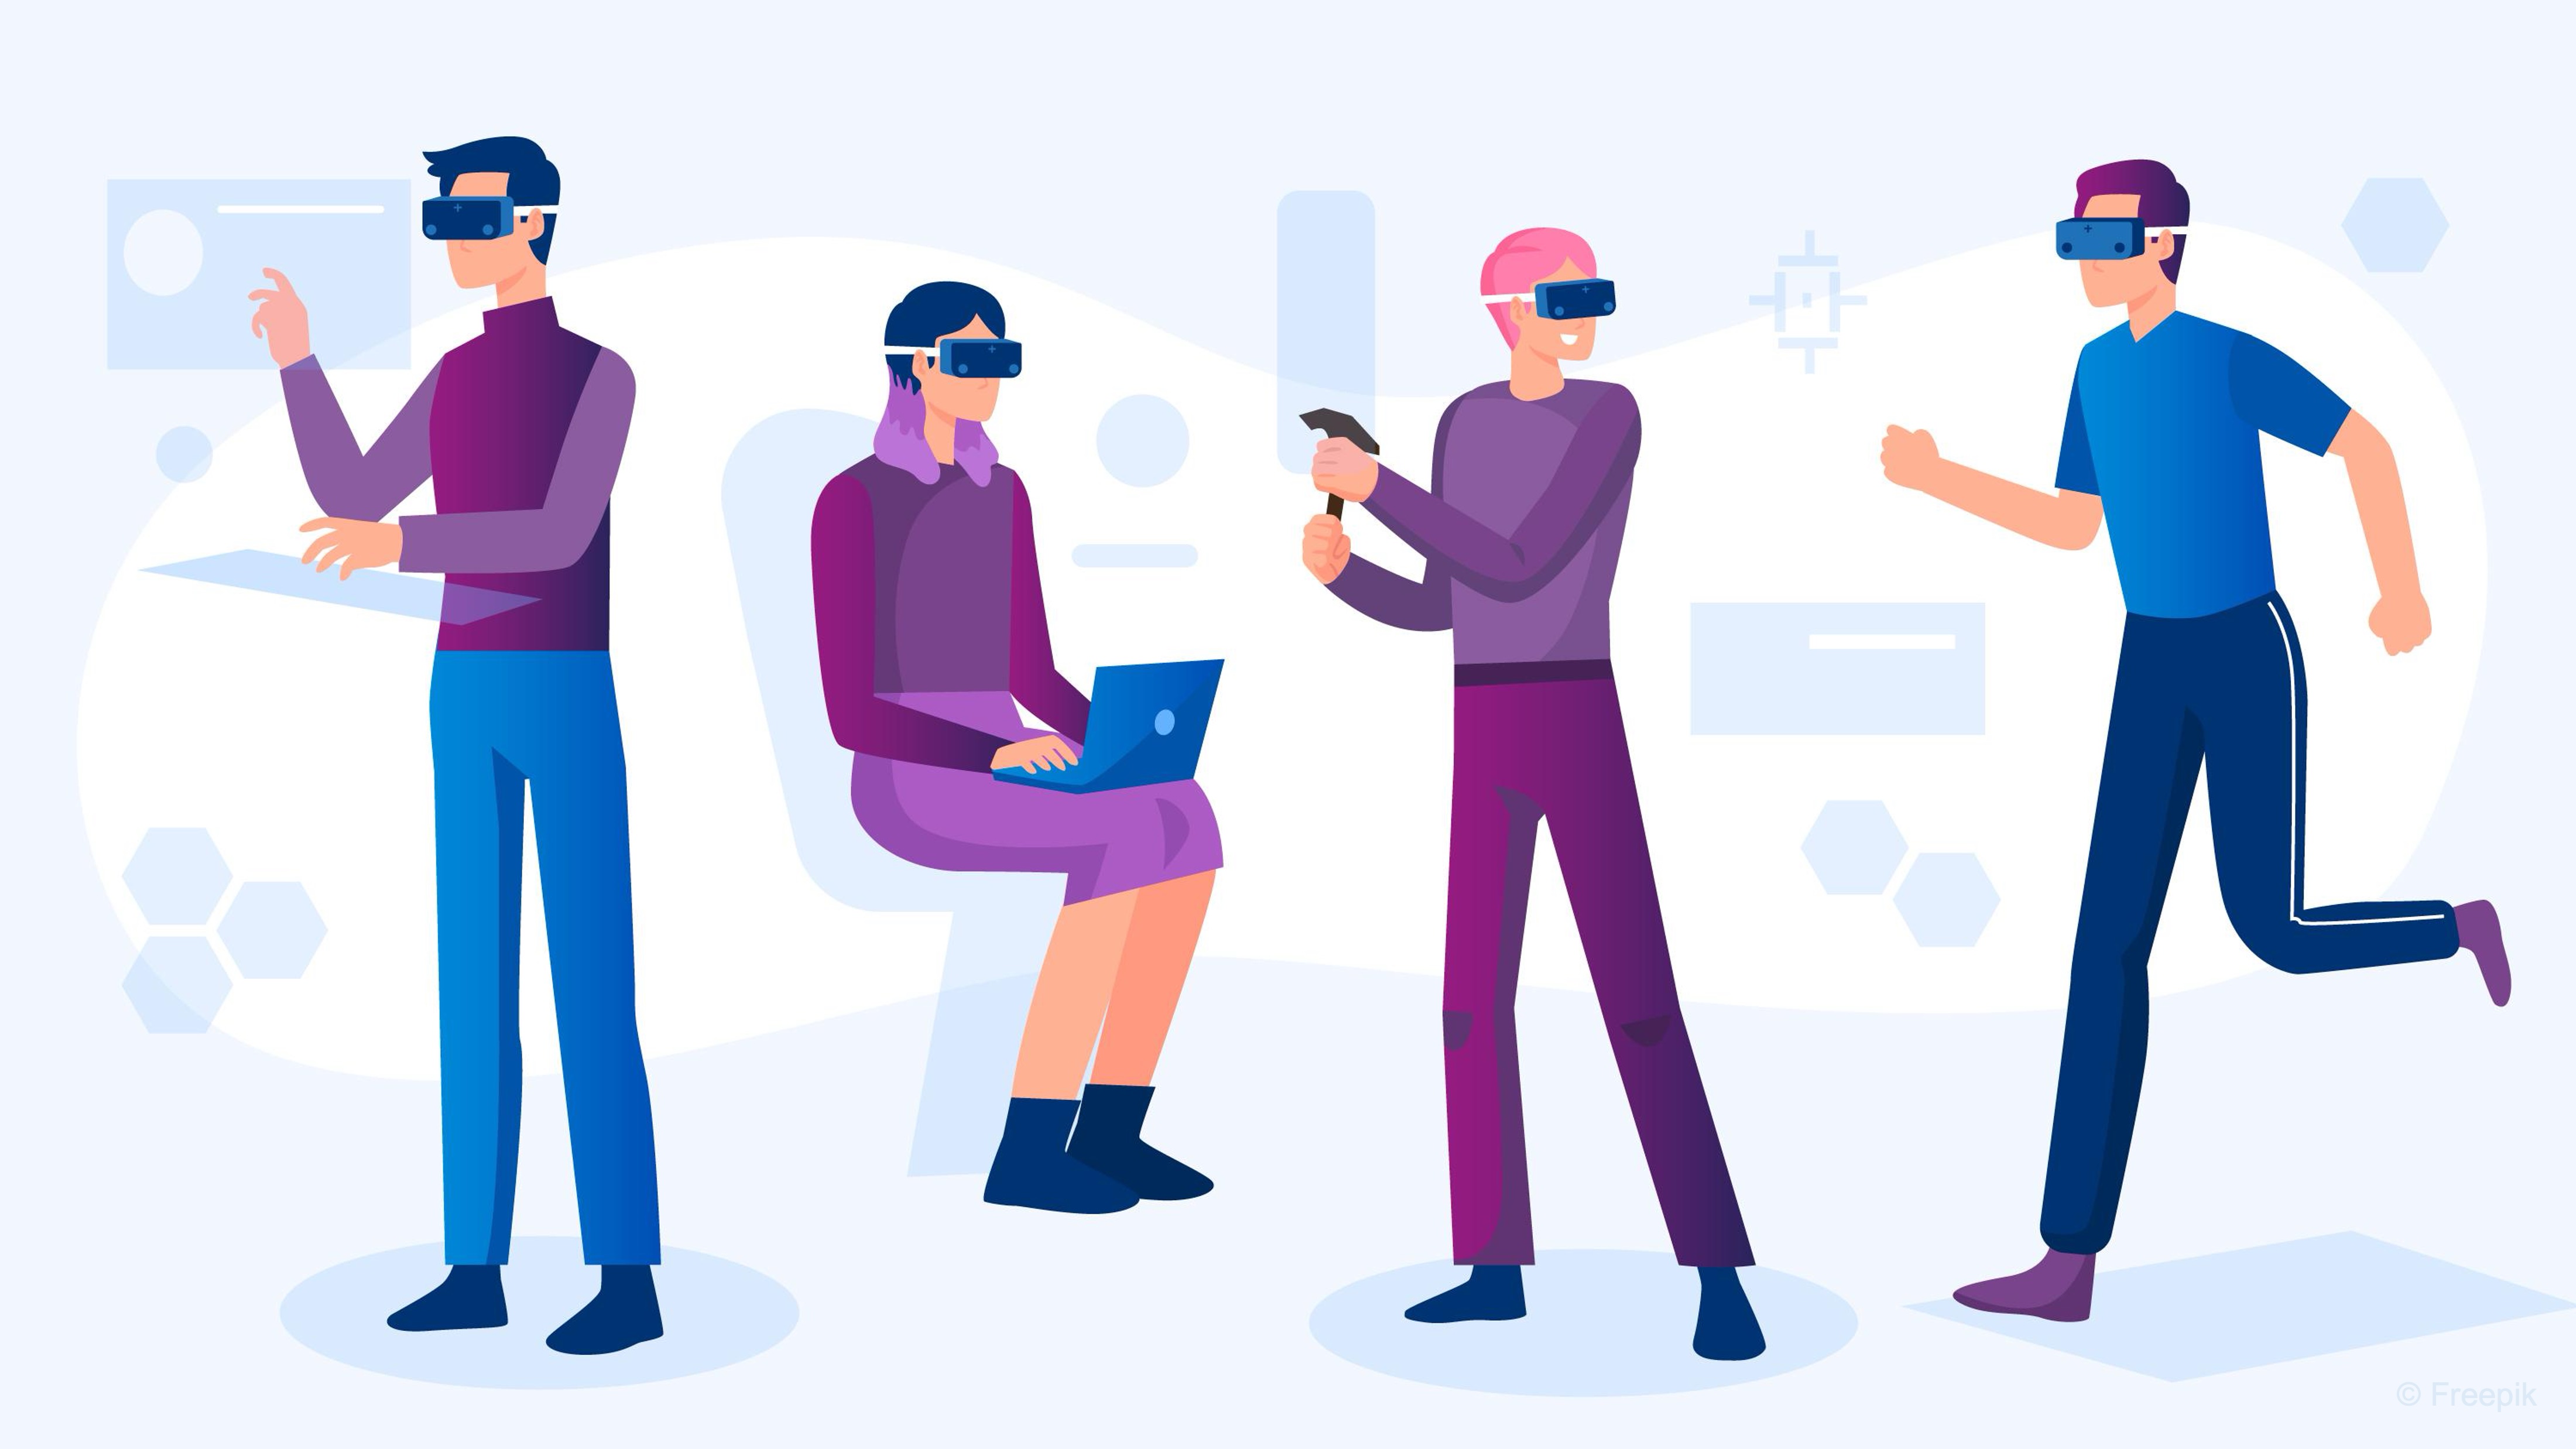
Interaction design in XR involves how users manipulate and navigate the virtual elements–essentially, the input and output loop between human and an immersive computer. In desktop or mobile interfaces, interaction is through clicking, typing, or touching a screen, usually confined to 2D windows. In XR, interaction becomes far more diverse: users can move their head and body, use hand controllers, touch or grab objects in mid-air, gesture, speak, or even use eye gaze to select things. The goal of XR interaction design is to make these interactions natural, intuitive, and responsive, bridging the gap between physical actions and virtual outcomes.
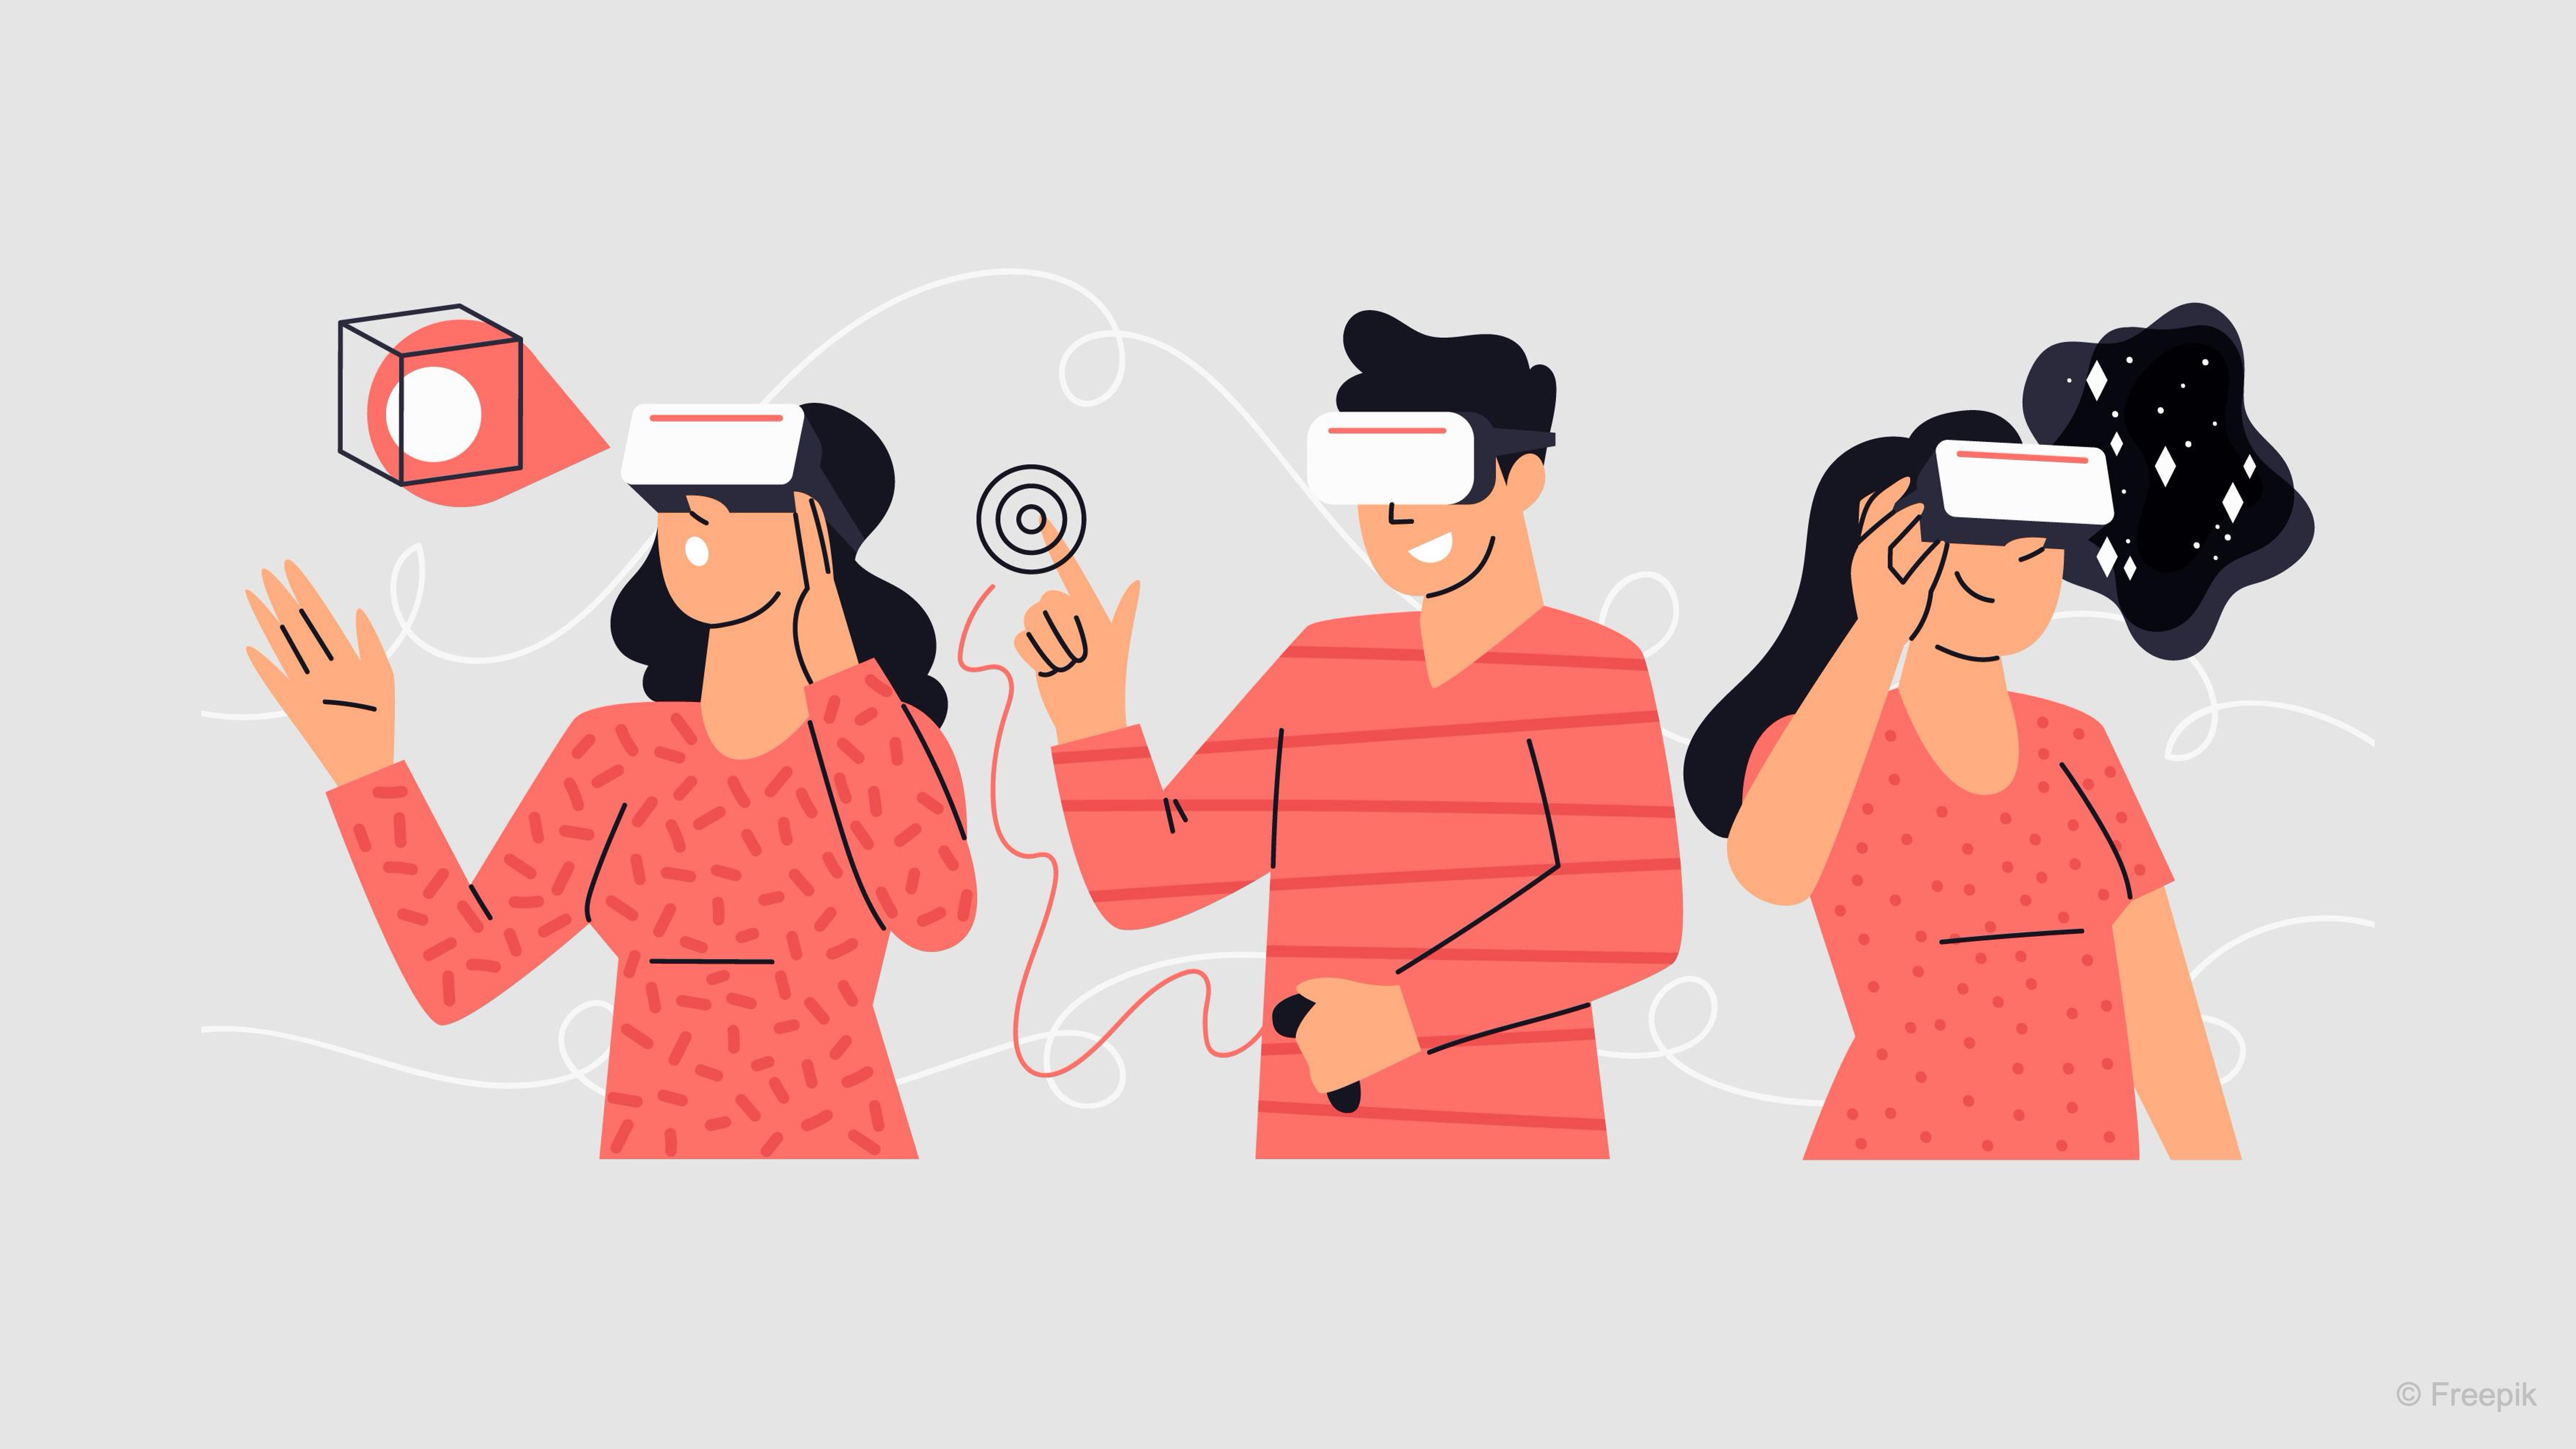
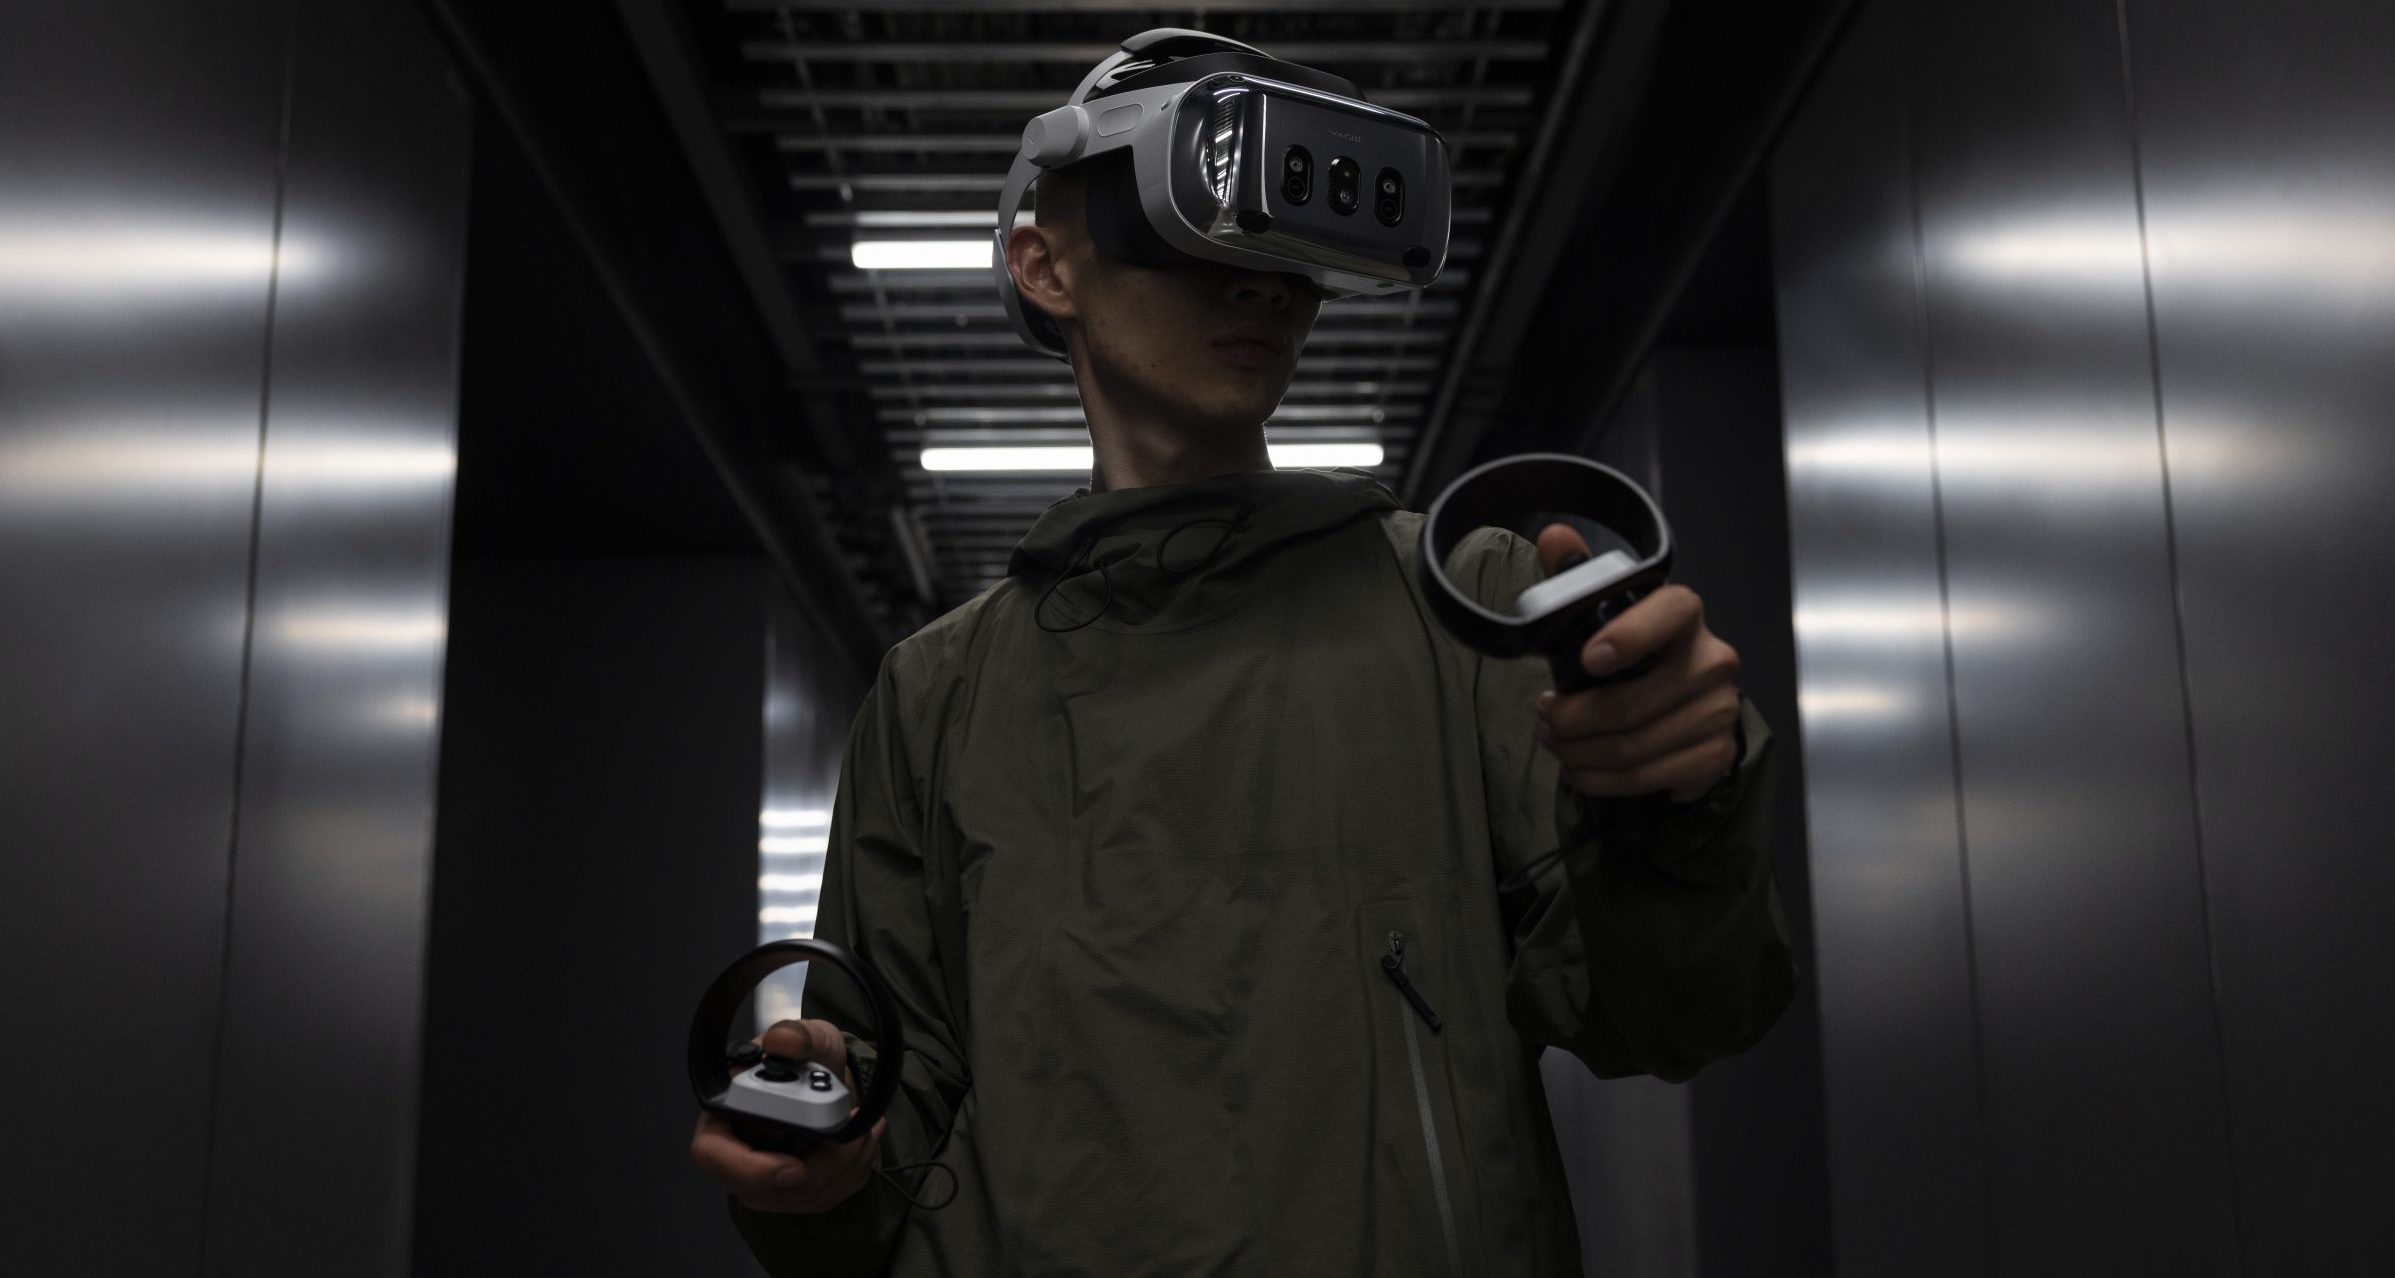
Input Modalities
-
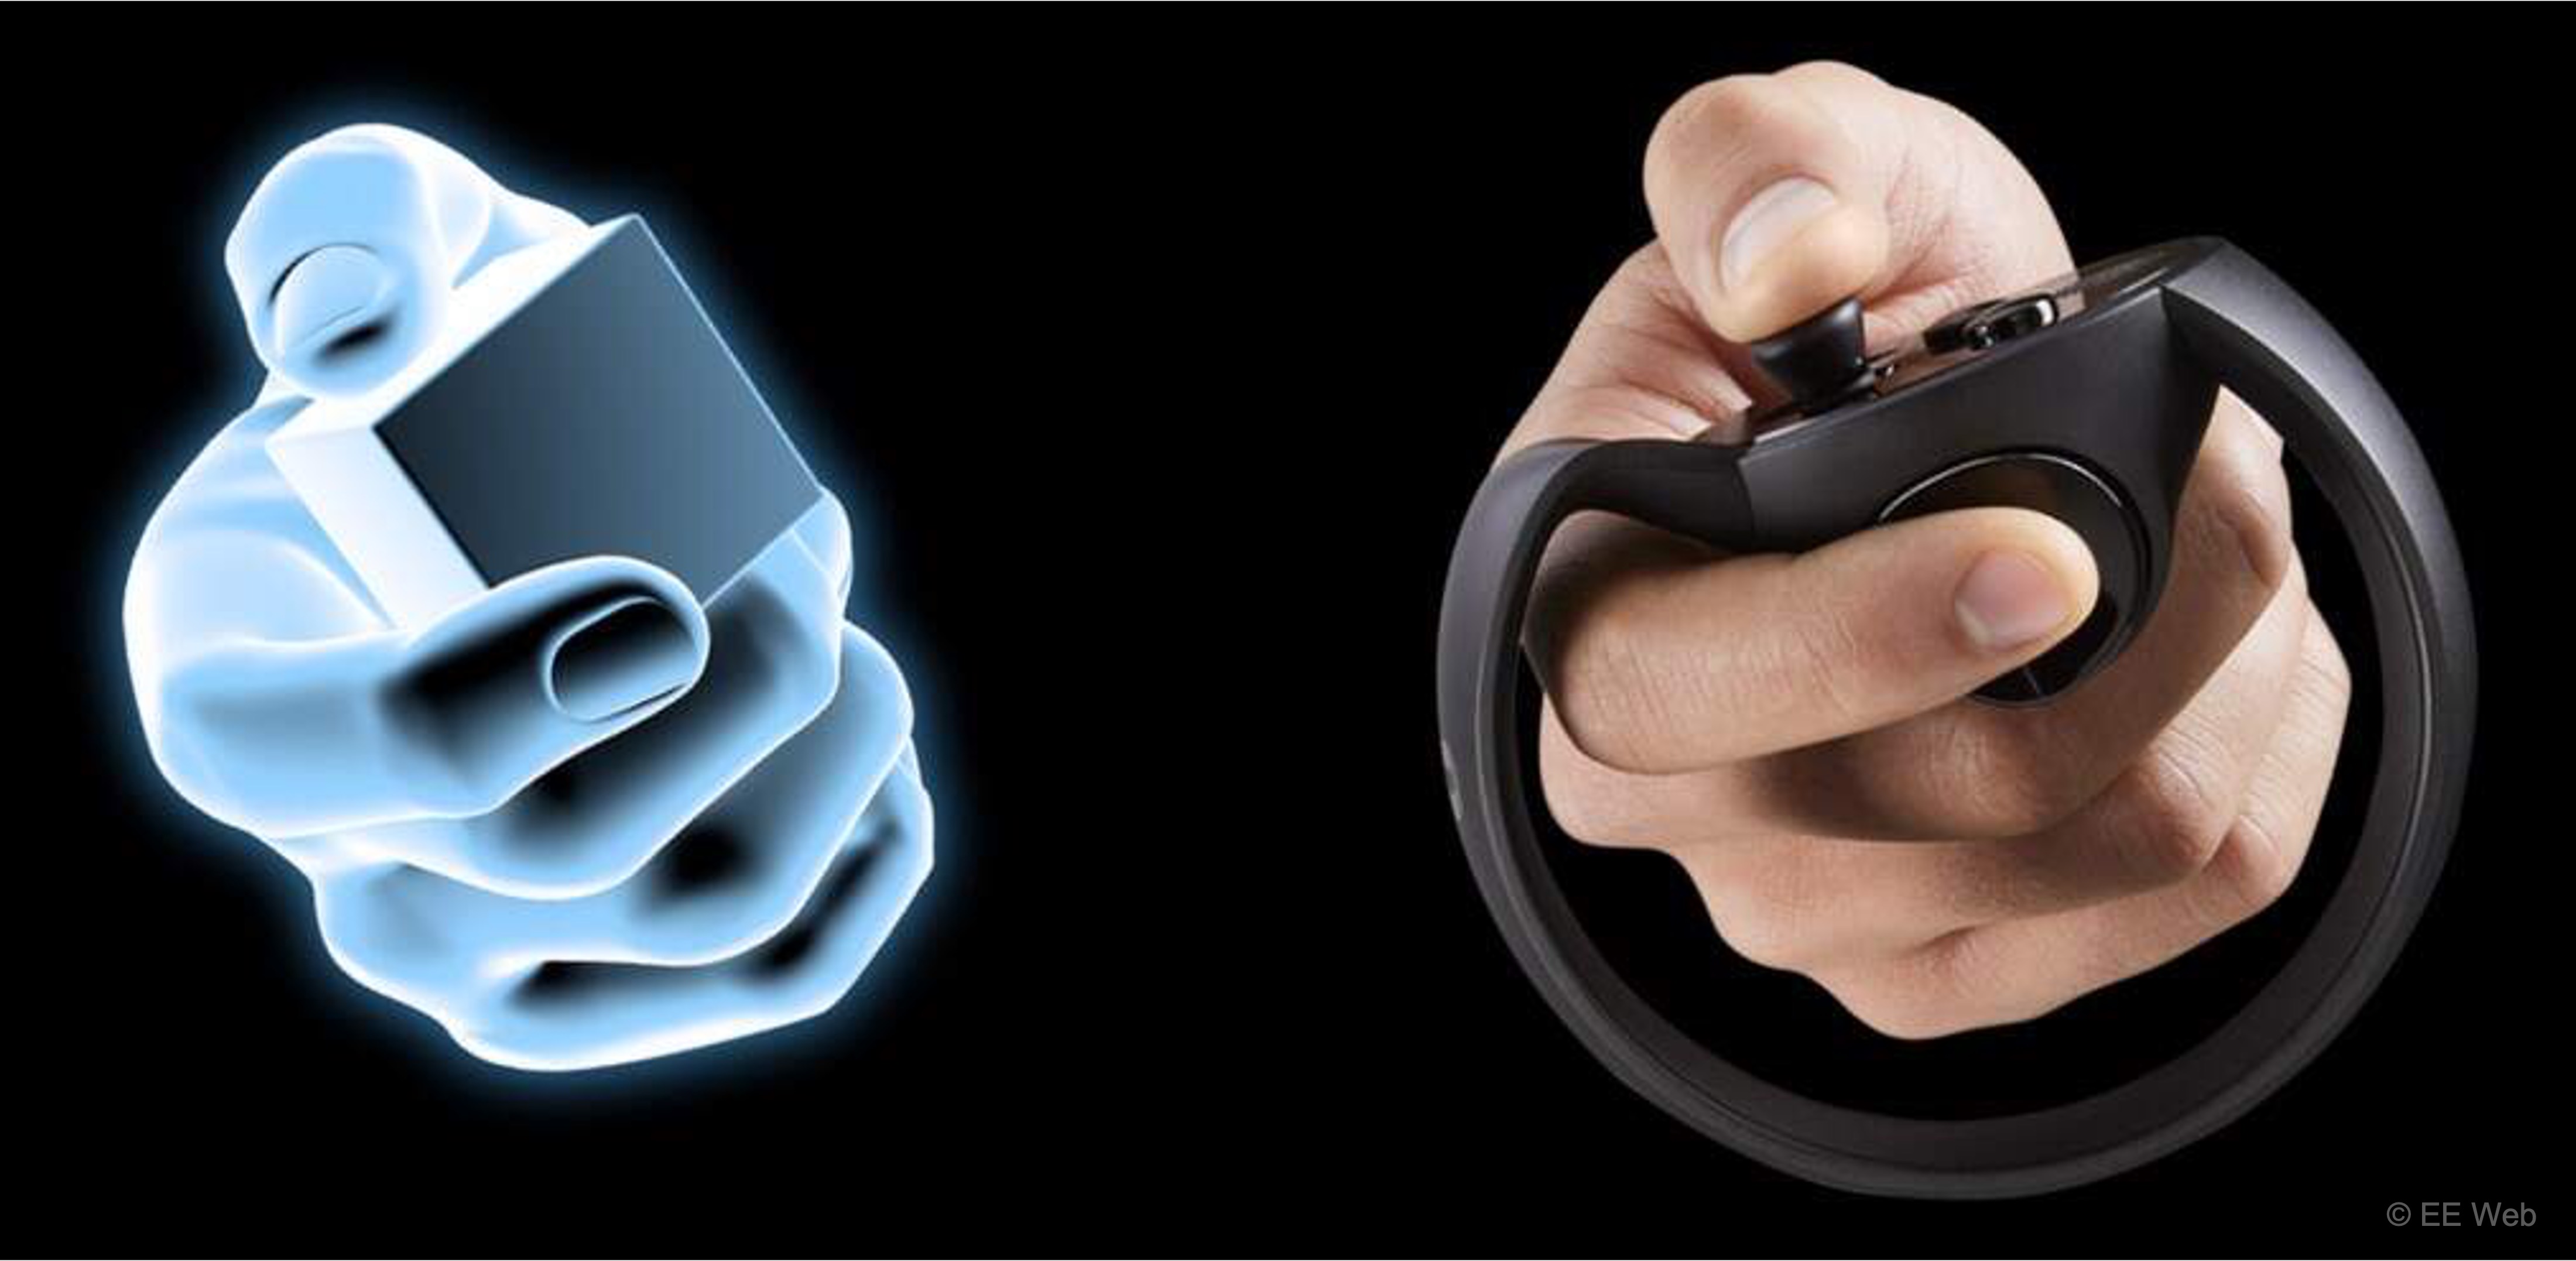
Handheld Controllers: Most XR headsets (like Meta Quest 4, Magic Leap 2, and Varjo XR-4) come with controllers featuring buttons, triggers, joysticks, and sensors. These allow fairly precise input–from pointing to squeezing triggers to simulate grabbing. Interaction design for controllers often maps buttons to actions (e.g., trigger to pick up objects, a grip button to grab, a thumbstick to teleport or walk). A principle here is consistency and following conventions: users quickly learn common controller mappings across apps (for instance, many VR games use the same button for menu or teleport). If you deviate, provide clear tutorials or options to customize.
-
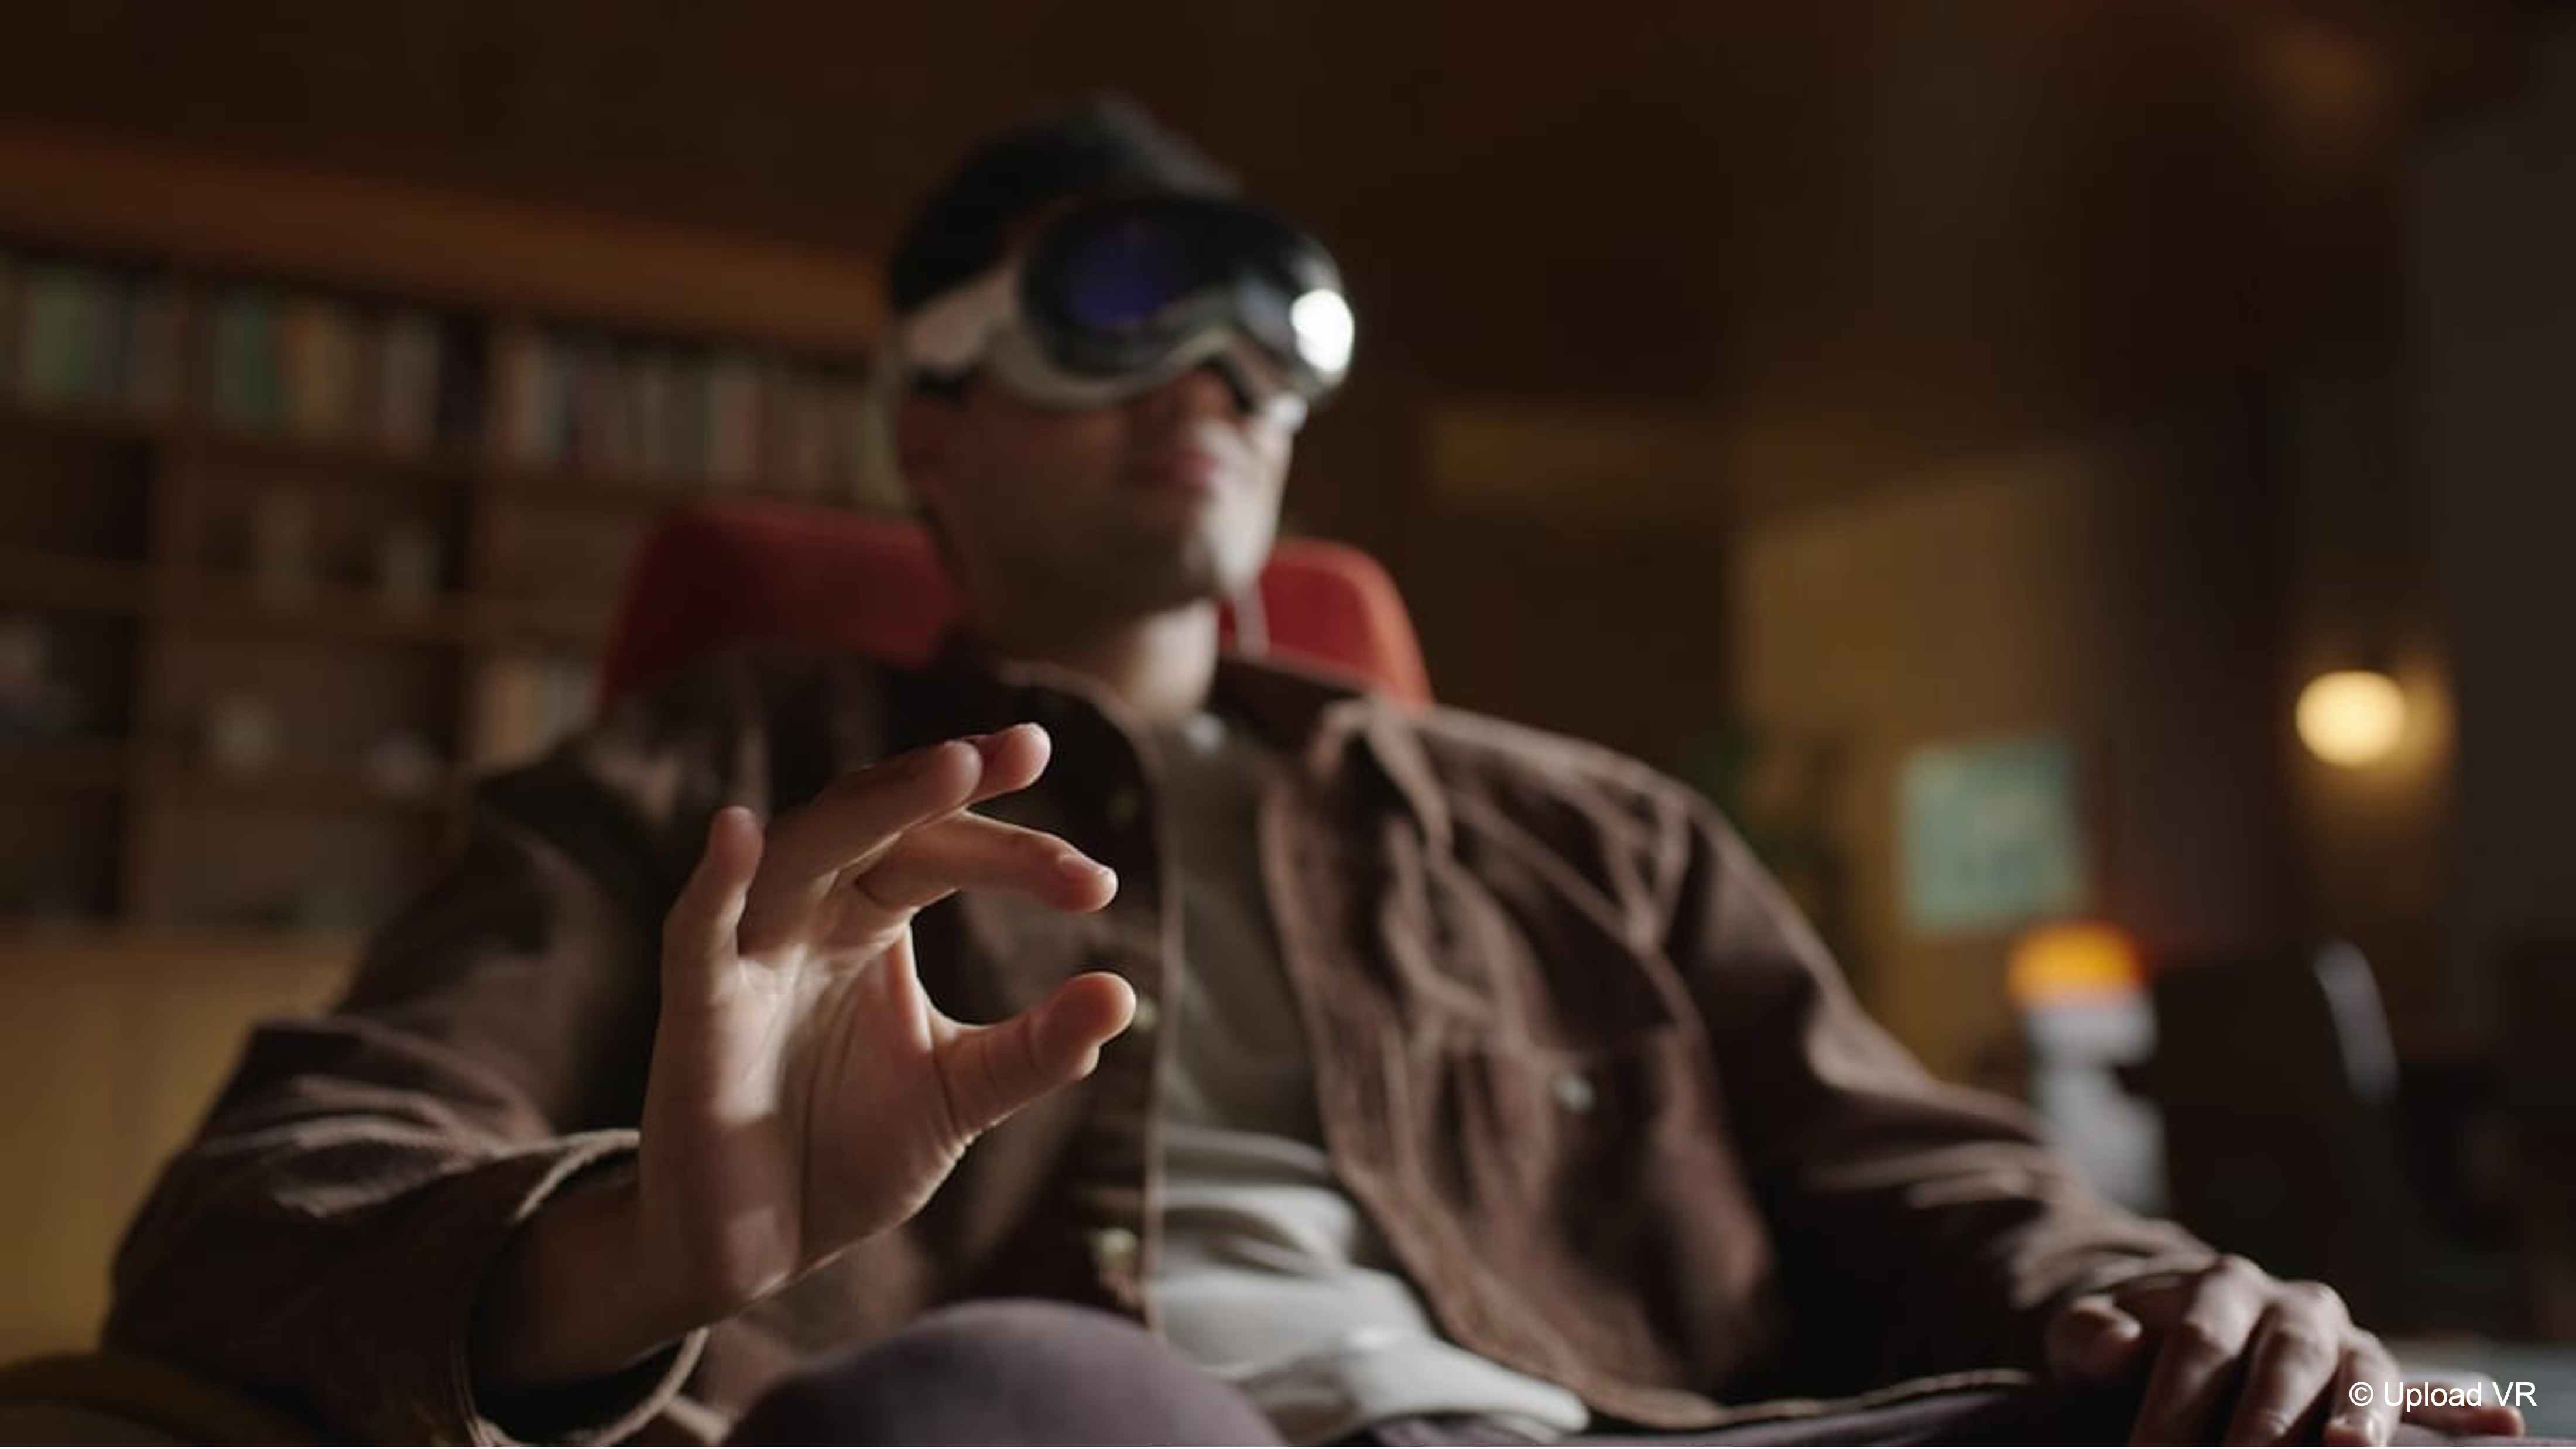
Hand Tracking and Gestures: Some XR headsets allow users to use their hands directly (via cameras capturing hand movements) without controllers (e.g., Meta Quest, Varjo, Apple Vision Pro, Magic Leap, and HoloLens). This enables very natural interactions–you can pinch, push, or wave. When designing hand-gesture interactions, it is important to use gestures that have an intuitive meaning (like pinching fingers to pick up, or turning a palm upward to represent “menu up”). The system should give feedback that a gesture is recognized, e.g., highlighting a virtual button when your finger is pointing at it. Also consider the ergonomics: mid-air pinching for long periods can fatigue users (the gorilla arm effect), so these interactions might be best for short tasks. Natural doesn’t always mean effortless–test how users physically feel after performing a gesture repeatedly.
-
Gaze and Head Movement: In both VR and AR, where a user looks can be a powerful implicit input. Some interfaces use gaze to hover-highlight targets (e.g., looking at an object for a second might select or examine it). Designing for gaze means making sure interactive targets are large enough and not too close together (to avoid mis-selection), and often a progress indicator (like a shrinking ring) is used to show an action will trigger if the user continues to look. All AR headsets track head direction (like Magic Leap and HoloLens); an interaction might be “look at the object you want to scan, then say ‘Scan’.” It’s a hands-free modality useful in contexts like maintenance or when the user’s hands are busy.
-
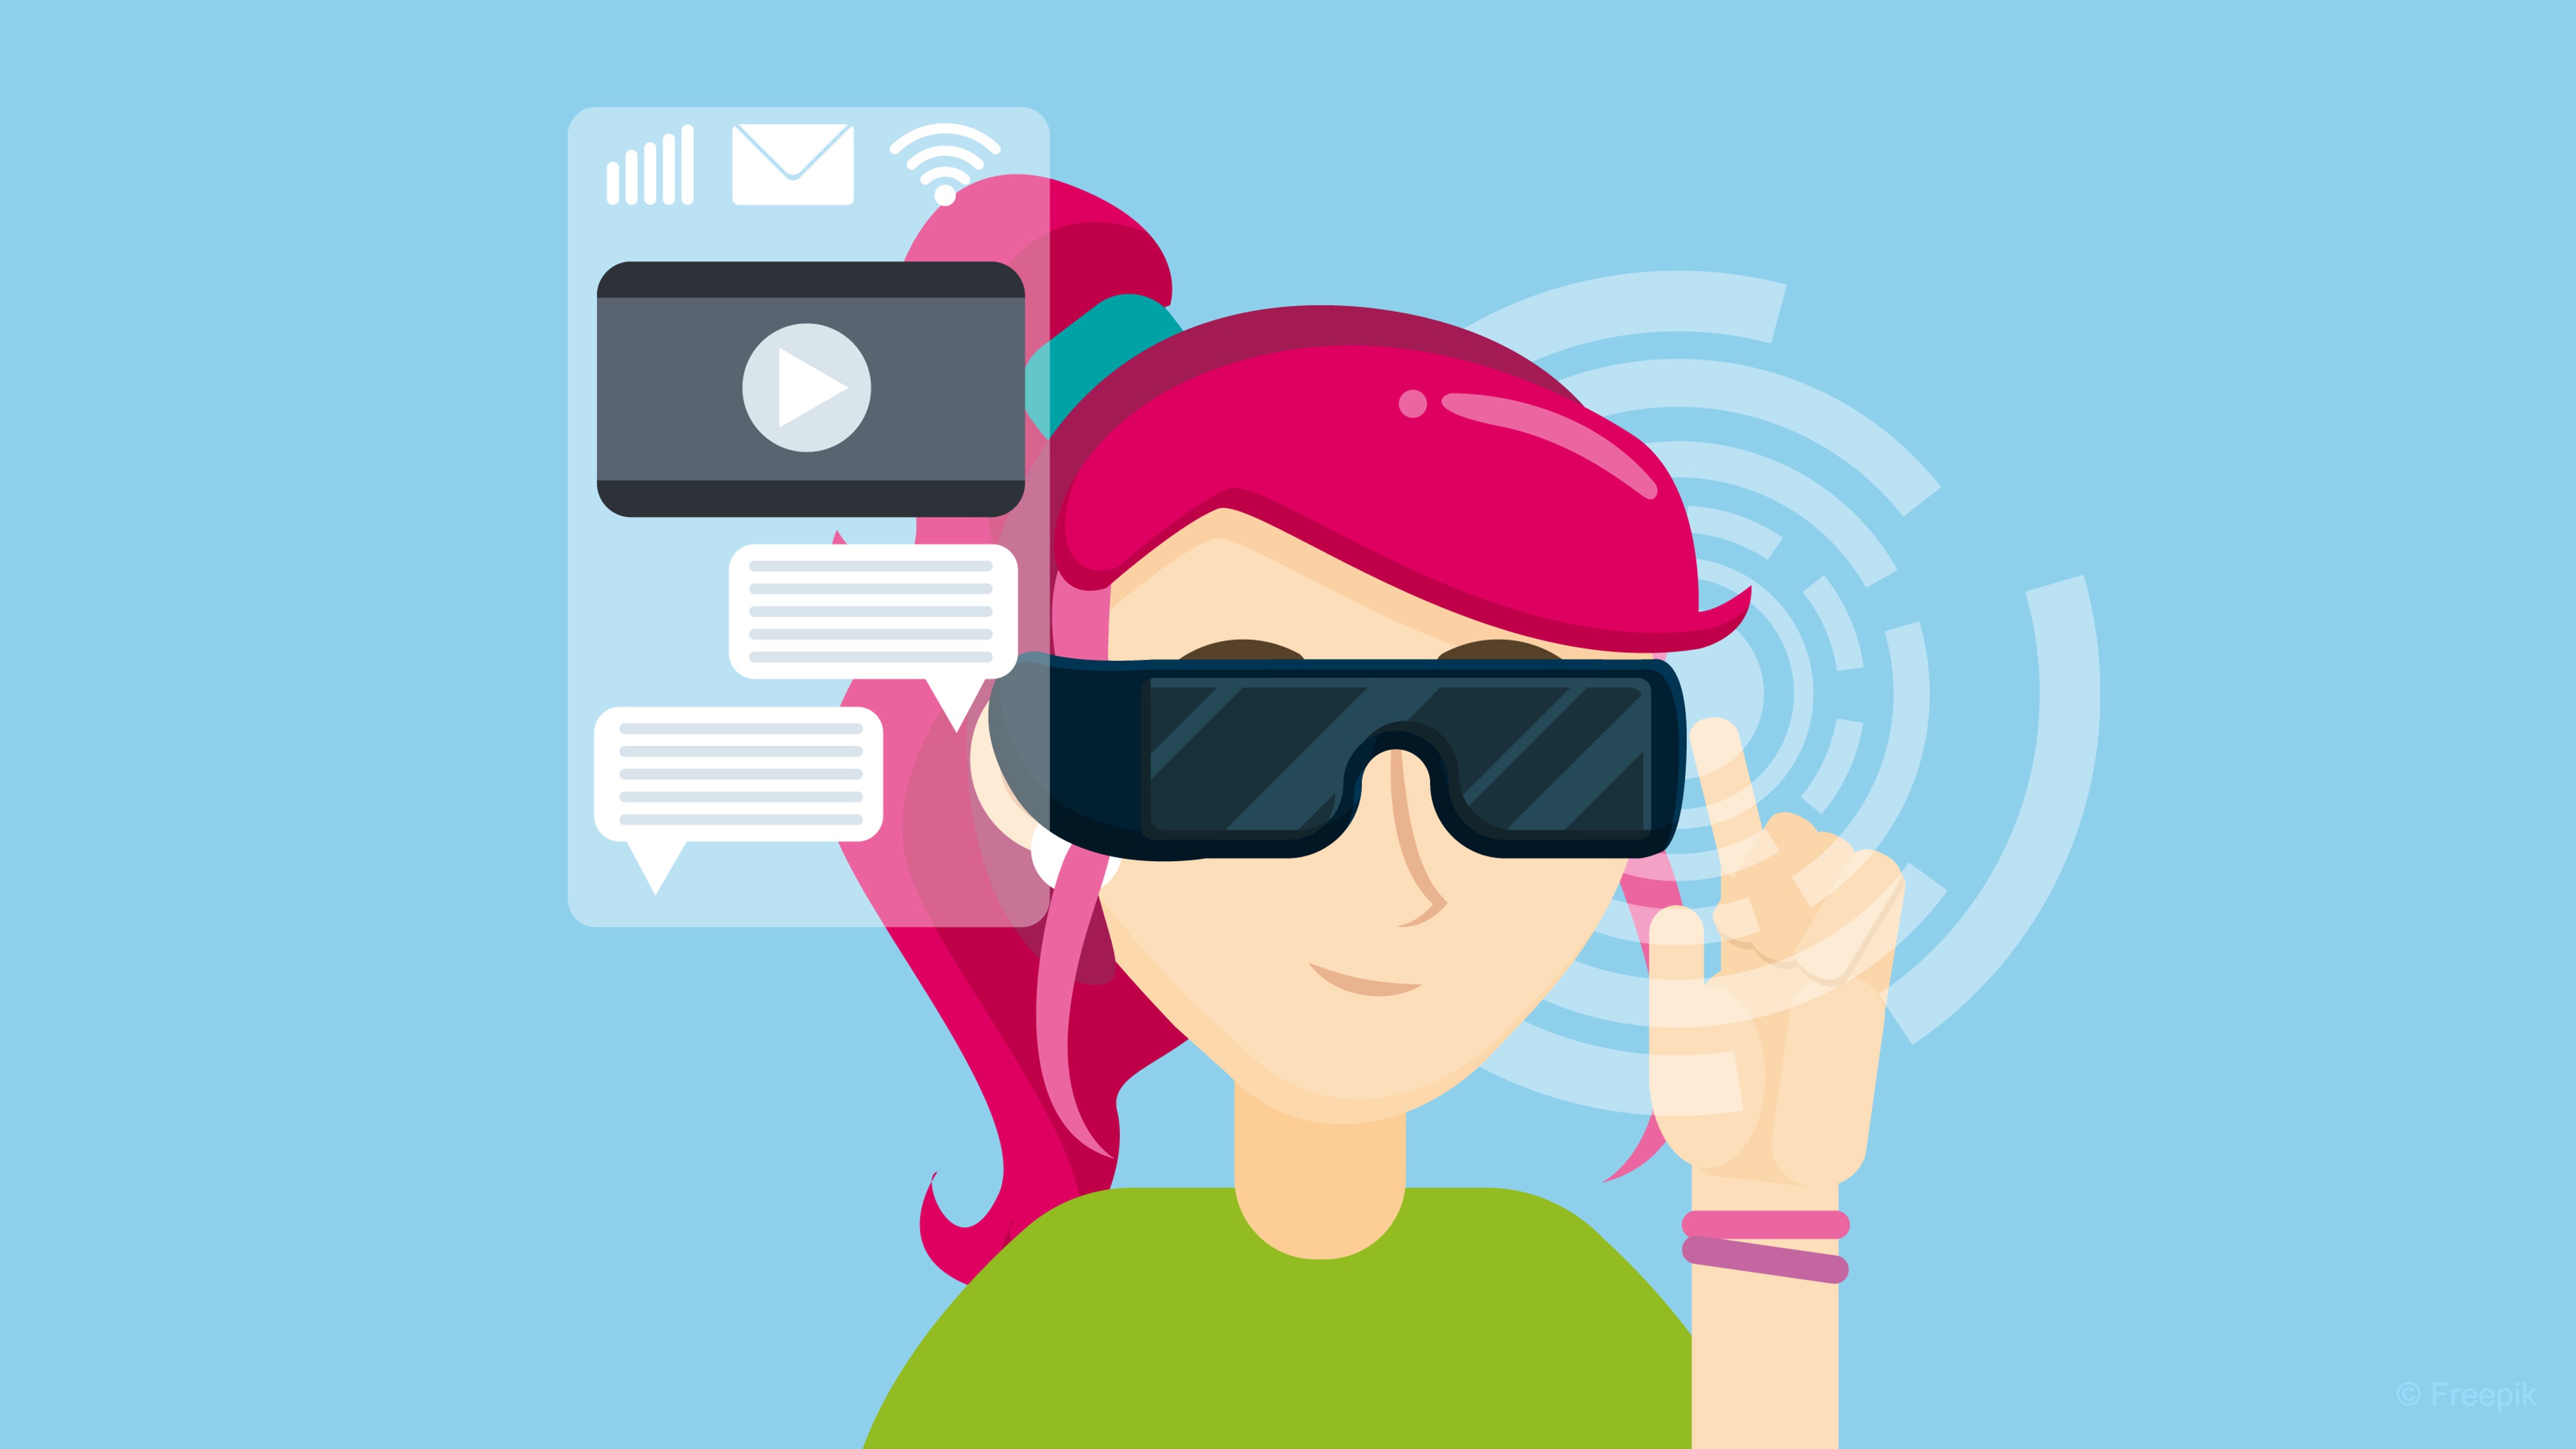
Voice Commands: Speech input can complement XR interactions, especially in AR where you might not have controllers. Designing voice commands means using clear, distinct phrases for actions and providing visual or auditory feedback that the system heard you (e.g., captions or repeating the command). Voice is natural for functions like “open menu”, “take photo”, or responding to virtual characters. Always have an alternative for noisy environments or users who may not speak the preset language.

-
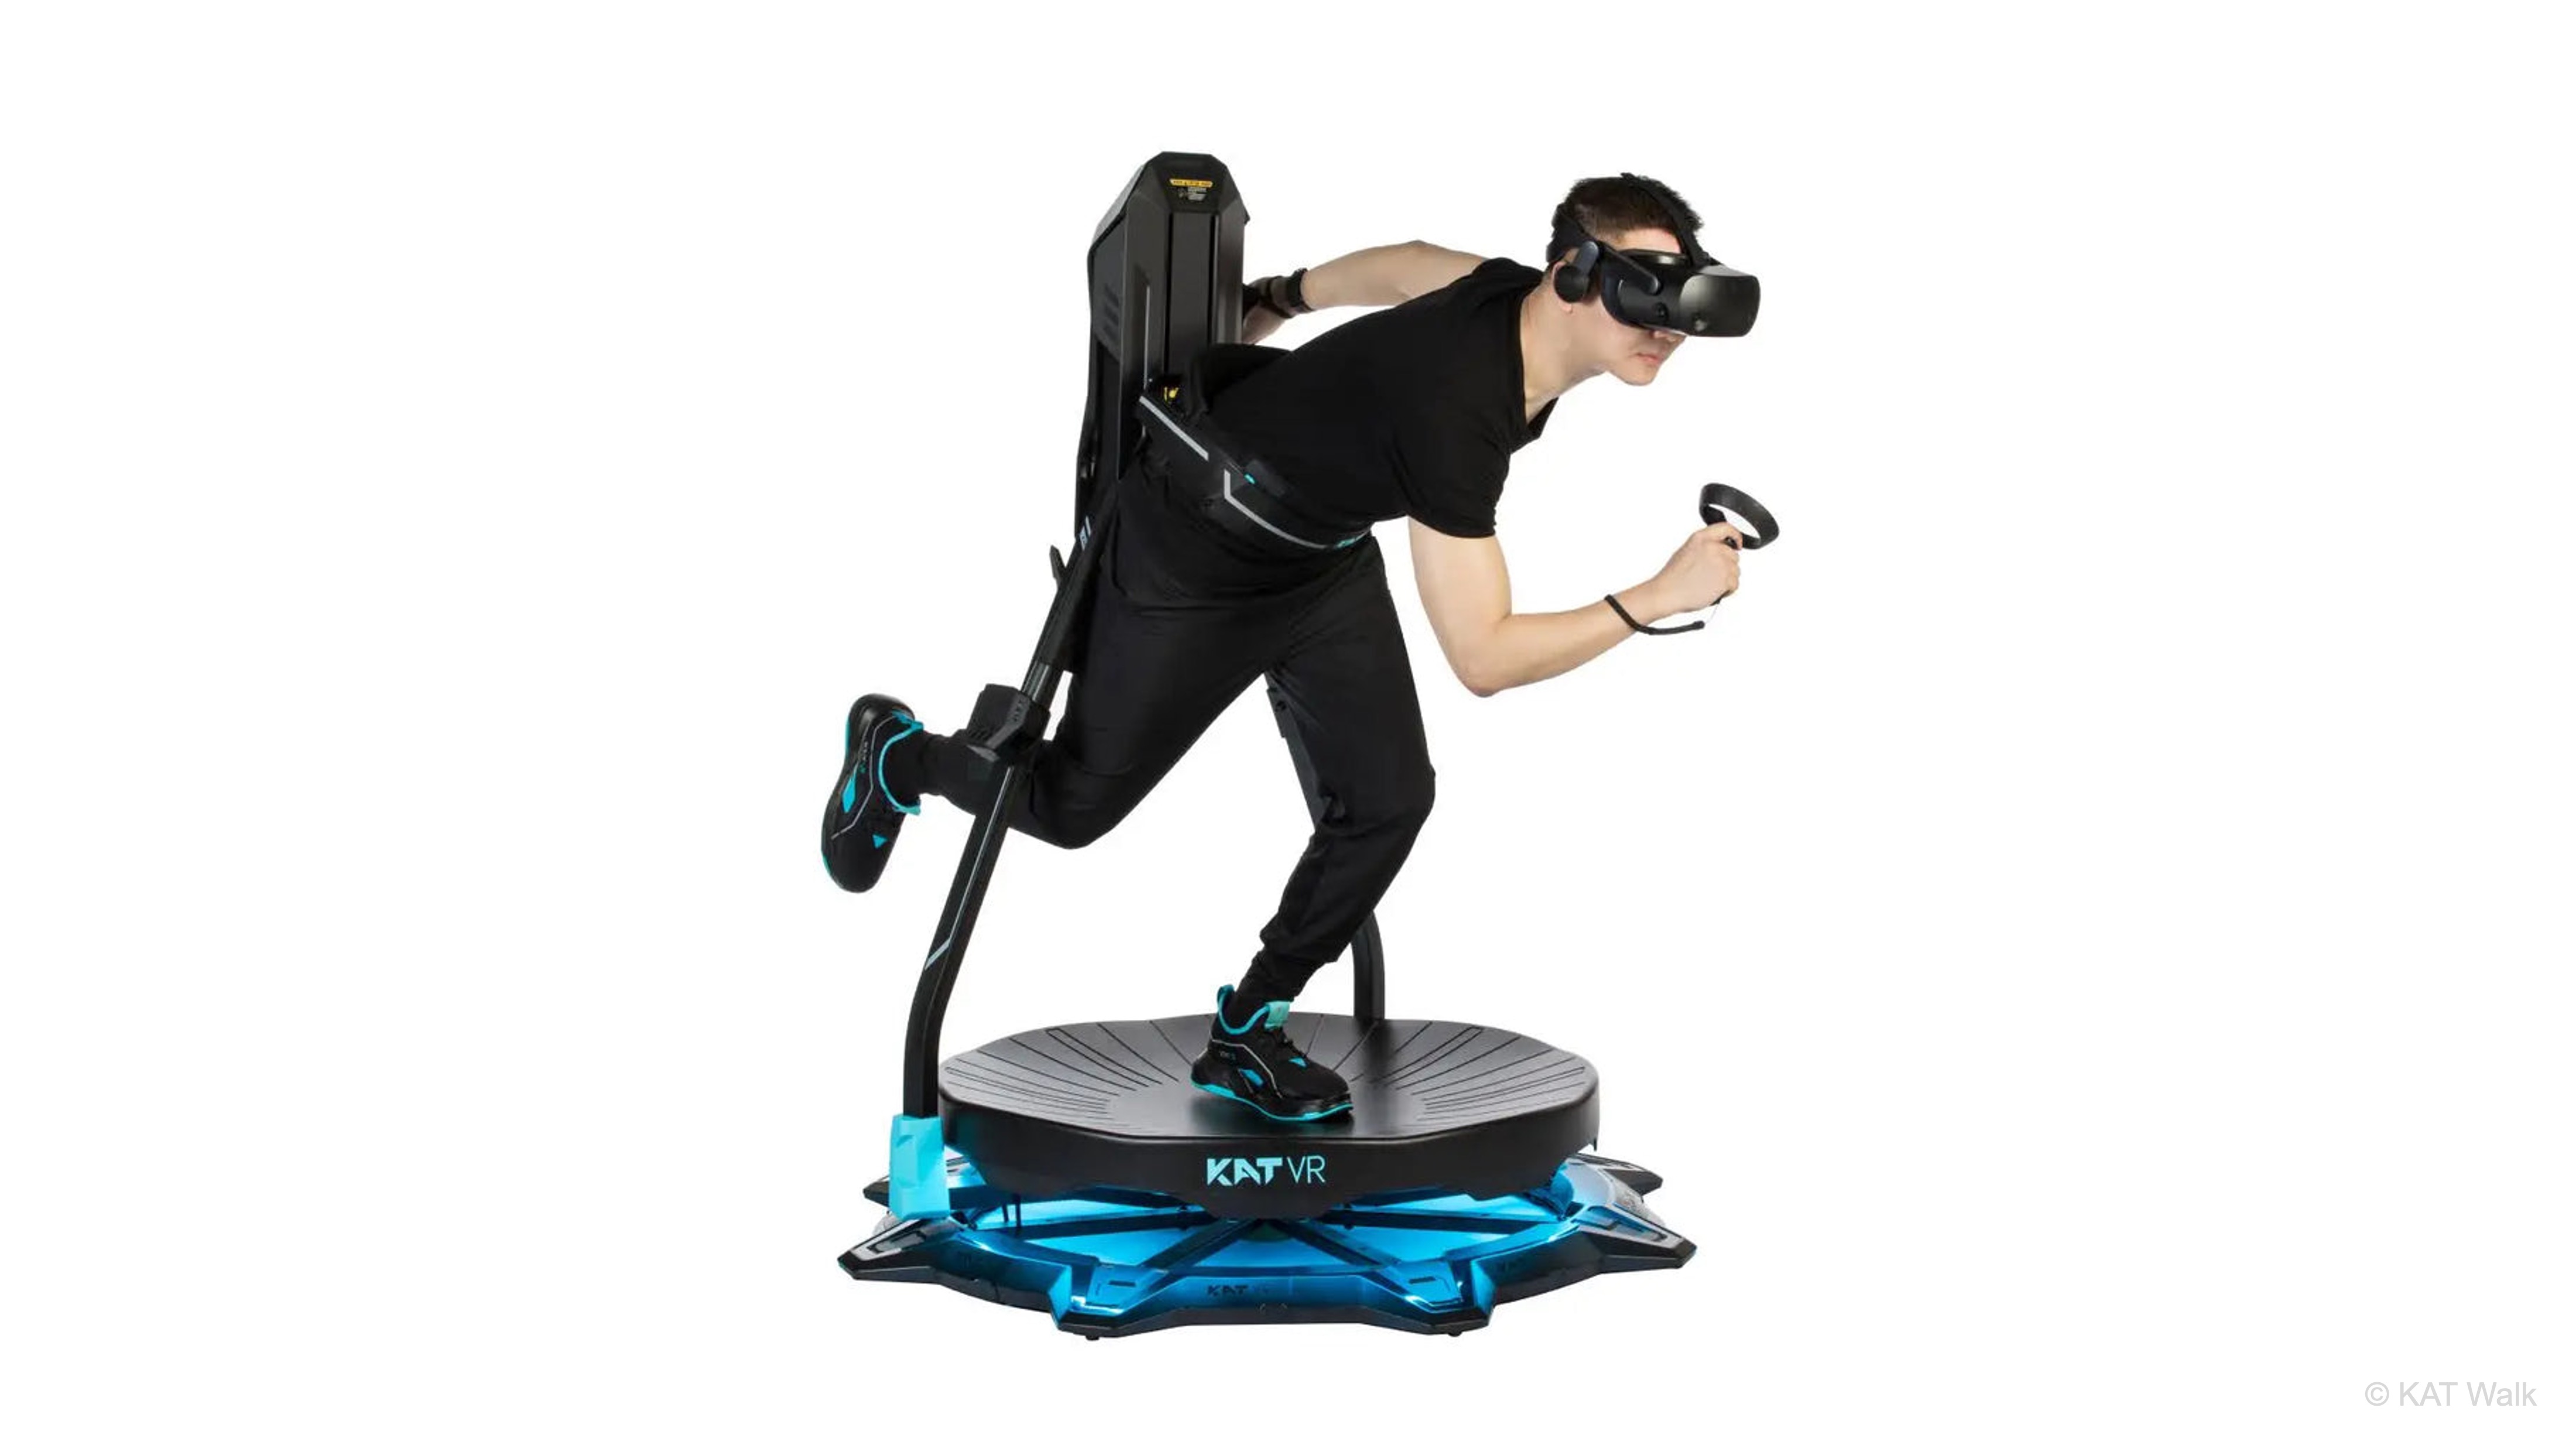
Physical Movement: An often-overlooked input is the user’s own movement. In room-scale VR, walking around is a form of input for navigation (limited by the real room size). Leaning, crouching, or moving closer to objects are all part of how users interact. As a designer, you should encourage natural movement where possible (because it increases embodiment) but also accommodate those who can’t move as freely (for instance, providing joystick movement or teleportation if a user is in a confined space or seated).
Natural Interaction
The most effective XR interfaces are those that feel natural—mirroring the way we interact with the physical world. Designing for natural interaction reduces friction, shortens the learning curve, and increases user satisfaction by tapping into innate human behaviors and expectations. Below are some guiding principles.
-
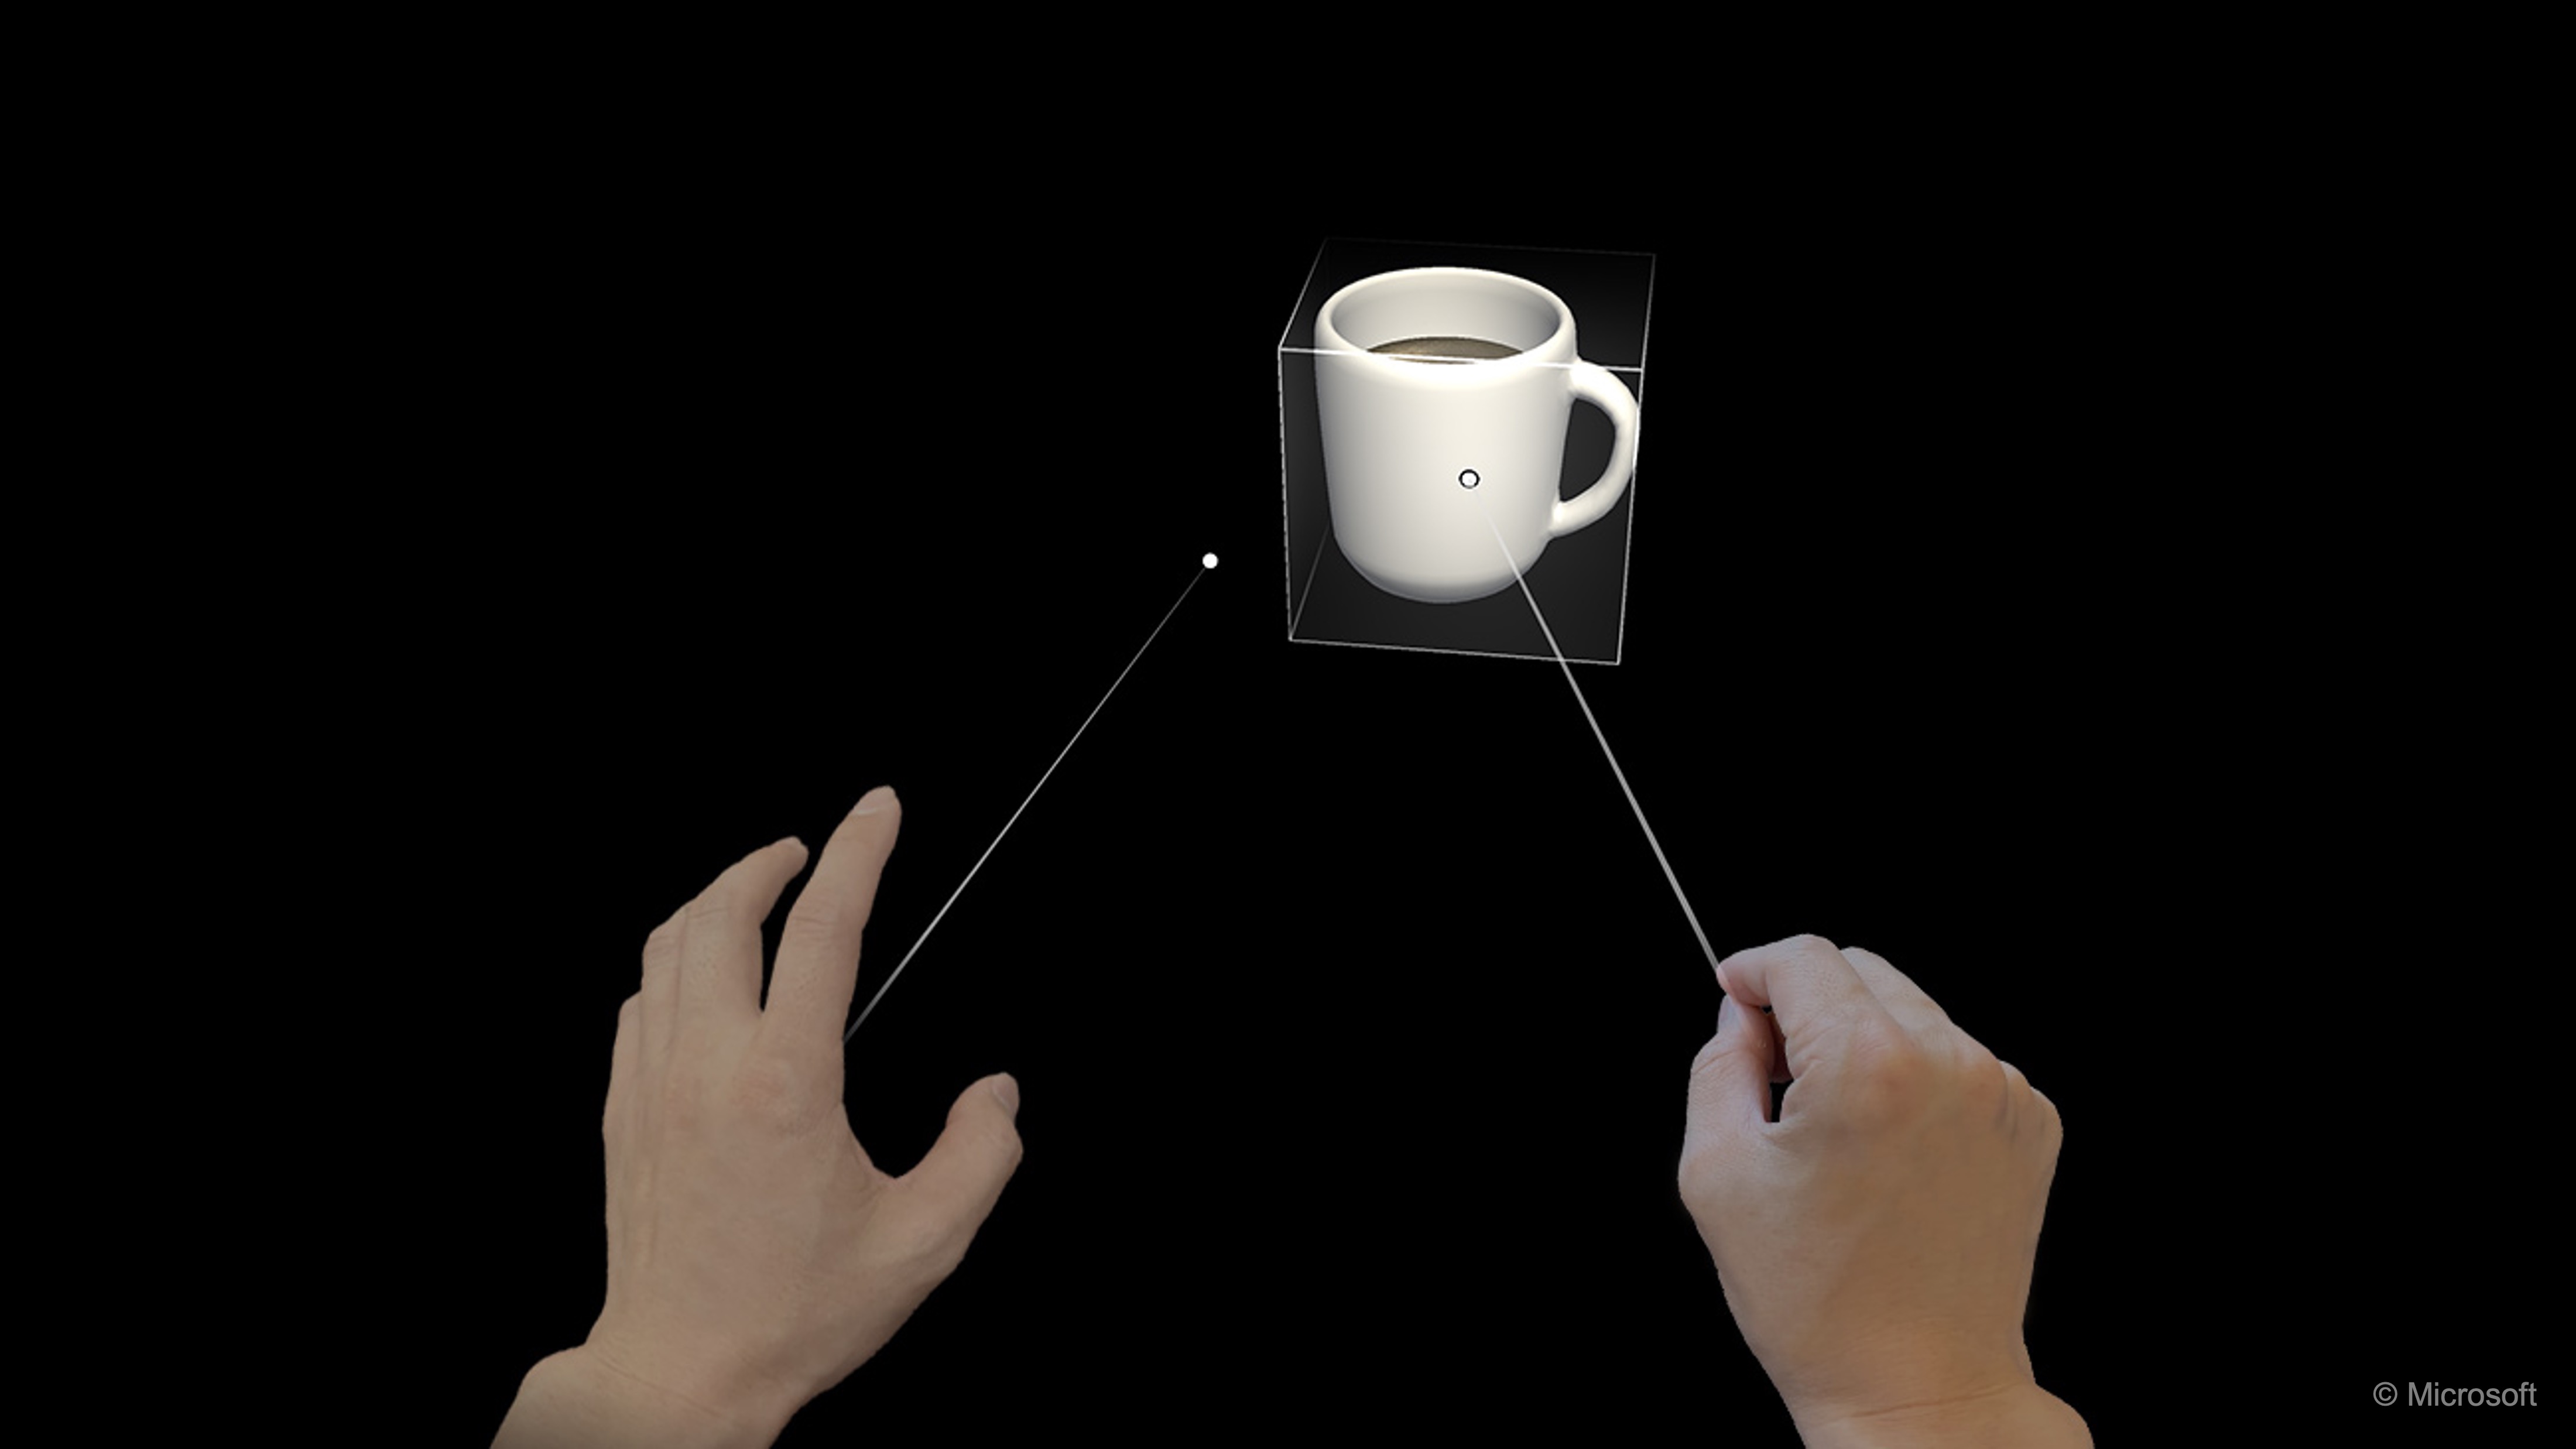
Prioritize Direct Manipulation: A central guideline in XR interaction design is to aim for direct manipulation whenever possible. This means allowing users to act on virtual objects in ways that resemble real-world physical actions. For instance, if a user wants to move a virtual engine component and hand tracking is available, they should be able to simply reach out and grab it—this feels direct, satisfying, and intuitive. Similarly, rotating a 3D model with both hands mimics how we handle physical objects, making the interaction immediately understandable.
-
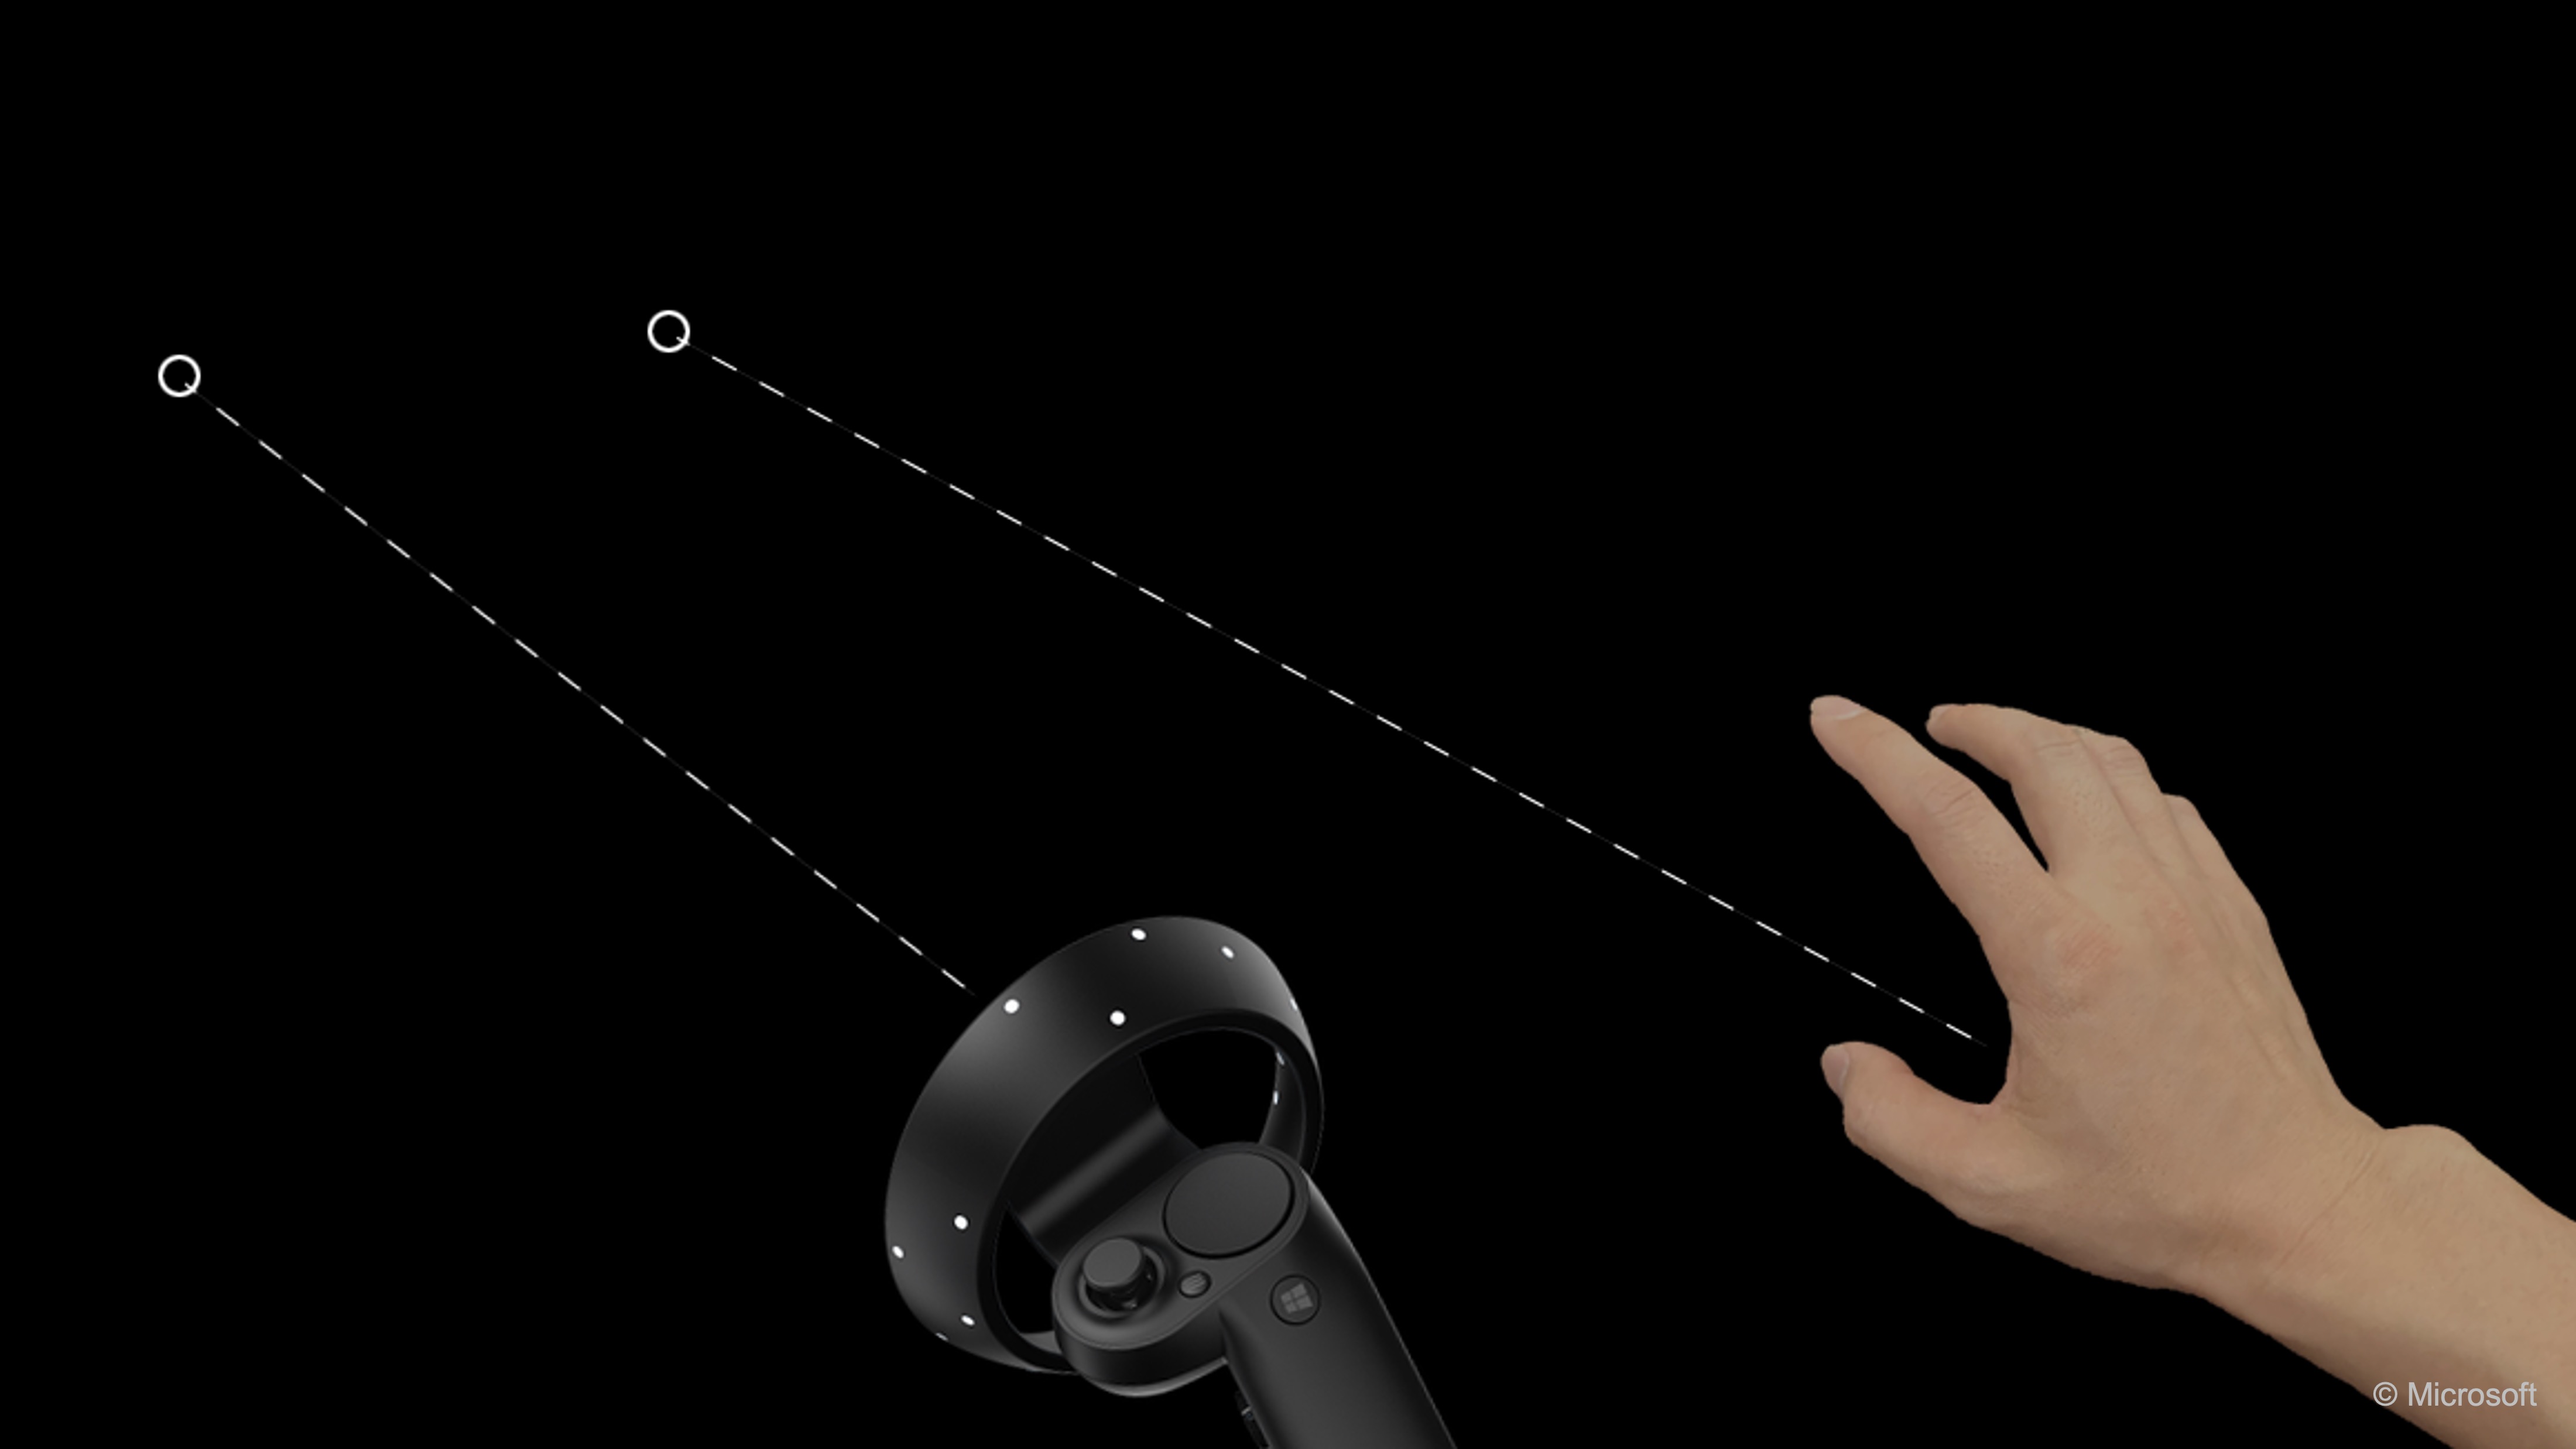
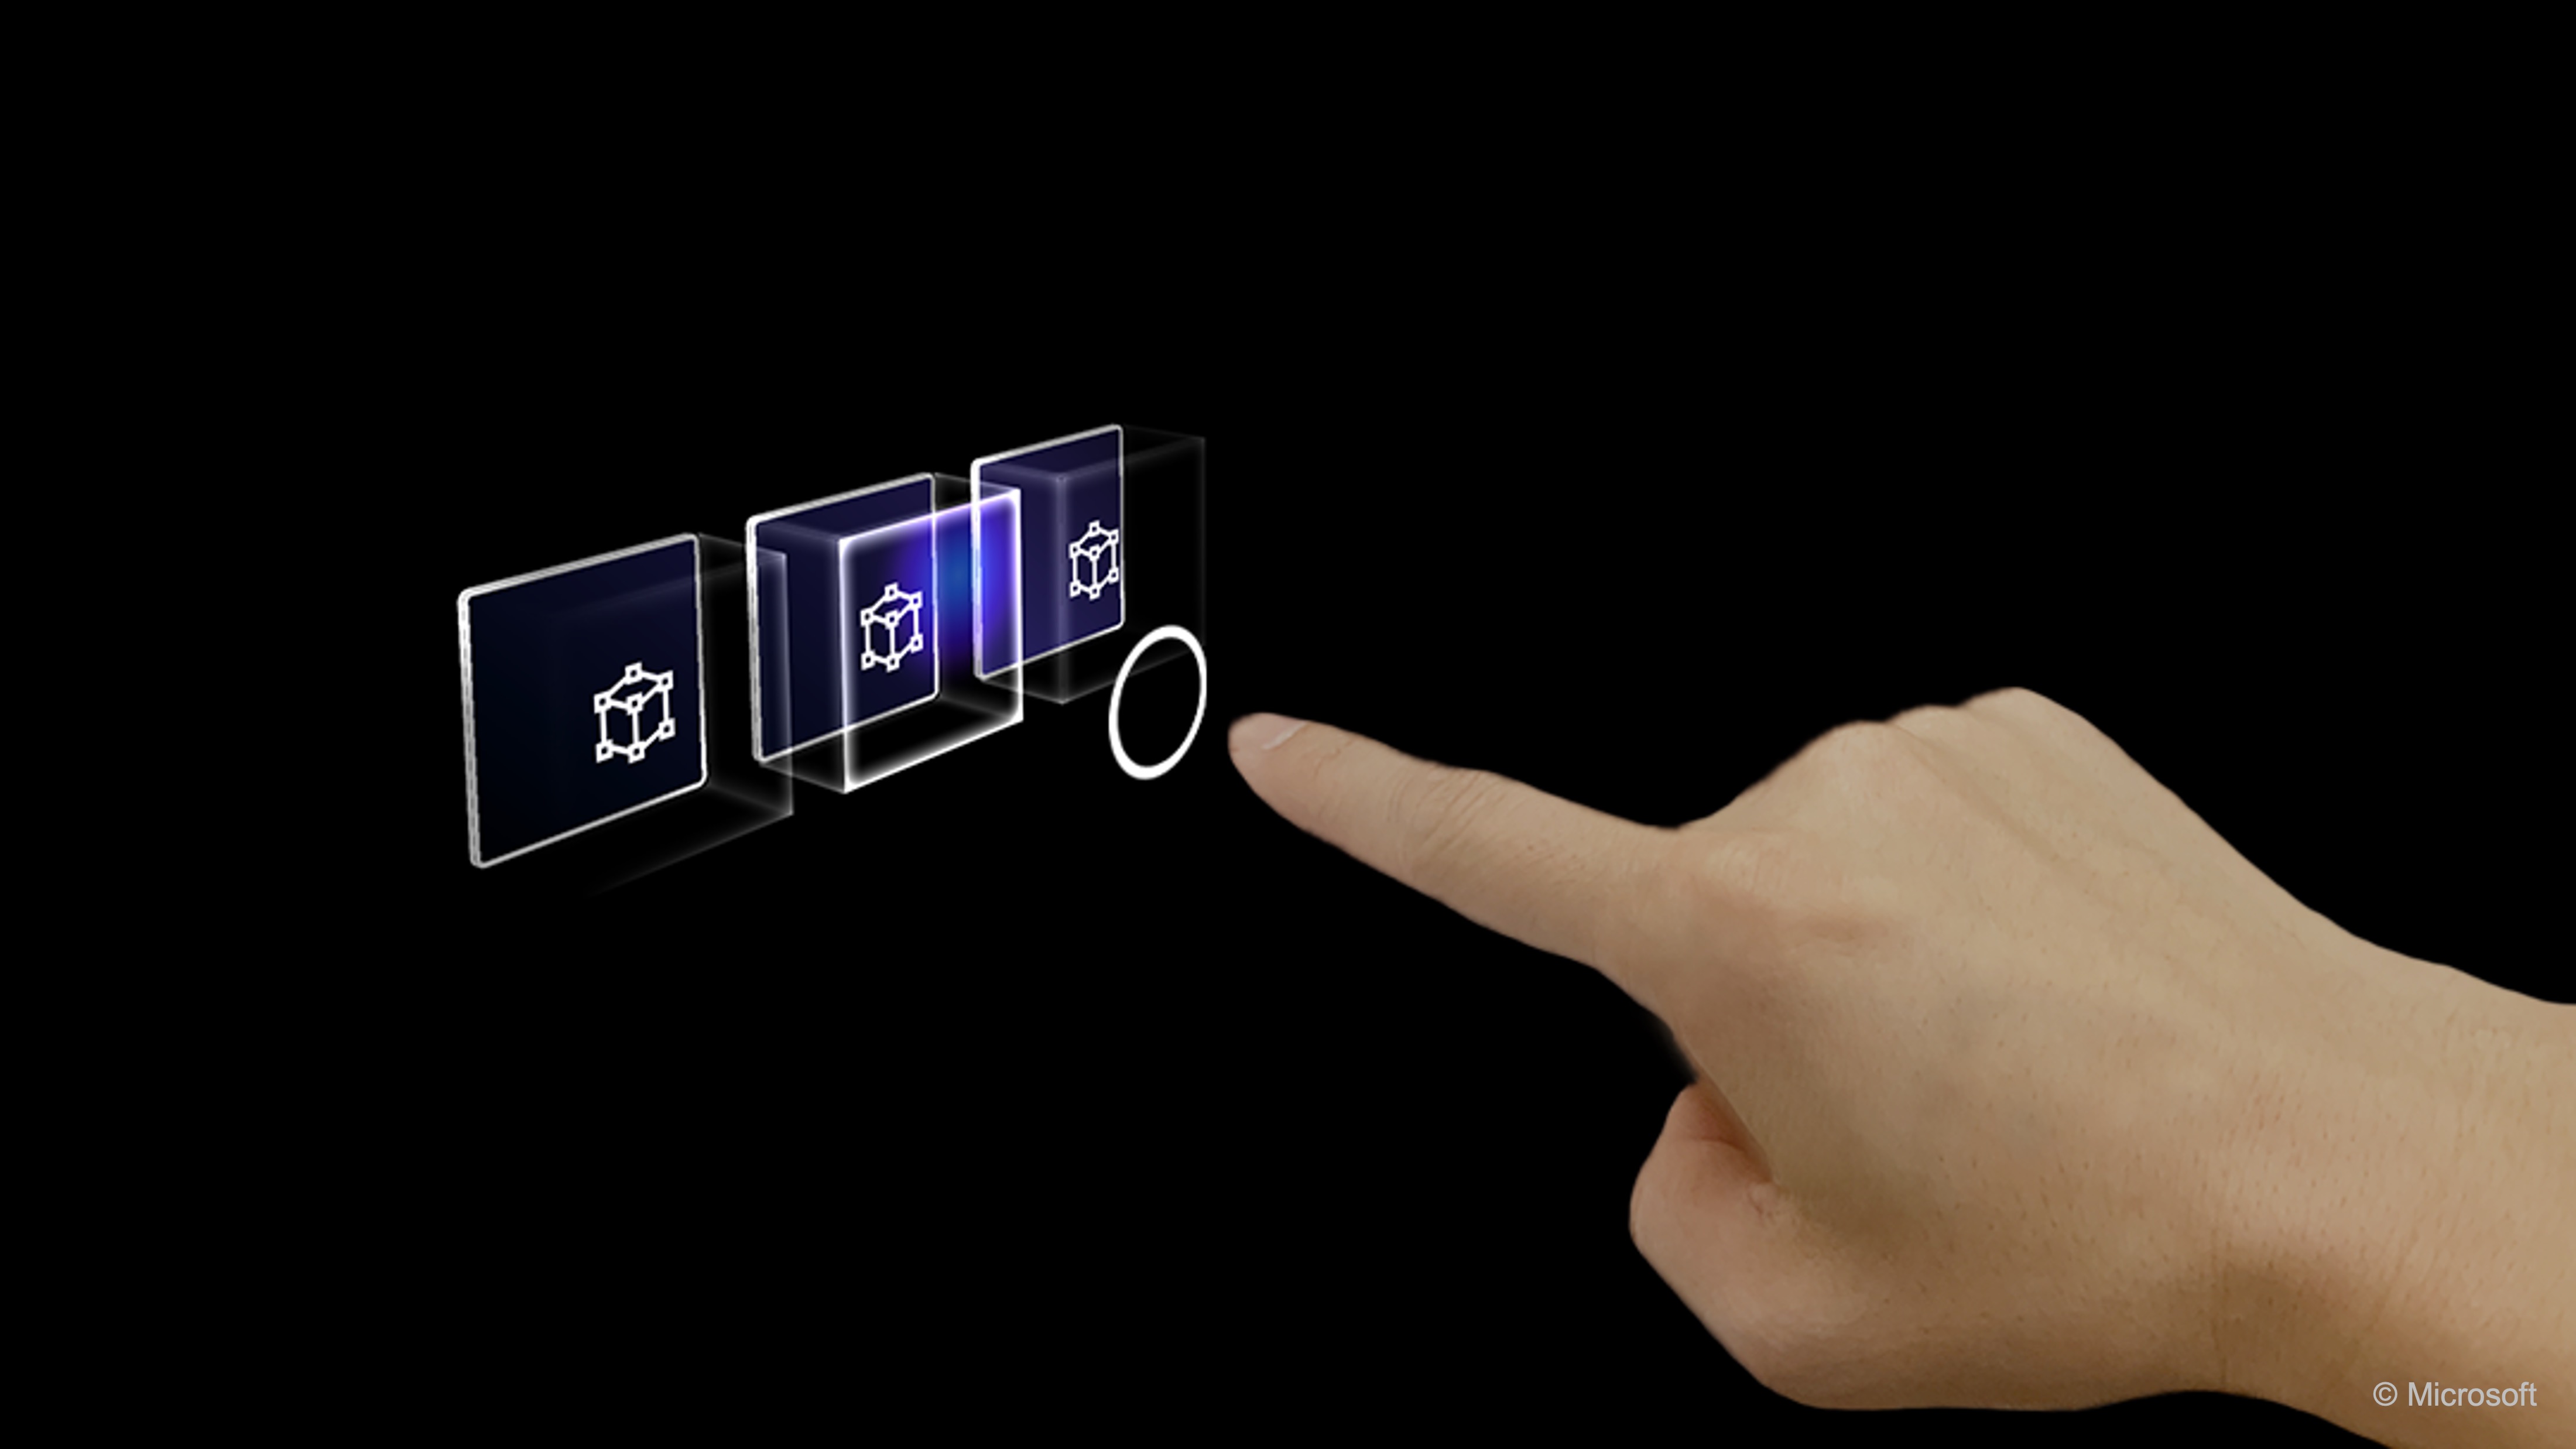
Provide Logical Alternatives When Needed: When direct manipulation isn’t feasible—due to hardware limitations or the need for precision—designers should use alternatives that still feel coherent and intuitive. One well-established example is the laser pointer (referred to as raycast) from a controller, which allows users to select or interact with distant objects. This metaphor acts like a 3D point-and-click, maintaining a sense of agency and clarity even at a distance.
-
Leverage Spatial Intuition: XR’s spatial affordances enable new forms of interaction. Rather than relying on flat UI elements like sliders or arrow buttons, XR interfaces should allow users to employ spatial reasoning and body-based gestures—grabbing, rotating, or moving virtual objects in space. Designing for this kind of embodied interaction allows users to apply their natural intuition, resulting in more immersive and fluid experiences.
-
Maintain Familiarity and Consistency: As foundational HCI principles emphasize, familiarity and consistency are key to usability. In XR, where many interaction paradigms are still evolving, it is especially important to align with emerging standards. For example, the virtual laser pointer has become a common design convention—similar to a 3D mouse pointer—and users have come to expect it for selecting distant objects or interacting with menu elements out of reach.
By adopting common interaction patterns, you make it easier for users to carry knowledge from one XR experience to another. Leveraging familiar tools like raycasting or gesture-based manipulation not only improves usability but also builds a shared interaction vocabulary that benefits the entire XR ecosystem.
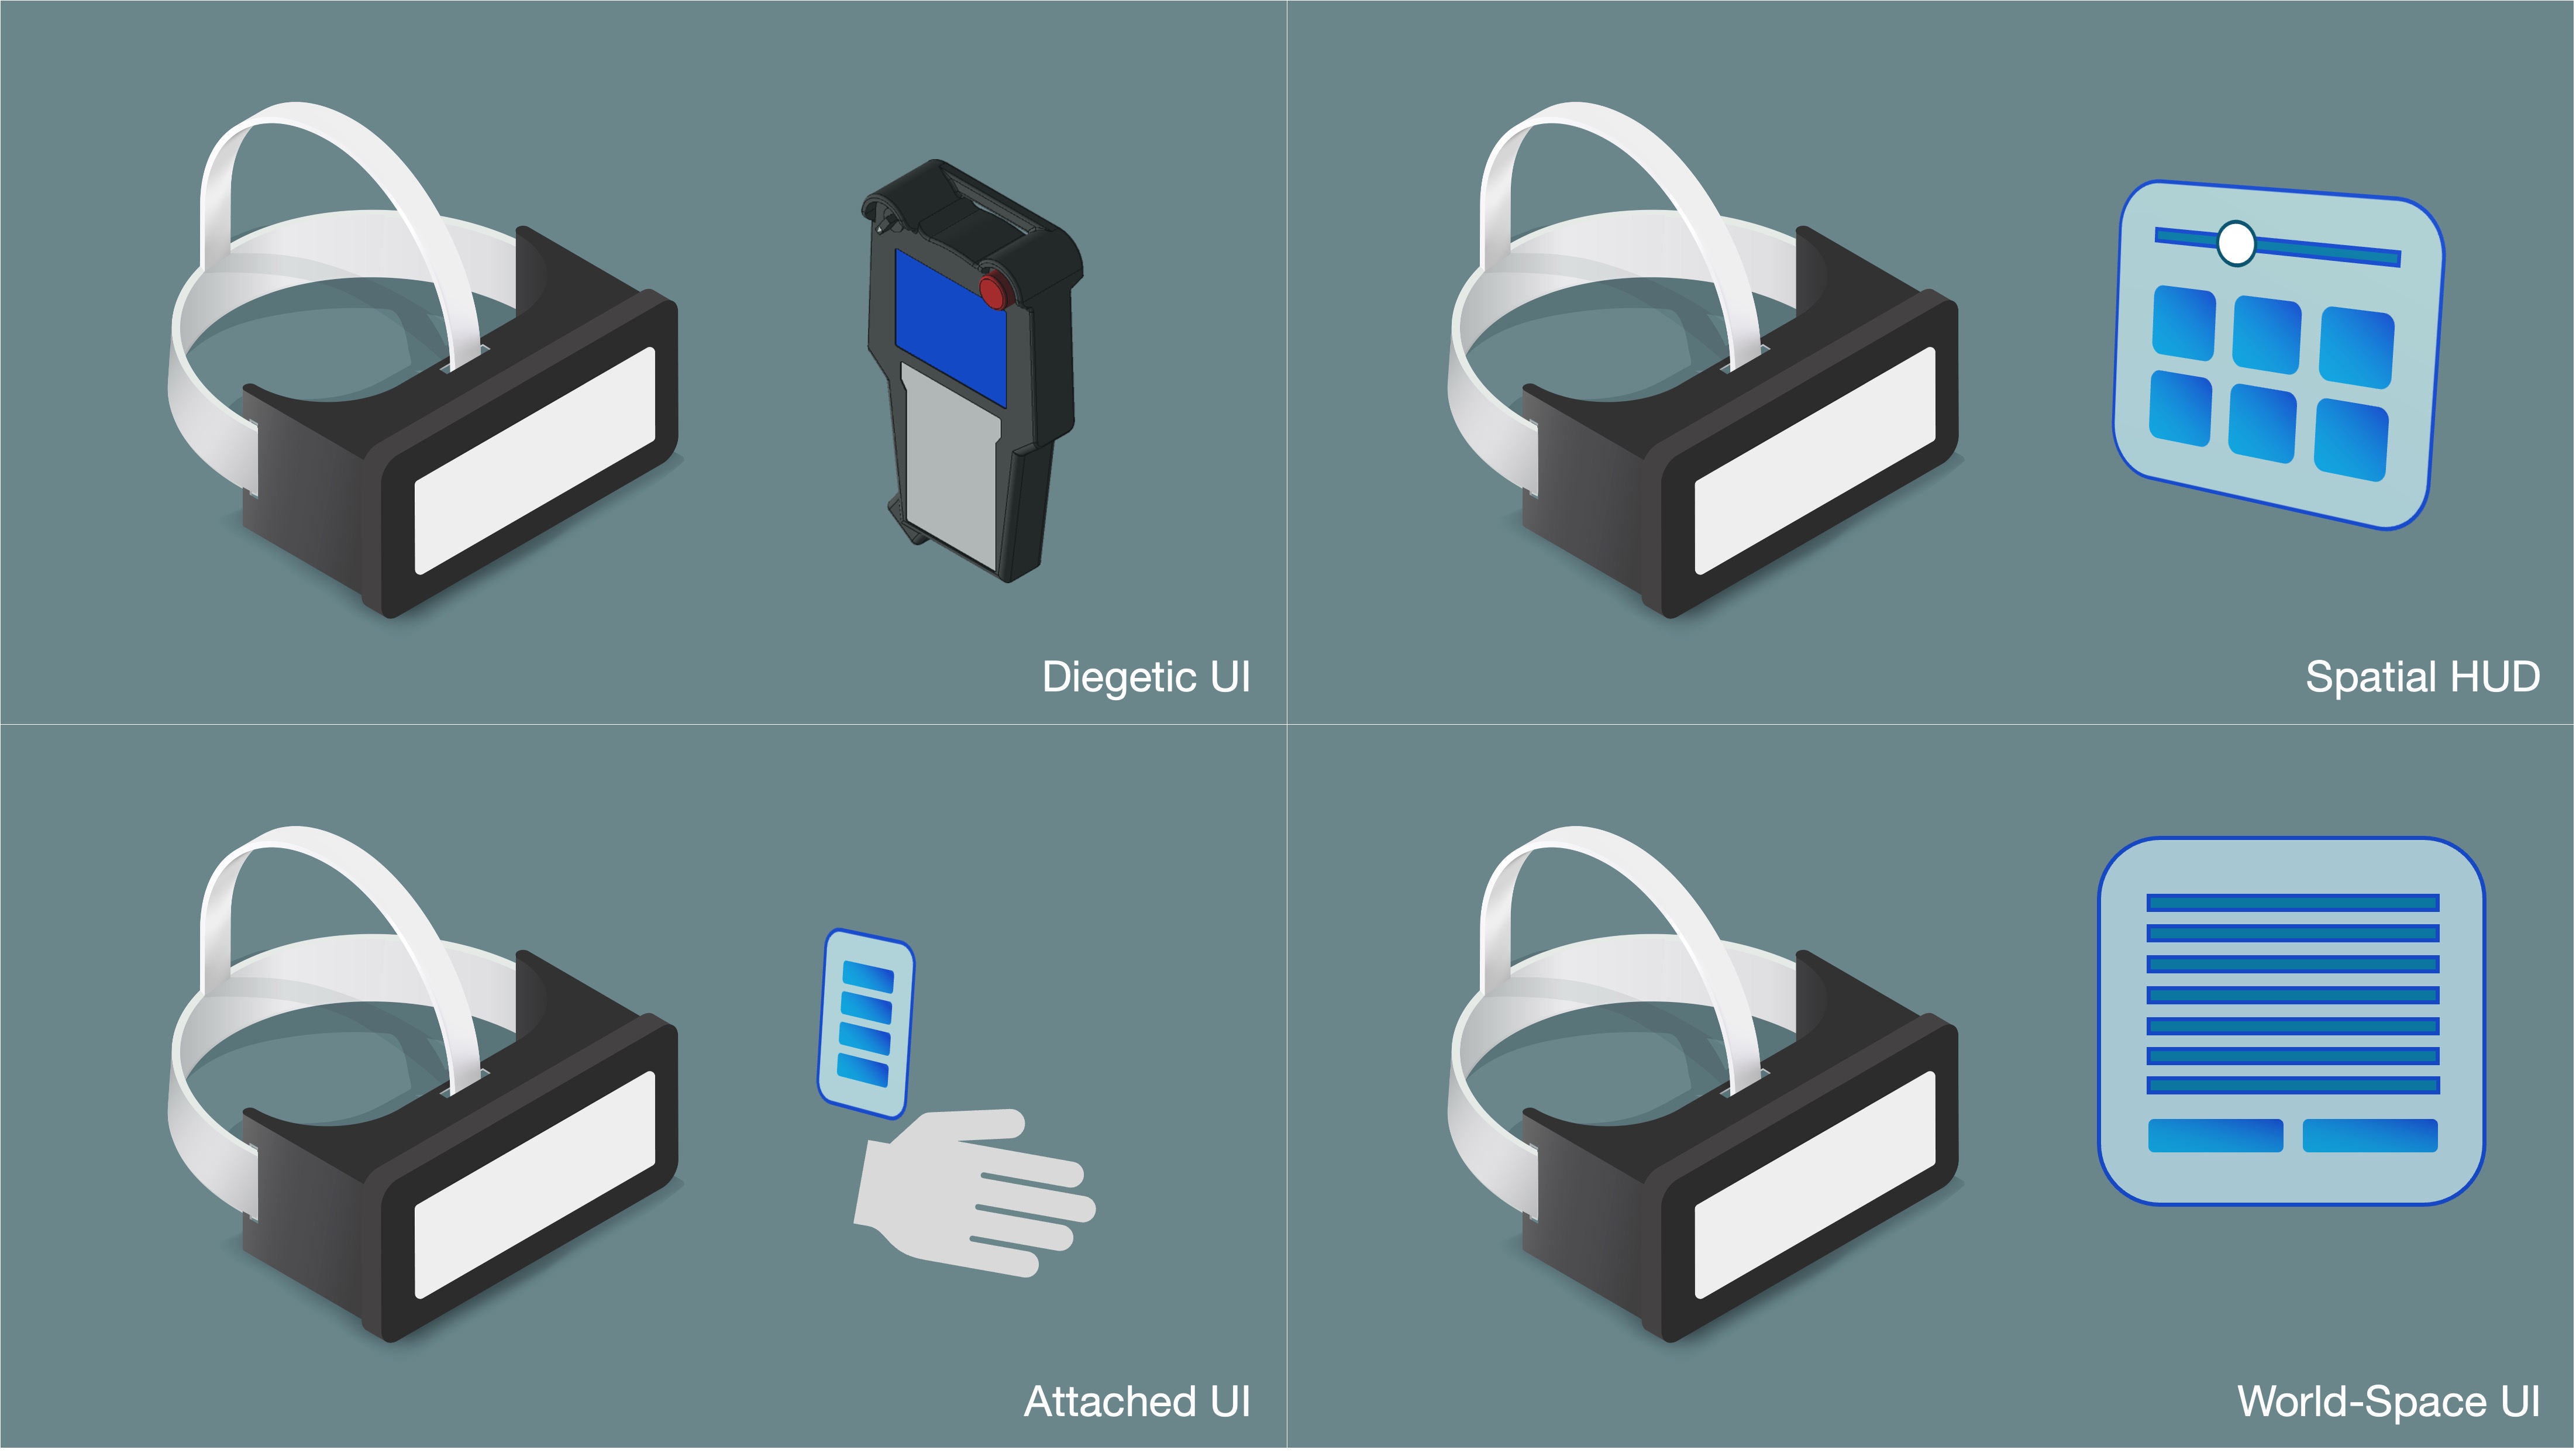
User Interface
Traditional interfaces have windows, icons, menus, and dialogs–XR has its own versions of these, but they must be re-imagined spatially. Nevertheless, traditional HCI principles for usability, comfort, and ease of use still apply. Some common approaches to XR UI include:
-
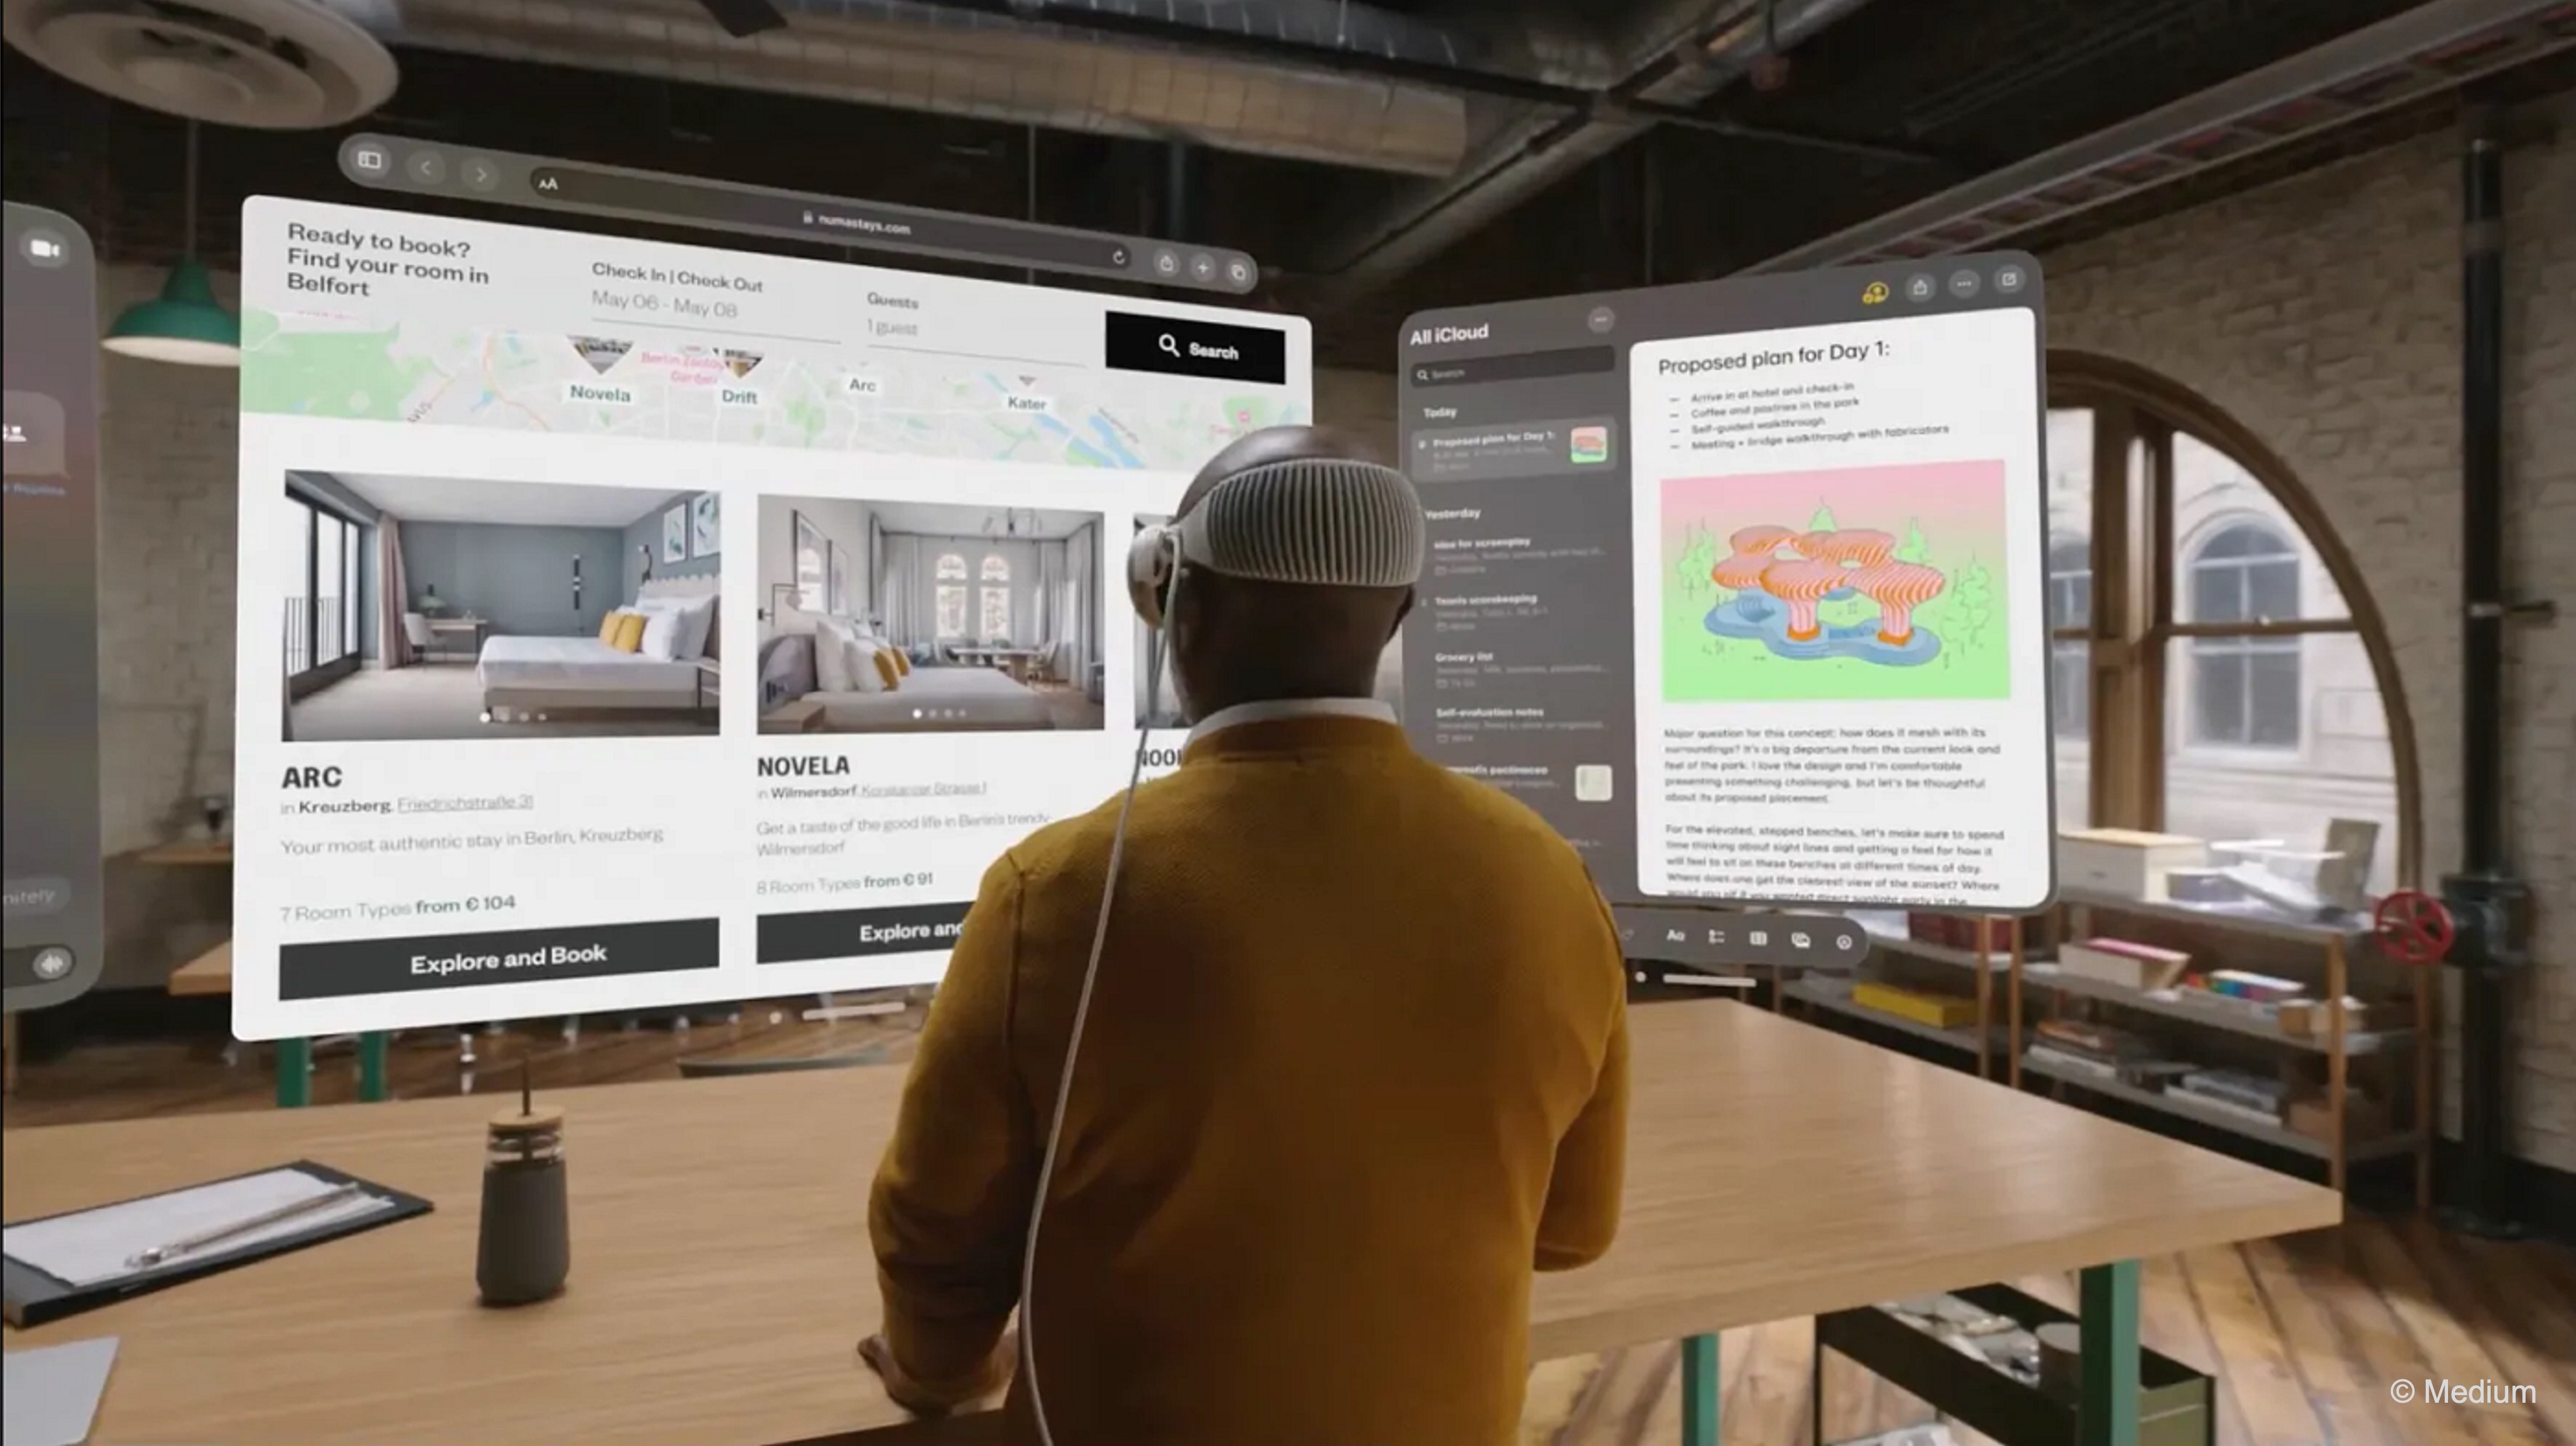
Diegetic UI: Interfaces that exist within the virtual world as part of the environment. For example, a battery gauge built into a machine or diagnostics shown on a virtual tablet. This keeps the UI immersive and consistent with the story world. However, readability and target size still matter—text must have appropriate font size and contrast, and buttons should be large enough to support imprecise inputs like hand tracking or pointing, ensuring efficient interaction.
-
Spatial HUD: Floating panels or screens placed at a comfortable distance in 3D space. For example, a tool menu might appear when summoned and be operated via laser pointer or direct touch. Panels should stay within a reasonable field of view—not too close (to avoid eye strain) or too far off-angle. When layering multiple HUD elements, designers should maintain depth separation to prevent overlaps and keep interactions clear.
-
Attached UI: Menus or interfaces that move with the user or controller, such as wrist-mounted menus or tool palettes tied to hand position. This keeps UI elements consistently accessible. Fully head-locked UI can feel disorienting, especially for precise tasks, so menus are often anchored to the hand or gaze-relative but fixed in space. For instance, a tool palette in a CAD app might follow the non-dominant hand for quick access without distracting movement.
-
World-Space UI: UI elements pinned to real-world or virtual surfaces, like AR overlays showing pressure above a valve. Ideal for persistent info such as compass direction or machine status. To avoid clutter or visual confusion, maintain high contrast, avoid stacking, and use depth cues or subtle layering to help users prioritize information—especially in safety-critical environments.
Locomotion
A special category of interaction in VR is locomotion–how the user moves through the virtual space. The interaction design for locomotion includes how the user triggers it (what button or gesture) and the feedback. Always give the user a sense of orientation after moving:, as this significantly impacts user experience:
-
Teleportation: One of the most common and comfortable methods. Users point to a destination (via controller ray or curved arc) and instantly “jump” there. To reduce disorientation, designers often include a screen fade, audio cue (e.g., swoosh), and a preview marker at the destination. While this minimizes sickness, it can slightly reduce immersion due to its unnaturalness.
-
Continuous Movement: Users push a joystick or touchpad to move smoothly in the desired direction—like moving a character in a traditional video game. It preserves immersion but can trigger motion sickness. To mitigate this, use vignetting (narrowing the user’s peripheral view during movement), offer adjustable speed settings or the ability to toggle this mode off, or combine with teleport to provide user choice.
-
Snap Turn: Users rotate in fixed increments (e.g., 30° or 45°) when pressing a button or joystick left/right. This minimizes disorientation during turning and is ideal for users prone to motion sickness.
-
Continuous Turn: Users rotate smoothly when holding the joystick to the side. It feels more natural and immersive but is more likely to cause dizziness. Should be optional and customizable.
-
Physical Walking: If the play area is large enough, allowing users to walk naturally through the space is the most immersive. However, designers must respect the real-world boundaries and can use techniques like redirected walking (subtle scene adjustments to keep the user within bounds). For larger spaces, physical walking is often combined with teleportation or artificial movement.
-
Arm-Swinging Locomotion: Movement is triggered by swinging the arms, simulating natural walking motion. This technique can feel more embodied and reduce sickness compared to joystick movement, especially for fitness, exploration, or accessibility use cases.
-
Climbing/Grab-Pull Locomotion: Common in games or vertical navigation tasks, users pull themselves through space by grabbing virtual objects (e.g., ledges, ropes, pipes). It creates a strong sense of embodiment and control, often reducing sickness due to its physicality.
-
Vehicle or On-Rails Motion: In scenarios where the user is in a vehicle, train, lift, or rollercoaster, motion is pre-defined and guided. To reduce sickness, include a stable visual frame—such as a cockpit or cabin interior—that grounds the user. This technique is useful in narrative sequences, transportation, or guided tours.
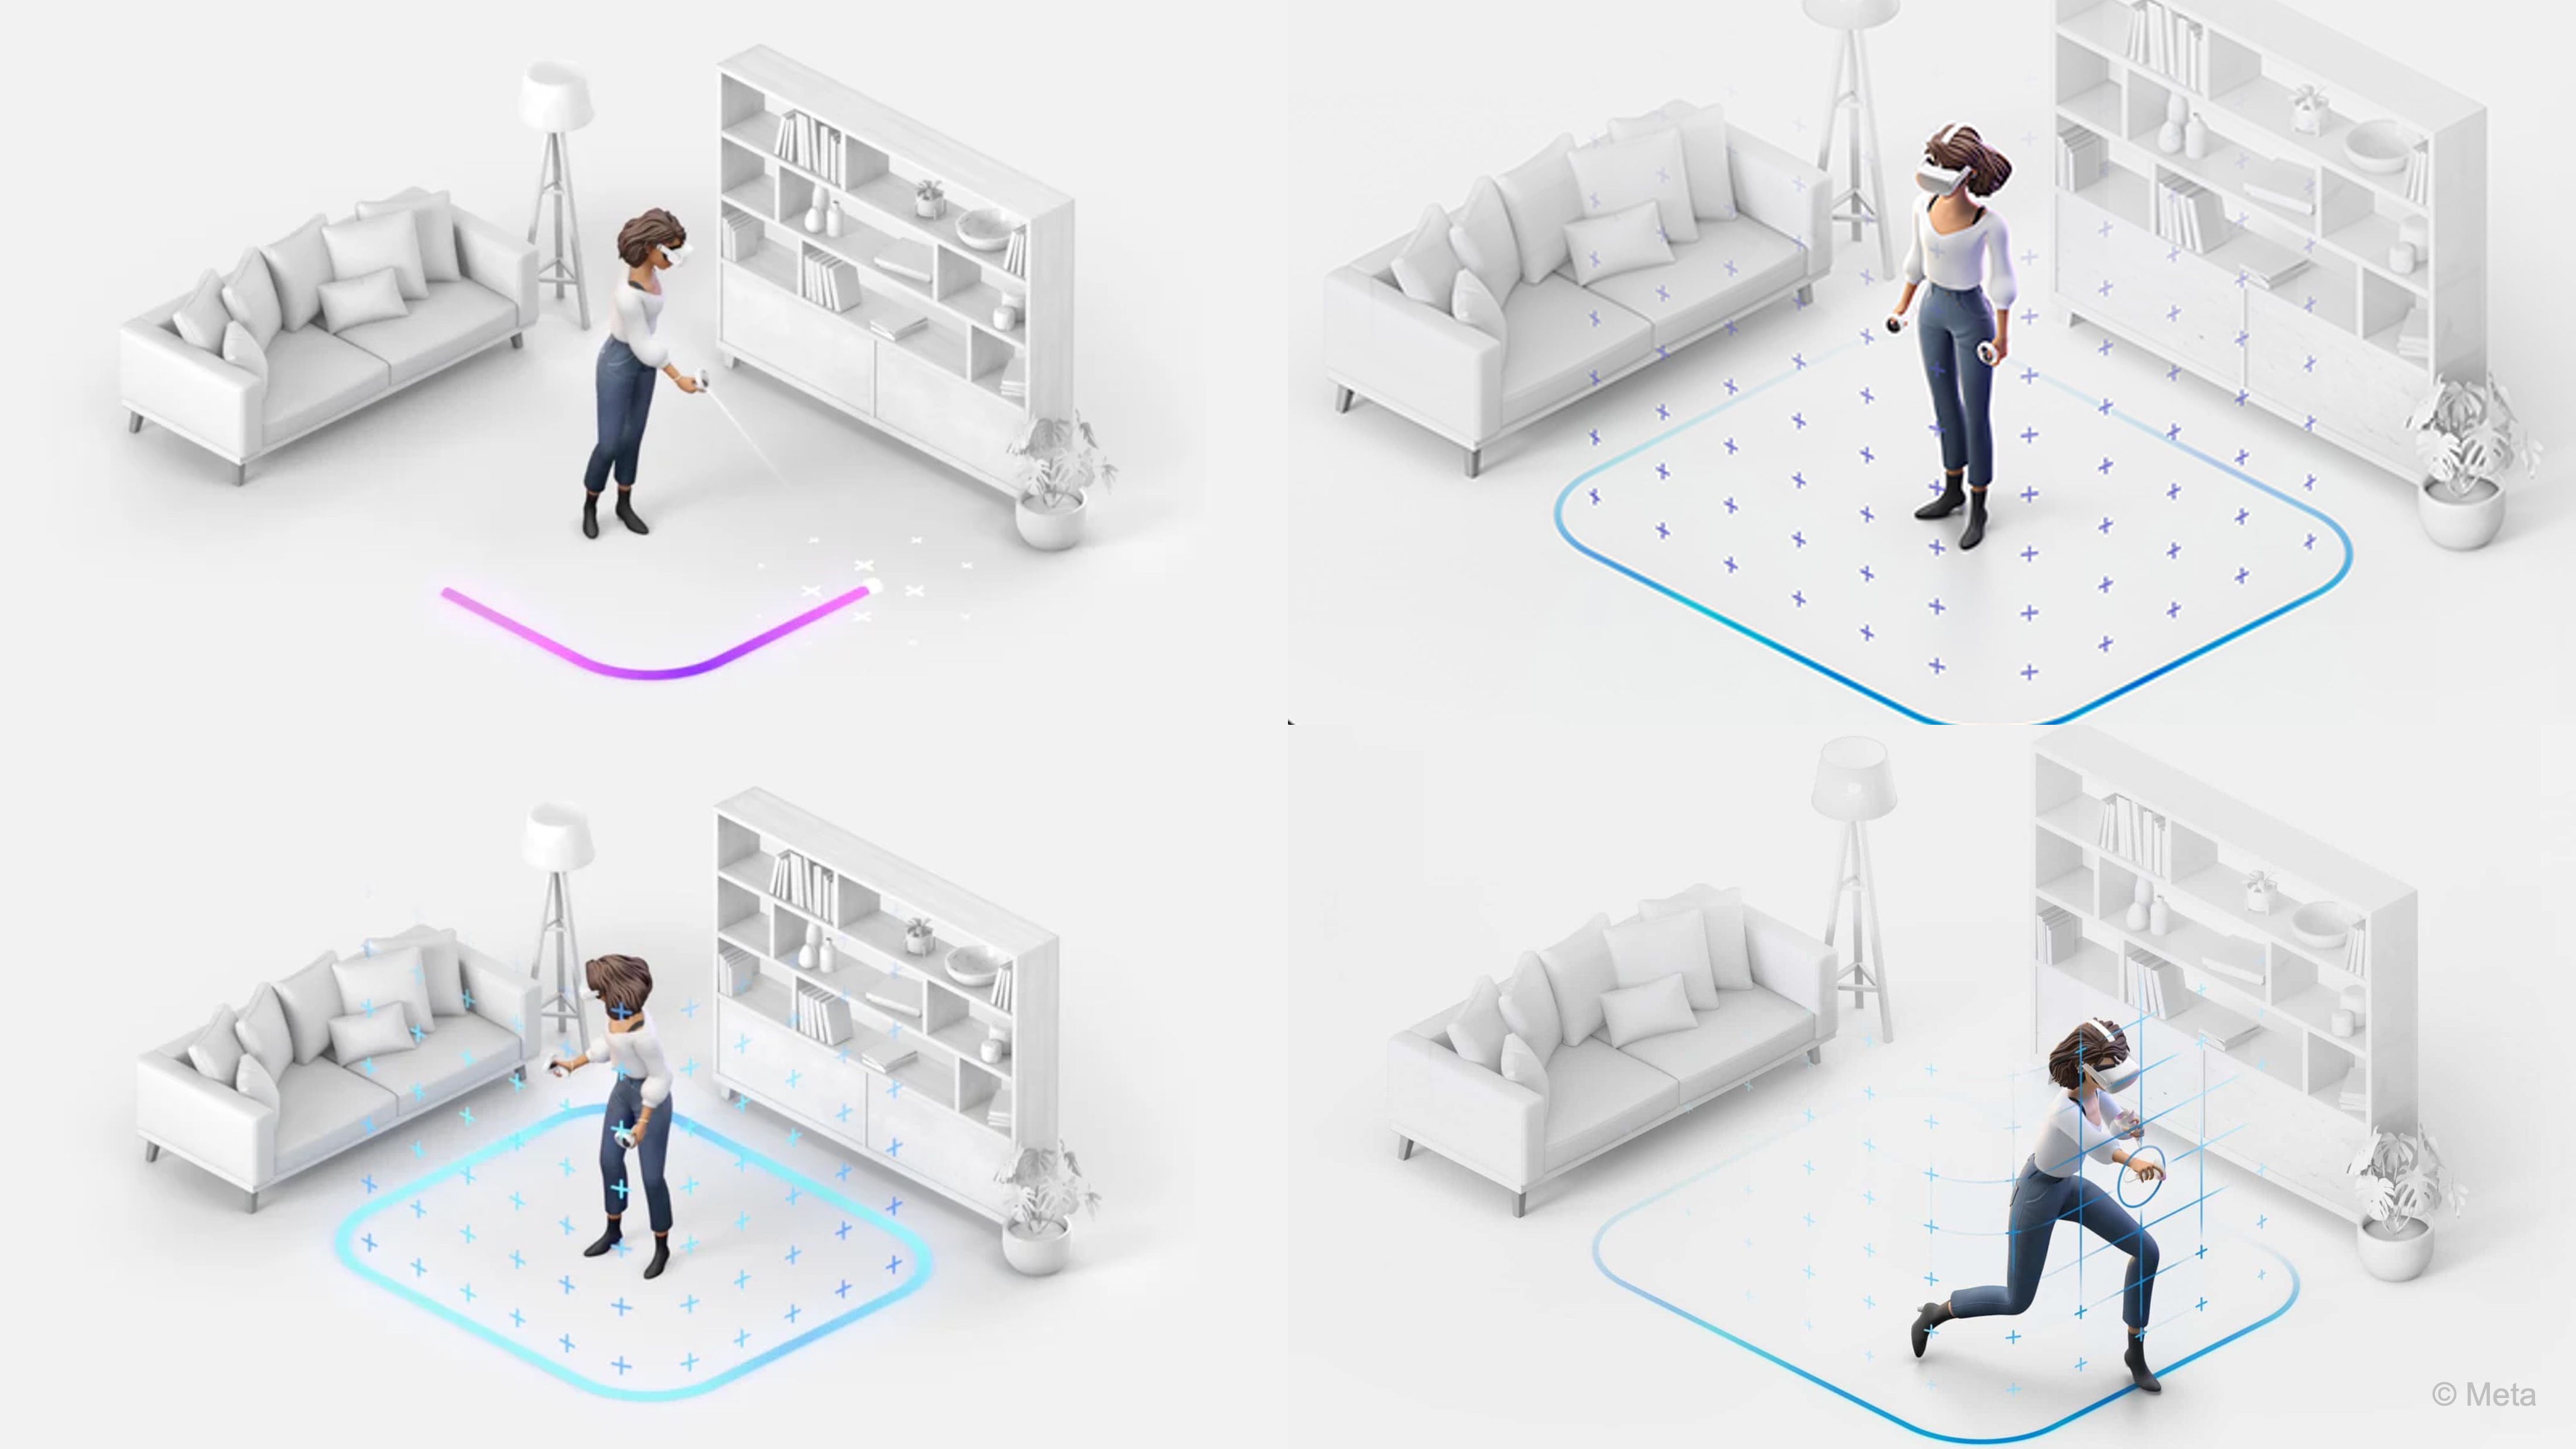
When using standalone VR headsets like the Meta Quest 3, always define a clear physical boundary (Guardian system) before locomotion. This ensures the user remains within a safe area, preventing accidental collisions with walls, furniture, or other real-world objects during immersive movement.
Feedback and Affordances
Good XR interaction design depends heavily on two pillars: providing immediate, clear feedback when the user interacts, and carefully designing affordances—visual or functional cues that suggest how objects should be used. Both are necessary to make the “unnatural” feel natural and to create intuitive, satisfying experiences.
-
Multimodal Feedback: XR interactions should respond immediately to user actions. Because they are often spatial and physical, combining multiple feedback channels reinforces the interaction.
- Visual Feedback: Objects should visibly react when pointed at, touched, or manipulated. Examples: a valve highlights when targeted in VR maintenance training; a “start” button changes color and animates when pressed; particles or sparks appear after successful calibration.
- Auditory Feedback: Sound effects confirm actions, even without direct visual focus. Examples: a click sound on activating a control panel, or a hiss/motor whir after pulling a lever in a training app.
- Haptic Feedback: Controller vibration simulates touch, impact, or mechanical response. Examples: a buzz when a robot arm contacts a part, or a jolt when a pressure valve pops open. Even simple haptics boost immersion, while advanced haptic devices (like gloves) are emerging for future XR tools.
-
Physics-Based and Analog Responses: XR interactions should feel analog and continuous. Grabbing and applying force should yield a realistic response—heavy objects feel harder to throw, light ones arc easily, and dropped tools fall and bounce naturally. Ensure collision forces and friction match context. Even without full realism, consistency matters: if one metal pipe breaks glass but an identical one passes through, provide a clear reason.
-
Designing Clear Affordances: Affordances show what an object invites you to do. A keypad should allow collision detection and give visual/audio feedback; a gauge should rotate or resist realistically. Misleading affordances frustrate—like a textured keypad that can’t be pressed or a lever that won’t move. For decorative items (e.g., reports on a table), design them so users don’t expect interaction—place behind glass, let hands pass through, or avoid cues like highlights or animations. Some apps outline only interactive objects when approached.
-
Touch and Gesture Affordances: In AR, input is often direct touch or gestures. Use clear visual hints for modes. Mobile AR objects should move fluidly under the finger, with handles/icons for rotation or scaling. Wearable AR gestures should feel natural (pinch, swipe) and give feedback—visual, audio, or haptic. For direct touch or interaction, match visuals to interaction possibilities. A physical handle signals pull; if a door opens via a button, design it with a panel or sci-fi slider look. Avoid “Norman door” mismatches—good affordances set correct expectations from the start.
It is strongly recommended to study Don Norman’s The Design of Everyday Things to gain a deep understanding of human-centered design principles and apply them effectively when creating intuitive, accessible, and immersive XR systems.
The XR Design Workflow
Designing for XR, perhaps more than for traditional platforms, demands an iterative development process. XR experiences are complex and often novel, so it is crucial to prototype early, test with real users often, and iterate based on feedback. Therefore, it is important to understand the XR development cycle: how to go from concept to a refined XR experience through progressive refinement and user research.
Prototyping XR Experiences
A prototype is an experimental model of your design–it can range from a simple paper sketch to a functioning interactive simulation. The main advice is to prototype in the medium as soon as possible. Because XR is experiential, a design that sounds great in concept might not work when you experience it. Yet, remember that prototypes are meant to be thrown away or rewritten–don’t over-engineer them. In XR, we have a spectrum of prototyping methods:
-
Storyboards and Sketches: Even though XR is 3D, you can start on paper. Draw storyboards of key user scenarios–for example, a sequence of a user entering a VR scene, seeing a menu, interacting with an object, etc. Sketch out the user’s field of view and what they would see. This helps communicate ideas and identify obvious issues. You might also sketch the layout of a VR environment from a top-down view to plan interactions and flow.
-
2D Wireframes for UI: If your XR experience has menus or HUD elements, you can wireframe those like any UI, specifying what elements appear and where. This doesn’t capture spatial feel but is good for content planning (like what options go in a menu).
-
Click-through Prototypes (2D simulation): Designers use tools like Figma to simulate XR flows. You might have images of a real environment with overlay mockups that you can click through to simulate what tapping an AR element does next.
-
3D Low-Fidelity Prototypes: This is where XR prototyping gets interesting. Tools like Unity or Unreal Engine allow you to very quickly create simple XR scenes. You don’t need final art; you can use basic shapes (cubes, spheres) to represent objects (this is often called “greyboxing” or “whiteboxing”). For instance, to prototype a VR room, you can use plain blocks for furniture just to test scale and navigation. There are also specialized XR design tools now–for example, ShapesXR or Gravity Sketch allow designers to create and arrange interfaces and environments directly in VR with no coding. You can draw in 3D space, place buttons, etc., and then actually experience it immediately. This is incredibly useful to get a feel for proportions and layout.
-
Wizard of Oz Prototypes: In XR, some features (like an AI-driven character or a complicated gesture recognition) might be hard to implement initially. A “Wizard of Oz” approach means you fake the functionality behind the scenes. For example, during a user test, a developer or designer could manually trigger events from a console while the user is in VR, simulating how an AI would respond. The user thinks the system is working, but a human is orchestrating parts of it. This can be a quick way to test if a concept is fun or intuitive before building the actual logic.
-
Physical Prototypes: Norman often emphasizes understanding through making–in XR, you can even do physical mockups. For AR, maybe rig up a tablet with printed overlays to simulate what AR content might look like in a space. For VR, some teams have done things like use cardboard to represent a headset view and sticky notes on walls to mimic virtual info, just to act out scenarios. While not common, these tactile approaches can help multidisciplinary teams communicate design intent early on.
Iterative Design Process
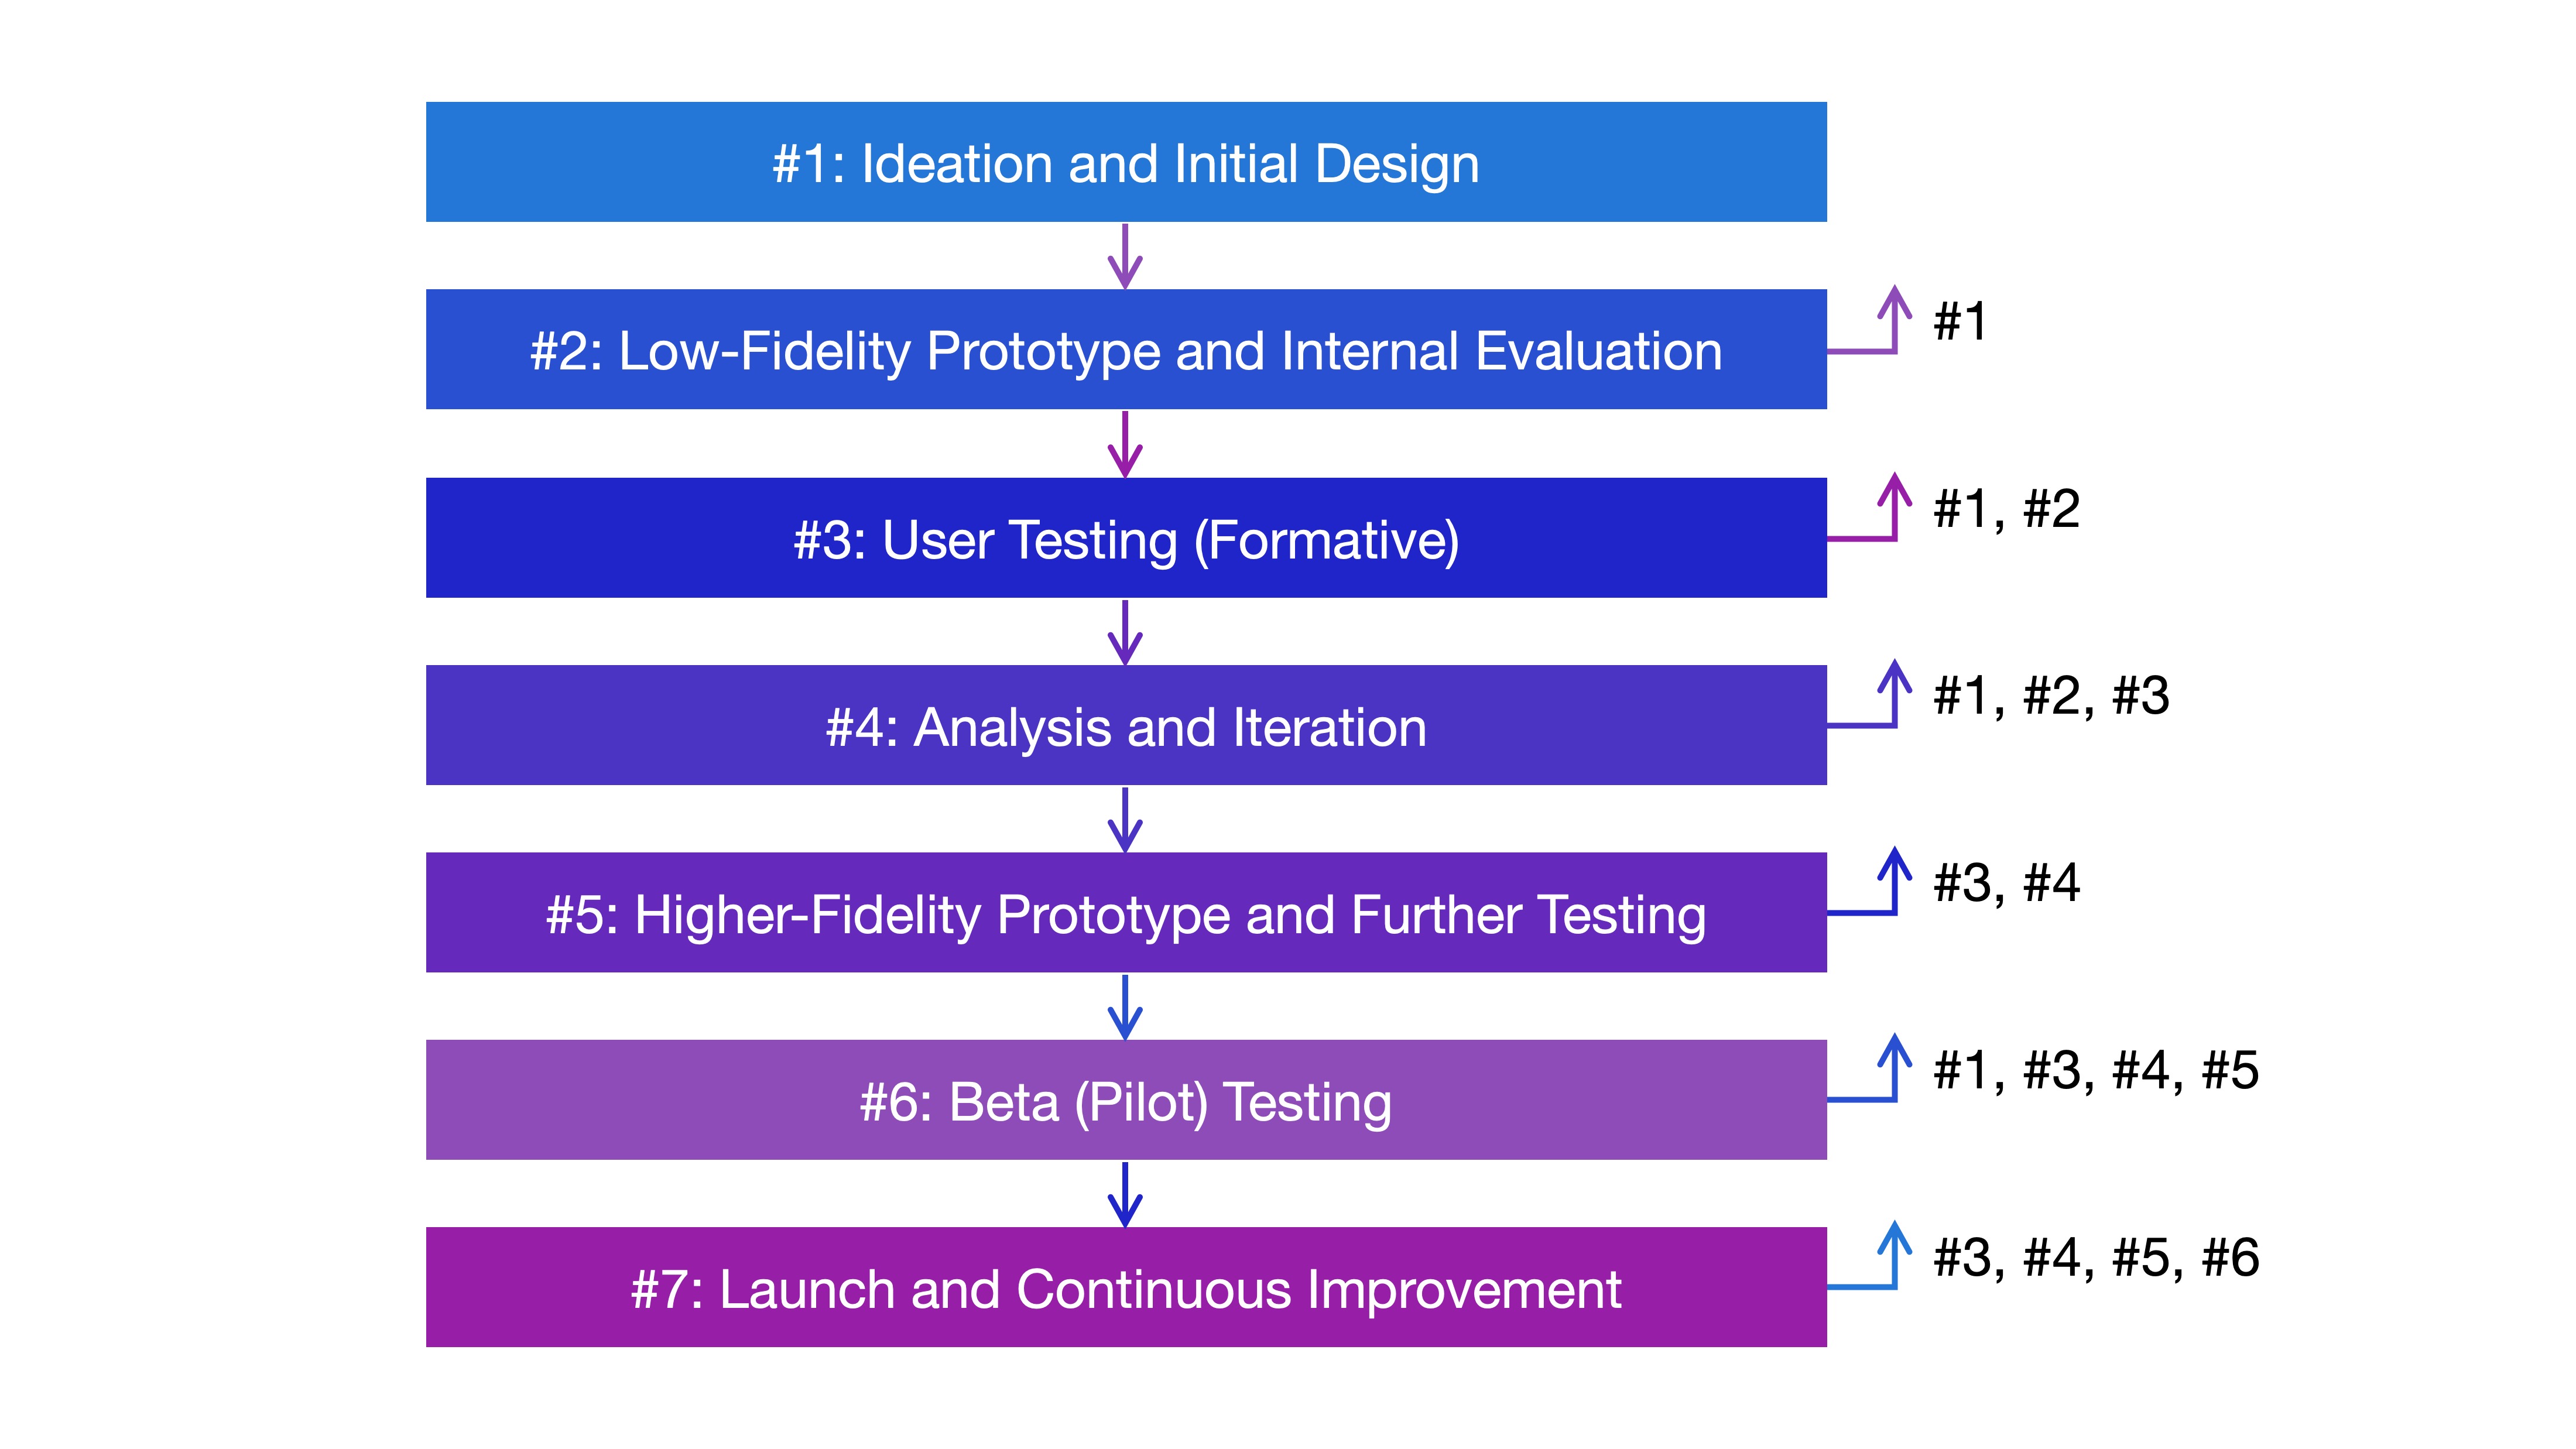
Design in XR, like in any interactive system, is inherently iterative: you design, prototype, evaluate, and redesign. In XR, this cycle is even more critical due to the medium’s novelty. Unlike traditional platforms with well-established conventions (e.g., pinch-to-zoom on smartphones), XR users have fewer ingrained expectations, making real user testing essential for intuitive, effective design. Testing often uncovers crucial insights: users may miss virtual objects or UI elements, struggle with unclear next steps, find interactions physically difficult, attempt unsupported actions, or experience discomfort. Testing XR also brings unique logistical challenges—securing equipment and ensuring safe physical spaces. With this in mind, the following seven stages, adapted from HCI design rules, outline a practical XR design process grounded in iteration and real-world feedback.
-
Ideation and Initial Design: Brainstorm the experience’s concept and features. Define user goals and scenarios. Consider constraints (target hardware, tracking capabilities, etc.) as they shape design choices. Write down assumptions about what users will do or prefer—these become things to verify later. Incorporate analytical evaluation early using known principles or heuristics (e.g., Nielsen’s heuristics adapted for XR: system feedback, consistency, error prevention). This helps identify design gaps before building.
-
Low-Fidelity Prototype: Build an early prototype focusing on core interactions or a single scene. Have the design team try it out. Observing each other can reveal issues—sometimes users try actions you didn’t expect. Note any pain points. The design process is rarely linear—feedback may prompt returning to ideation. Can return to Step 1 if the concept or assumptions need revisiting.
-
User Testing (Formative): Get real target users to try the prototype. Since XR prototypes can be rough, guide them as needed but capture genuine reactions: confusion, delight, unsupported actions, or performance issues (motion sickness, fatigue). Use empirical evaluation and have users “think aloud” to describe what they think they can do, what they try, and how they feel. Be open to pivoting. Can return to Step 1 (if goals or scenarios need redefining) or Step 2 (if the prototype’s structure and interactions need redesign).
-
Analysis and Iteration: Compile findings from tests. Prioritize issues: fix problems that block task completion or cause discomfort first, then address minor improvements. Ideate solutions, modify the design, and implement changes. Keep a documented log of iterations to avoid repeating mistakes and support collaboration. Can return to Step 1 (for concept changes), Step 2 (to rebuild a low-fidelity prototype), or Step 3 (to retest fixes).
-
Higher-Fidelity Prototype and Further Testing: As the design matures, make the prototype more realistic. Add functionality and visual polish, especially if testing aesthetics or complex interactions. Continue testing in cycles. Conduct usability testing at multiple stages—early concept validation, mid-stage usability, and near-final verification. Use both heuristic reviews and real-user tests. Can return to Step 3 (for targeted user testing) or Step 4 (to refine based on higher-fidelity findings).
-
Beta (Pilot) Testing: With a near-complete version, do broader testing with external users to catch remaining issues and ensure it works in real environments (especially for AR, where conditions vary). Stay in sync with developers; implementation limits may require design changes—retest after adjustments. Can return to Step 1 (if concept fails in real-world use), Step 3 (for more testing), Step 4 (to refine fixes), or Step 5 (to improve fidelity before another beta).
-
Launch and Continuous Improvement: After release, continue gathering data. Built-in analytics can reveal how users interact with the app—where they spend time, which interactions they use or ignore, and when they quit. Plan updates based on analytical reviews and user feedback. Keep documenting changes and test their impacts. Can return to Step 3 (for user testing of new features), Step 4 (for prioritizing post-launch fixes), Step 5 (for enhancements), or Step 6 (for another beta before a major update).
XR Usability Testing
-
Observation and Note-taking: Have one person guide the test and another silently observe and take notes, if possible. The observer can note times, user quotes, body language, and issues. Note that you might need to budget time to acclimate some users to XR controls before testing the actual content. A tip is to have a “warm-up” period: let the user play a generic XR tutorial first. This way, when they test your prototype, they’re a bit more experienced. In a VR CAD modeling tool, the observer might note when a user struggles to locate the “extrude” function or exhibits confusion during object alignment.
-
Think-Aloud Protocol: Encourage the user to talk as they use the prototype: “Now I’m going to try this… I expected that to do something… I don’t know what this is…” etc. It’s a bit tricky in VR because the user can’t see you to remember to talk, so remind them beforehand. Sometimes you can even display prompts in-game like “How do you feel? (Tell us)” to remind them. During testing of a virtual circuit simulation lab, prompt users to verbalize what they’re attempting when connecting resistors or probing voltage.
-
Post-test Interview: After the user finishes, ask open-ended questions: “What was your favorite part? What was frustrating? Was there anything you wanted to do that you couldn’t? How did you feel physically during the experience?” If they removed the headset early or seemed uneasy, probe that gently. In a VR engineering training sim, ask if the user felt confident in the simulated machine assembly task, or if any step was physically or mentally taxing.
-
Surveys and Questionnaires: For certain aspects like motion sickness or presence, standardized questionnaires exist. For example, the Simulator Sickness Questionnaire can measure discomfort symptoms; a presence questionnaire can gauge how transported they felt; or NASA Task Load Index (TLX) can help you detect cognitive load. These can be given after the session to quantify those factors. After using a VR welding simulator, issue a presence questionnaire to determine if users felt like they were genuinely working in a fabrication shop.
-
Metrics and Logs: If your prototype is instrumented, collect data like errors (e.g., how many times did they press the wrong button), completion time for tasks, and so forth. In VR, you can log things like where the user is looking (heatmaps of gaze) or how often they collided with boundaries. This quantitative data, combined with small sample sizes, can highlight trends (e.g., all users took a long time on puzzle 3 – maybe it’s too hard or not well signposted). In an engineering maintenance training sim, track time to complete diagnostics and how many incorrect parts were interacted with before selecting the right one.
-
A/B Testing: In later stages, you might A/B test two interaction styles if unsure (e.g., Version A uses teleport, Version B uses smooth locomotion with comfort options) and see which users prefer or if performance differs. Typically done with larger beta tester groups. In a VR control room simulator for power plant operators, test different interface layouts to determine which leads to fewer critical errors or faster response times.
XR Design Best Practices
-
Start Small and Early: Don’t wait to have all art or content ready. Use blocks and simple shapes to test mechanics or layout. An early VR prototype can be as simple as a blank room where you can teleport and pick up a cube – that might be enough to answer “is the teleport comfortable at these distances?” or “does reaching down to the floor feel okay?”. When building a VR training simulator for machine operation, test just grabbing and operating a basic lever before modeling the full complex control panel.
-
Iterate in Cycles: Plan design-test-adjust cycles. Even a short cycle (design one week, test at end of week, refine next week) can yield insights. Each iteration should ideally test only a few new things; otherwise, if you change everything between tests, you won’t know which change caused which result. When developing AR instructions for assembling industrial equipment, iterate on showing just one or two steps at a time before attempting full assembly guides.
-
Engage Real Users: While you as a designer will of course try the experience yourself many times (dogfooding), real users will surprise you. Get target audience users if your project has one (kids for a kids app, etc.). Their feedback is the most representative. For an XR maintenance training app for HVAC systems, ensure actual field technicians test it–not just engineers who already know the system well.
-
Use Structured Testing Methods: Follow usability testing methodologies–have clear tasks for users to try, don’t lead them too much, ask open questions. For XR, also ensure safety and comfort throughout (give breaks if someone looks uneasy, always have water and maybe a fan for VR as it can get warm with a headset). When testing a VR control room simulator, assign specific system-check tasks and record how intuitively users operate without external hints.
-
Record Observations and Data: Because users can’t fill out forms or notes while in VR, the onus is on the test facilitators to capture info. Video record if possible. Right after a session, debrief with your team and write down the big observations while fresh. During a VR prototype test for remote robotic arm control, video the headset view and hand tracking to later analyze user hesitation or error patterns.
-
Be Ready to Refactor: In development terms, be ready to change your implementation to accommodate design changes from testing. Keeping code modular (separating input handling, for instance) can help swap interaction methods easily. This is more for the engineering side, but it intersects with design–sometimes designers might avoid a change thinking “it’s too late or hard to change now.” If you plan ahead for iteration, it never is too late to improve the user experience. In a VR equipment inspection app, modularize the input system so that swapping from hand controllers to hand-tracking APIs doesn’t require full rewrites.
-
Never Assume–Validate: XR is full of assumptions (“maybe users will love doing X”). Whenever you catch an assumption, find a way to test it. Even a quick hallway test with a colleague can validate an obvious thing (“could you figure out how to open the door in this demo?”). Don’t assume users will intuitively “grab” virtual handles in an AR maintenance app. Validate with field tests to ensure the gesture feels natural and works consistently.
Key Takeaways
Human-centered design in XR prioritizes user needs, comfort, and accessibility, adapting established HCI principles to immersive, spatial environments. Effective XR experiences balance immersion and presence with clear visibility, intuitive affordances, responsive feedback, and safe, ergonomic interactions. Designers must thoughtfully select and combine input modalities—controllers, hand tracking, voice, gaze, and movement—based on context, user abilities, and environmental conditions, ensuring natural and consistent mappings. Prototyping early, testing often with real users, and iterating based on feedback are essential to refining usability, reducing cognitive load, and managing complexity. By aligning spatial layout, interaction design, and environmental integration with user expectations and physical realities, XR systems can deliver engaging, intuitive, and inclusive experiences that feel both natural and purposeful.